A moka pot that gets proper care will reward you with rich, smooth coffee for years.
One that gets neglected starts producing bitter, metallic, stale-tasting cups within weeks.
The good news: moka pot maintenance is simple, and most of it takes less than two minutes after each brew.
This guide covers every part of the routine, from the quick rinse after your morning cup to the deeper descaling sessions that keep mineral deposits from ruining your coffee’s flavor.
Quick Answer
Rinse and dry your moka pot after every single use, and deep clean it with a vinegar or citric acid solution once a month. Check the rubber gasket every few months for cracks, and replace it at least once a year. Store the pot disassembled in a dry spot to prevent corrosion and trapped moisture.
Read on for the full step-by-step routine, plus tips on safety valve care, storage, grind size, and when it is time to retire your pot.
How a Moka Pot Brews Coffee
Alfonso Bialetti brought the moka pot to market in 1933, and the design has barely changed since.
Water sits in the bottom chamber, where heat turns it into pressurized steam.
That pressure pushes the hot water upward through a filter basket packed with ground coffee.
The brewed coffee then collects in the upper chamber, ready to pour.
You can hear the whole process happening: a low gurgle as the water rises, followed by a hiss and sputter once the chamber empties.
The mechanism is straightforward, but it depends on clean parts, a good seal, and unobstructed pathways.
A dirty filter, a worn gasket, or a clogged safety valve will change the pressure, the flow, and the taste of your coffee.
That is why regular care matters more with a moka pot than with most other coffee makers.
Beginner Note A moka pot does not produce true espresso. It brews strong, concentrated, espresso-style coffee at roughly 1.5 bars of pressure, compared to the 9 bars an espresso machine generates.
How to Clean a Moka Pot After Every Brew
This is the single most useful habit you can build.
Let the pot cool down completely before you touch it, since the metal stays hot for several minutes after brewing.
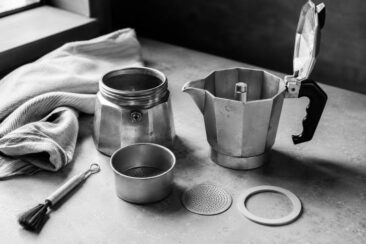
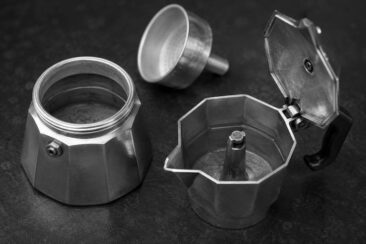
Unscrew the top chamber from the bottom, and lift out the filter basket.
Tap the spent coffee grounds into the trash or compost.
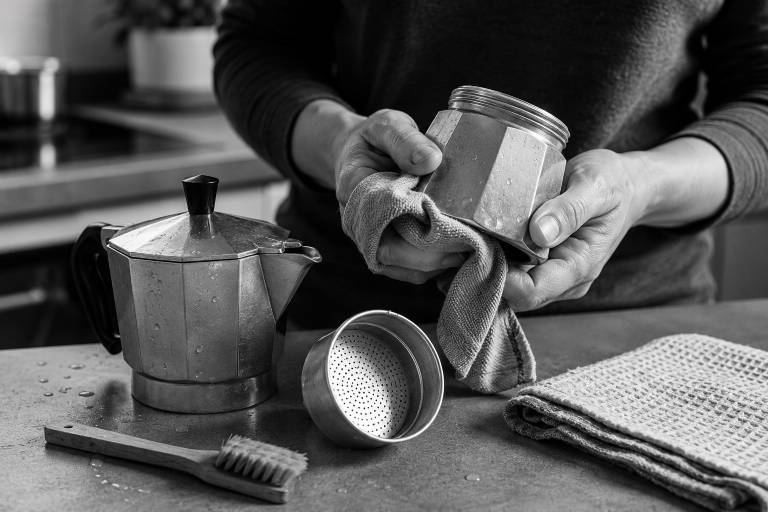
Rinse every piece under warm running water, using your fingers or a soft cloth to wipe away oily residue.
Do not use a dishwasher. The high heat and harsh detergent will strip the protective coffee patina from aluminum pots, leaving behind a dull, chalky surface and a metallic flavor in your next brew.
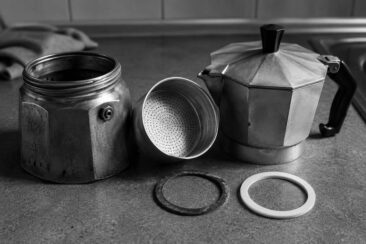
Pay attention to the rubber gasket ring and the filter screen at the bottom of the upper chamber.
Old grounds love to hide in the grooves of the gasket, and they will go rancid if left there.
Once everything is rinsed, dry each part with a clean towel or let them air dry separately before storing.
Quick Tip Mild dish soap in small amounts will not ruin your moka pot. The old Italian tradition of “never use soap” made sense when soaps were heavily perfumed, but a drop of unscented soap and a thorough rinse is fine if your pot feels greasy.
If you want to learn how to prepare a new moka pot before its first brew, read our guide on how to season a moka pot.
How to Deep Clean and Descale a Moka Pot
A daily rinse handles surface residue, but mineral deposits build up inside the chambers over time.
You will notice them as white, chalky spots on the metal, especially if your tap water is hard.
Left alone, limescale narrows the water pathways and slows the brew, producing over-extracted, bitter coffee that smells more like burnt metal than fresh grounds.
Deep clean your moka pot once a month if you brew daily, or every two to three months for lighter use.
Here is how to do it:
- Disassemble the pot completely, including the gasket and filter screen.
- Mix equal parts white vinegar and water, or dissolve two teaspoons of citric acid in a cup of warm water.
- Fill the bottom chamber with the solution up to the safety valve line.
- Let it soak for 20 to 30 minutes.
- Scrub each piece gently with a soft brush, paying attention to any visible scale deposits.
- Rinse every part thoroughly under running water until no vinegar smell remains.
| Descaling Method | Best For | Soak Time | Notes |
|---|---|---|---|
| White vinegar (1:1 with water) | Light to moderate buildup | 20–30 minutes | Rinse well to remove vinegar taste |
| Citric acid (2 tsp per cup of water) | Heavy limescale | 15–20 minutes | Gentler on aluminum than vinegar |
| Baking soda paste | Surface stains and odors | 10 minutes | Not strong enough for deep scale |
| Brew-cycle method (vinegar solution run through the pot) | Full internal flush | One full brew cycle | Best quarterly reset for heavy users |
Common Mistake Do not soak aluminum moka pots in undiluted vinegar. Full-strength vinegar corrodes aluminum over time, and you will see pitting on the metal surface. Always dilute it.
The brew-cycle method is worth trying once a quarter.
Fill the bottom chamber with your diluted vinegar or citric acid solution, reassemble the pot without any coffee, and run it on the stove as if you were making a normal brew.
The pressurized solution pushes through every internal channel, clearing buildup that soaking alone cannot reach.
Rinse and dry the pot afterward, then run one cycle with plain water before your next real brew to flush any lingering taste.
How to Check and Replace the Gasket and Filter
The rubber gasket is the ring that seals the top and bottom chambers together.
When it works, you get steady pressure and a smooth brew.
When it fails, you get sputtering steam, weak coffee, and leaking from the moka pot’s seam.
Pick up the gasket and press it between your fingers.
Fresh rubber feels soft, pliable, and bounces back when squeezed.
A worn gasket feels stiff, looks cracked or flattened, and may have a brittle texture.
Replace the gasket at least once every 12 months, or sooner if you see visible damage or your pot starts leaking mid-brew.
Signs your gasket needs replacing:
- Steam escapes from the middle seam during brewing
- The coffee stream sputters or sprays instead of flowing steadily
- The rubber looks discolored, shrunken, or cracked
- You smell burnt rubber when the pot heats up
The metal filter screen sits just below the gasket.
Check it for clogs by holding it up to a light source.
If many of the tiny holes are blocked with compacted coffee oils, soak it in your descaling solution or gently scrub with a soft brush.
Replacement gaskets and filters are inexpensive and widely available from Bialetti and other manufacturers.
Most cost less than $5 and take about 30 seconds to swap in.
When to Replace If steam escapes from the middle seam no matter how tightly you screw the chambers, the gasket is done. Replace it before your next brew.
How to Clean the Safety Valve on a Moka Pot
Most people forget about this small brass or metal knob on the side of the bottom chamber.
The safety valve releases excess pressure if something goes wrong during brewing, preventing dangerous pressure buildup inside the pot.
If coffee grounds, limescale, or old oils clog the valve, it cannot do its job.
A blocked safety valve is the number one cause of moka pot “explosions,” those dramatic moments where the pot bursts open and sends coffee across the kitchen ceiling.
Check the valve every time you descale the pot.
Press it gently with a toothpick or pin to make sure it moves freely.
If it feels stiff or stuck, soak it in your descaling solution and work it loose carefully.
You should be able to feel the valve spring compress and release with light pressure.
Never fill the bottom chamber with water above the valve line, since submerging it prevents the valve from venting steam when it needs to.
Quick Tip Point the safety valve away from you when the pot is on the stove. If it does release steam during a brew, you want the jet directed at the backsplash, not at your hand.
How to Store Your Moka Pot the Right Way
Proper storage protects your pot during the days or weeks between uses.
Store the moka pot disassembled, with the top chamber, bottom chamber, filter basket, and gasket all separated.
Keeping the chambers screwed together during storage compresses the gasket constantly, which flattens it faster and shortens its lifespan.
Separated parts allow air to circulate and prevent the damp, stale smell that comes from trapped moisture.
Choose a dry cabinet or shelf away from the stove and out of direct sunlight.
Heat and humidity accelerate corrosion on aluminum moka pots, turning the surface dull and chalky.
Keep all the small parts together in a container or bag so nothing gets lost between uses.
Caring for Aluminum vs Stainless Steel Moka Pots
The material your moka pot is made from changes how you should clean and protect it.
Most classic moka pots, including the iconic Bialetti Moka Express, are made from aluminum.
Stainless steel models are newer, heavier, and built for induction stovetops.
| Care Factor | Aluminum | Stainless Steel |
|---|---|---|
| Dishwasher safe? | No. Causes oxidation, discoloration, and metallic taste | No. High heat can warp gaskets and damage the finish |
| Soap sensitivity | Sensitive. Strips the natural coffee patina that protects the metal | Less sensitive. Soap rinses off cleanly without residue |
| Oxidation risk | High. Discoloration appears as white or gray spots | Low. Stainless resists oxidation well |
| Descaling frequency | Monthly with diluted solutions only | Monthly. Can tolerate slightly stronger descaling agents |
| Patina buildup | Develops a thin coffee oil layer over time that improves flavor | Does not build a patina. Flavor stays neutral |
Aluminum pots develop a dark coffee patina on the inside walls after regular use.
This layer is normal and actually helps seal the porous metal surface, reducing any metallic flavor in the brew.
Scrubbing it away with abrasive pads or strong chemicals defeats the purpose.
Stainless steel pots do not build this layer, so they taste slightly cleaner out of the box but lack the warm, rounded flavor that seasoned aluminum produces.
Beginner Note If your aluminum moka pot looks gray, spotty, or chalky on the inside, that is likely oxidation from moisture or harsh cleaning. Read our full guide to moka pot discoloration for specific fixes.
Tips That Help Your Moka Pot Last Longer
Choose the Right Burner Size
A burner that is wider than the base of your moka pot wraps heat around the sides, scorching the handle and overheating the upper chamber.
Match the burner to the pot’s base diameter so only the bottom receives direct heat.
Medium-low heat works for most moka pots.
If the coffee shoots out fast and tastes burnt, the heat is too high.
Use Filtered Water
Hard water leaves mineral deposits faster, which means more frequent descaling and a shorter lifespan for internal parts.
Filtered water reduces scale buildup and removes chlorine or chemical tastes that muddy the flavor of your coffee.
The difference is noticeable from the first cup: cleaner aroma, smoother body, no chalky aftertaste.
Get the Grind Size Right
The recommended grind size for a moka pot is medium-fine, close to the texture of table salt.
Too fine a grind chokes the water flow and produces bitter, over-extracted coffee.
Too coarse a grind lets water rush through, creating a weak, watery cup.
For a standard 3-cup moka pot, about 15 grams of coffee in a full filter basket with water filled to the safety valve line gives a strong, balanced brew.
Do Not Over-Tighten the Chambers
Gentle hand-tightness is all you need.
Forcing the chambers together compresses and deforms the gasket, wearing it out weeks earlier than necessary.
If your pot gets stuck after brewing, run the base under warm water for a few seconds to loosen the thermal seal, then twist with a dry towel for grip.
Common Moka Pot Care Mistakes to Avoid
Leaving wet grounds in the filter basket overnight. The damp grounds go stale, grow mold, and leave a rancid smell that takes multiple rinses to remove.
Using high heat to speed up the brew. Cranking the burner to maximum does not save meaningful time.
It scorches the coffee, creates a harsh burnt smell, and can overheat the safety valve.
Cleaning with steel wool or abrasive scrubbers. These scratch aluminum surfaces, strip the protective coffee patina, and create rough spots where scale and oxidation take hold faster.
Filling water above the safety valve. This blocks the valve from venting excess pressure and raises the risk of a dangerous pressure failure.
Skipping the gasket check. A gasket that looks fine from the outside can be compressed flat on the sealing edge.
Pull it out and inspect it every few months.
Reassembling the pot when parts are still damp. Trapped moisture inside a sealed moka pot creates the perfect environment for corrosion and mold, especially on aluminum.
Common Mistake If your coffee tastes metallic or stale and cleaning does not fix it, the problem is likely a worn gasket, a clogged filter, or oxidation on the aluminum walls. Address those before blaming the coffee beans.
When Should You Replace Your Moka Pot?
A well-maintained moka pot can last 10 years or longer.
The pot itself rarely fails, but certain signs tell you it is time for a new one.
Replace your moka pot if you notice any of these:
- Deep pitting or flaking on the interior aluminum surface
- A persistent metallic taste that survives descaling and a new gasket
- Visible cracks or warping in the bottom chamber
- A safety valve that will not move or cannot be unclogged
- The thread between the chambers is stripped and no longer seals
Minor cosmetic discoloration on the outside is normal and does not affect performance.
Interior damage is the concern, since flaking metal can end up in your coffee and compromised walls may not hold pressure safely.
If your pot is still structurally sound but tastes off, try replacing the gasket, filter, and cleaning the safety valve before buying a new one.
Those three small parts solve the majority of moka pot taste problems for under $10.
Your Moka Pot Deserves Two Minutes of Care
The entire daily routine, rinse, dry, store disassembled, takes less time than waiting for the coffee to brew.
Monthly descaling adds another 30 minutes, most of it hands-off soaking time.
That small investment keeps your moka pot producing the rich, full-bodied coffee it was designed for, cup after cup, year after year.