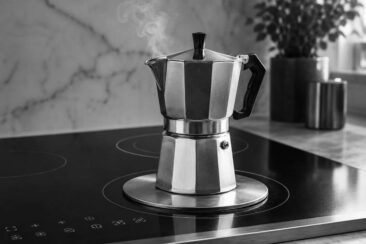
A moka pot can brew rich, full-bodied coffee on a glass top stove, but only if you match the right pot material to your specific stovetop type.
The wrong combination leads to scratched glass, uneven heating, or coffee that tastes burnt and bitter.
Thousands of home brewers face this exact issue every morning, standing in their kitchens wondering whether their aluminum Bialetti will ruin that smooth ceramic surface.
This guide covers the material choice, the heat settings, and the safety steps that protect your stove and your brew.
Quick Answer
Yes, a moka pot works on a glass top stove. Stainless steel moka pots are the safest choice for glass surfaces. A heat diffuser placed between the pot and the glass prevents scratches and distributes heat more evenly. Set your burner to medium-low (3 or 4 out of 10) and never slide the pot across the glass.
Read on for the exact steps, material comparisons, and troubleshooting fixes.
Can You Use a Moka Pot on a Glass Top Stove?
The short answer is yes.
Moka pots work on glass top stoves, and many people brew with them daily on ceramic, radiant, and smooth-top electric surfaces.
The main concern is not whether the pot will work, but whether it will scratch the glass or heat unevenly.
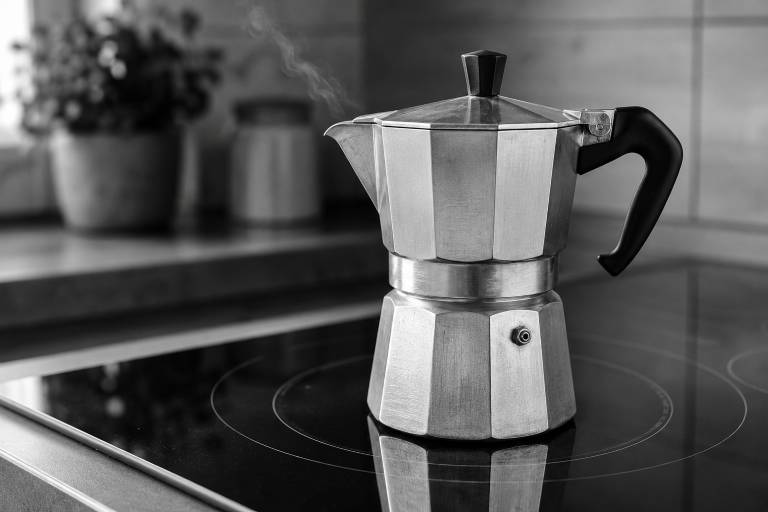
Aluminum moka pots have rough, octagonal bottom edges that can scuff the surface if dragged or placed carelessly.
Stainless steel pots sit flatter, feel smoother on the underside, and create less friction against glass.
The other factor is heat transfer: glass top stoves distribute heat differently than gas stoves, and they retain heat longer after you turn the burner off.
That residual heat can push your brew past the sweet spot, turning smooth coffee into something harsh and metallic.
Quick Tip Lift the moka pot straight up when removing it from the burner. Sliding it, even gently, can leave thin aluminum marks on the glass that require a specialized cooktop cleaner to remove.
Glass Top vs. Induction: Know Your Stove Type Before Brewing
Not all glass-surface stoves work the same way, and the distinction matters for moka pot compatibility.
A radiant glass top stove uses electric coils beneath a ceramic-glass panel to heat your cookware through direct contact.
Any moka pot material, including aluminum, will heat on a radiant glass top.
An induction stove looks almost identical on the surface, but it heats through electromagnetic fields instead of radiant coils.
Only ferromagnetic metals respond to induction, which means a standard aluminum moka pot will not heat at all on this type of stovetop.
| Stove Type | How It Heats | Aluminum Moka Pot? | Stainless Steel Moka Pot? |
|---|---|---|---|
| Radiant glass top | Electric coils under glass | Yes, with care | Yes, recommended |
| Induction | Electromagnetic field | No, will not heat | Yes, if magnetic base |
| Electric coil | Exposed spiral element | Yes | Yes |
A quick test can tell you which stove you have: hold a refrigerator magnet to the bottom of a pot and place the pot on the burner.
If the pot heats up only when the magnet sticks to it, you have an induction cooktop.
If the pot heats regardless of the magnet, your stove is radiant.
Aluminum vs. Stainless Steel: Which Material Is Safer on Glass?
Aluminum and stainless steel are the two materials you will find in almost every moka pot on the market, and each has a clear tradeoff on a glass surface.
Aluminum is lightweight and conducts heat roughly 10 times faster than stainless steel (around 237 W/m·K compared to about 16 W/m·K for stainless).
That speed means water heats quickly, but it means the pot responds to temperature changes almost instantly, making over-extraction a risk on stoves that run hot.
The octagonal base of a classic aluminum Bialetti can leave gray scuff marks on smooth glass if you are not careful about placement.
Stainless steel moka pots are heavier, more scratch-resistant, and safer on glass surfaces.
They heat more slowly, which actually gives you a wider margin for temperature control on a glass top burner.
Italian-made stainless steel models from Bialetti (like the Venus line) and similar brands are designed with flat bases that sit flush against smooth cooktops.
The price difference is noticeable: a 6-cup aluminum moka pot runs about $25 to $35, and a stainless steel version of the same size costs $35 to $55.
For anyone who wants to understand how a moka pot works and why material choice changes the brew, the internal mechanics are the same regardless of material.
Common Mistake Many guides claim that aluminum “does not conduct heat as efficiently as stainless steel.” The opposite is true. Aluminum conducts heat far faster than stainless steel. The real disadvantage of aluminum on glass tops is the scratching risk and its incompatibility with induction burners.
How to Brew with a Moka Pot on a Glass Top Stove
Brewing on glass follows the same core process as any other stovetop, with a few adjustments for heat control and surface protection.
Step 1: Fill the Base with Water
Unscrew the top chamber and remove the filter basket.
Fill the bottom chamber with water up to just below the safety valve line, which sits about halfway up the inside wall.
Use cold or room-temperature water for a slower, more controlled extraction.
Hot water from a kettle speeds up the process but can overshoot on a glass top stove that already retains heat.
Step 2: Add Coffee to the Filter Basket
Grind your beans to a medium-fine consistency, slightly coarser than true espresso but finer than drip.
Fill the filter basket to the rim and level it off with your finger.
Do not tamp or press the grounds down, as this restricts water flow and builds too much pressure inside the chamber.
Loose grounds on the rim can prevent a tight seal, so wipe the edge clean before screwing the top on.
Step 3: Place the Pot and Set the Heat
Clean the stovetop surface of any debris, coffee grounds, or moisture before placing the pot.
Lift the moka pot and set it gently in the center of the burner, aligning the base with the heating element underneath.
Set the burner to medium-low, around 3 or 4 out of 10.
Glass top burners cycle on and off to maintain temperature, so a lower setting prevents the spikes that scorch coffee.
If you are using a heat diffuser, place it on the burner first, then set the pot on top of the disc.
Step 4: Watch, Listen, and Remove
Within 4 to 8 minutes, you will hear a soft gurgling or hissing sound as steam pushes brewed coffee up through the funnel into the top chamber.
The coffee stream should flow steadily and look dark golden-brown, not pale or watery.
Remove the pot from the burner as soon as the stream lightens or sputtering begins.
On a glass top stove, the burner stays hot after you turn it off, so lift the pot away entirely rather than just switching off the dial.
Leaving it on the residual heat will keep extracting, and those last few seconds often produce the bitter, ashy notes that ruin the cup.
For a deeper walkthrough of the full brewing method, see the complete moka pot brewing guide.
Do You Need a Heat Diffuser for a Glass Top Stove?
A heat diffuser is a flat metal disc, usually stainless steel or cast iron, that sits between the moka pot and the stove surface.
It serves two purposes: protecting the glass from direct contact with the pot base, and spreading heat more evenly across the bottom chamber.
On a glass top stove, the heating element concentrates in a ring shape, which means the center and edges of the pot receive different amounts of heat.
A diffuser smooths out those hot spots, and it costs between $10 and $15 at most kitchen supply stores.
You do not strictly need one if you are using a stainless steel moka pot with a flat base on a radiant glass top.
The diffuser becomes especially useful with aluminum pots, where it prevents scuffing and compensates for the octagonal base shape that reduces contact area.
Any moka pot user on a glass stove benefits from the extra layer of temperature control, especially on burners that run hotter than expected.
Avoiding common moka pot mistakes starts with managing heat, and the diffuser is one of the simplest tools for that.
Your moka pot diffuser checklist:
- The disc should be wider than or equal to the diameter of the moka pot base
- Flat, unwarped surface with no raised edges
- Stainless steel or aluminum construction (avoid painted or coated discs that can chip)
- Centered on the burner before placing the pot on top
What Size Moka Pot Works Best on a Glass Top Stove?
Matching the pot size to the burner diameter makes a real difference in brew quality on glass surfaces.
A 1-cup moka pot (about 2 inches across the base) sitting on a large 8-inch burner wastes energy and heats unevenly, with the small base absorbing only a fraction of the heat output.
That mismatch forces you to crank the heat higher than necessary, which leads to bitter coffee and hot handles.
A 3-cup or 6-cup moka pot fits most standard glass top burners well, with the base covering enough of the heating element to absorb heat evenly.
The 6-cup size, which brews about 10 ounces of coffee, is the most popular for daily home use on any stove type.
Larger 9-cup and 12-cup models need a full-size burner and take longer to brew, so they work better on stoves where you can control the heat in small increments.
| Moka Pot Size | Base Diameter (approx.) | Best Burner Size | Typical Brew Time on Glass |
|---|---|---|---|
| 1-cup | ~2 inches | Smallest burner | 3 to 5 minutes |
| 3-cup | ~3 inches | Small to medium burner | 4 to 6 minutes |
| 6-cup | ~3.5 inches | Medium burner | 5 to 8 minutes |
| 9-cup | ~4 inches | Large burner | 6 to 9 minutes |
Safety Tips for Protecting Your Glass Stove
Glass top stoves look sleek, but they scratch and crack more easily than most people expect.
A few simple habits keep the surface clean and undamaged during moka pot brewing.
Always lift, never slide. Dragging an aluminum moka pot across glass leaves gray metal transfer marks that look like scratches and require cooktop cleaner and a razor scraper to remove.
Check the pot bottom before placing it. Coffee grounds, dried residue, or grit stuck to the base act like sandpaper against the glass surface.
Let spills cool before wiping. Coffee that drips onto a hot glass top caramelizes and bonds to the surface, creating dark spots that pit the glass if scrubbed when still hot.
Keep a dedicated cooktop cleaner nearby. Brands like Cerama Bryte or Bar Keepers Friend make formulas designed for ceramic glass that remove stains without scratching.
Never use the moka pot without water. Running an empty base on a hot burner can warp the aluminum, trigger the safety valve, and leave permanent heat marks on the glass.
Beginner Note If you see a faint circle on the glass after brewing, that is usually a heat shadow, not a scratch. Wipe the cooled surface with a damp cloth and a small amount of cooktop cleaner. If the mark disappears, the glass is fine.
Troubleshooting Common Problems on Glass Top Stoves
Glass stove brewing introduces a few issues that gas stove users rarely encounter.
| Problem | Likely Cause | Fix |
|---|---|---|
| Coffee tastes burnt or bitter | Burner too high, or pot sat on residual heat | Lower to 3 out of 10, remove pot at first sputter |
| Coffee comes out weak and watery | Grind too coarse, or burner too low | Use a finer grind and raise heat one notch |
| Brew takes more than 10 minutes | Poor contact between base and heating element | Center pot on burner ring, or add a heat diffuser |
| Gray marks on stovetop | Aluminum transfer from pot base | Apply cooktop cleaner, scrape gently with a flat razor |
| Safety valve leaking steam | Water above valve line, grind too fine, or worn gasket | Check water level, coarsen the grind, inspect the gasket |
Final Thoughts
A moka pot and a glass top stove are a perfectly fine pairing when you respect the surface and control the heat.
Stainless steel pots with flat bases are the safest long-term choice for glass cooktops.
Aluminum pots work on radiant glass tops, but they need a heat diffuser underneath and careful handling to prevent marks.
The single best change you can make is lowering the heat: set it to medium-low, remove the pot at the first sputter, and lift it off the burner entirely instead of letting it sit on cooling glass.
That one habit will protect the stove and improve the taste of every cup.