There’s nothing quite like the rich aroma and flavor of a perfectly crafted cappuccino.
But who says you need to head to a fancy coffee shop to indulge in this caffeinated delight?
With just a few essential tools and strategic techniques, you can brew an amazing cappuccino with your Moka pot right in your home.
Say goodbye to expensive espresso machines and hello to mastering the art of homemade cappuccinos!
This guide will walk you through everything from choosing the right coffee beans to nailing that creamy milk foam topping.
Key Takeaways
- A Moka pot is an affordable and effective way to make a high-quality cappuccino at home, mimicking the intensity of an espresso machine.
- Using precise measurements with tools such as a coffee scale and thermometer can improve the consistency and taste of your homemade cappuccinos.
- Choosing high-quality coffee beans, using filtered or bottled water, and experimenting with milk alternatives or flavorings can all enhance the overall flavor of your homemade cappuccino.
- Utilizing equipment such as a French press for frothing milk and a stainless steel milk jug for easy cleaning can streamline the brewing process while producing barista-level results every time.
What Is A Cappuccino?
A cappuccino is a popular coffee beverage combining espresso with steamed milk and velvety foam.
Originally from Austria, this delightful drink gained its fame in Italy, where it has since become a staple of Italian café culture.
To create the traditional Italian cappuccino, baristas use precise coffee-to-milk ratios – one-third espresso, one-third steamed milk, and one-third froth – resulting in an exquisite blend of textures and tastes tantalizing your taste buds.
Often served in small 5-ounce cups to preserve flavor density, cappuccinos are typically enjoyed during breakfast or post-dinner periods.
Although many people enjoy grabbing their shot of caffeine at local cafes or Starbucks outlets worldwide, there’s something magical about creating your perfect homemade cappuccino with a Moka pot.
It requires practice and attention to detail but offers immense satisfaction when you master this luxurious brew at home.
Benefits of Making Cappuccino at Home with Moka Pots
A Moka Pot is an excellent choice for making a cappuccino at home, as it allows coffee enthusiasts to recreate the flavor complexity of a traditional Italian espresso without breaking the bank on expensive equipment.
Originating from Italy, this classic stovetop brewing method has found its way into kitchens worldwide due to its affordable price and ability to produce a strong, full-bodied coffee with a rich aroma.
One of the key benefits of using a Moka Pot is that it gives individuals more control over their brewing process than automatic machines or capsule systems.
This hands-on approach allows users to experiment independently with grind size, water temperature, and extraction time until they find their perfect cup.
Crafting a homemade cappuccino using a stovetop espresso maker offers practicality and satisfaction.
It provides an accessible option for those looking to enjoy barista-quality drinks within the comfort of their own homes while encouraging creativity by granting complete control over every aspect of the brewing journey.
Essential Equipment and Ingredients
Crafting the perfect Cappuccino requires precision and the right tools.
Among these essentials are a Moka Pot, a high-quality coffee grinder, a coffee scale, a French press, a thermometer, filtered or bottled water, milk, and a stainless steel milk jug.
Mastering the art of coffee making entails more than just following a recipe; it’s about understanding each ingredient’s nuances and their role in creating that perfect cup.
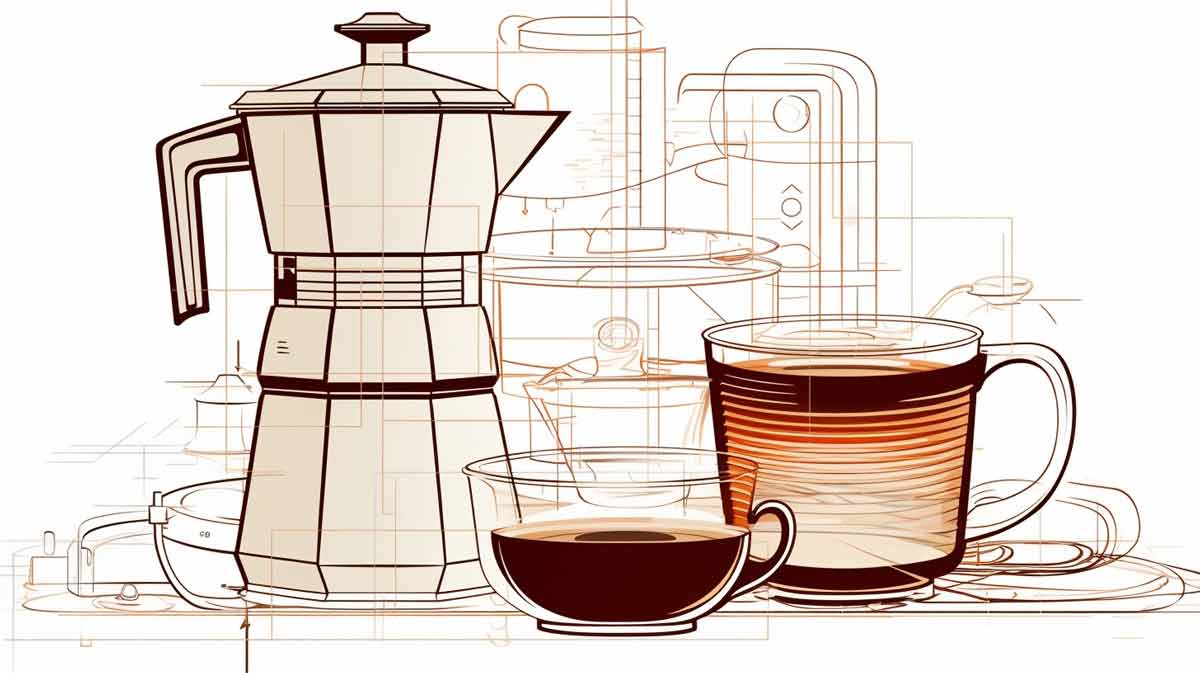
1. A Moka Pot Coffee maker
A Moka pot is an iconic stovetop coffee maker designed in Italy by Alfonso Bialetti in 1933.
It has since become a popular brewing method for many coffee enthusiasts who appreciate the rich and robust flavor it produces, often compared to espresso.
This little aluminum wonder consists of three main compartments:
- The bottom chamber for water.
- The middle filter basket for coffee grounds.
- The top chamber is where brewed coffee collects.
Many people choose to use a Moka pot instead of an espresso machine because of its affordability and ease of use.
With minimal equipment required and no need for electricity or expensive machines, you can still enjoy delicious homemade cappuccinos without breaking your budget.
Additionally, using a Moka pot allows better control over various factors crucial to creating great coffee, such as grind size and brewing time, so each cup truly reflects your preferences.
2. High-Quality Coffee Grinder
The coffee grinder is an essential piece of equipment for making a perfect cappuccino.
A high-quality burr grinder ensures that the coffee beans are ground uniformly, leading to better extraction and, ultimately, a better-tasting cup of cappuccino.
Blade grinders chop up the beans unevenly, leading to over-extraction or under-extraction.
For example, when using a moka pot to make cappuccino at home, it is recommended to use medium-fine espresso-grade beans with a consistent grind size.
Additionally, using freshly ground coffee beans instantly improves the flavor profile of your cappuccino, as pre-ground store-bought coffee may be stale, affecting how well it brews when used in your coffee maker.
3. Coffee Scale
A coffee scale is essential for crafting the perfect homemade cappuccino.
It ensures that precise measurements of coffee and milk are used to achieve a consistent and balanced cup every time.
A good quality scale like the Art De Vivre Coffee Scale helps control variables such as weight and water temperature, allowing for precision in brewing.
Measuring your ingredients with a coffee scale contributes to consistency in taste and provides excellent feedback on each element’s contribution to your final product.
For instance, when experimenting with ratios or brew guides, you’ll be able to observe how different amounts of ground beans impact extraction times or if steaming too much frothed milk disrupts the balance between espresso shot and steamed milk mixture.
4. French Press
A French press is a simple and affordable tool that can be used to make a high-quality cappuccino at home with a Moka pot.
The French press, also known as a press pot or plunger pot, is typically used for brewing coffee by allowing coffee grounds to steep in hot water before pushing them through a mesh filter.
In this case, the French press can be used to froth milk for the cappuccino by heating milk on the stovetop until it reaches about 150°F and then using the French press to pump air into the milk until it reaches dense micro-foam consistency.
This method eliminates the need for a separate milk frother, making it convenient for home coffee enthusiasts.
5. Milk Frother
A milk frother is another useful tool for creating the perfect cappuccino at home with a Moka pot.
While a French press can be used for frothing milk, a dedicated milk frother offers even more convenience and precision.
Various milk frothers are available, including handheld electric frothers, steam wand attachments for espresso machines, and standalone frothing machines.
Each type has its advantages, but home baristas often prefer a handheld electric frother for simplicity and ease of use.
Using a milk frother allows you to create creamy, velvety foam that perfectly complements the rich flavor of the espresso in your cappuccino.
A frother produces consistent results by heating and aerating the milk simultaneously, ensuring the foam has the ideal texture and density.
When choosing a milk frother, look for one with adjustable settings to customize the foam to your liking.
Whether you prefer a thick, dense cappuccino foam or a lighter, airy froth, a quality frother will give you the control you need to achieve the perfect cappuccino every time.
6. Thermometer
Using a thermometer may seem unnecessary, but it is crucial to heat milk to the right temperature for a tasty cappuccino.
The ideal temperature for steaming milk is between 150-155°F, which can be tricky to gauge without a thermometer.
Overheating the milk can result in scalding and burnt flavors, while underheating will produce flat and tasteless foam.
Invest in a good quality digital thermometer that provides accurate readings quickly to achieve perfect-frothed milk every time.
With the help of a thermometer, you can easily create professional-grade cappuccinos at home.
7. Filtered Or Bottled Water
Using the right water is essential to making a perfect homemade cappuccino.
Using tap water with high levels of chlorine or other impurities can affect the taste of coffee and prevent it from brewing correctly.
To ensure your cappuccino’s flavor is not compromised, using filtered or bottled water when making your coffee at home is recommended.
Filtered water helps to remove any minerals and chemicals that might alter the taste of your coffee while preserving its natural flavors.
Bottled water, however, has already been purified and provides a consistent quality that contributes to better-tasting cappuccinos.
8. Milk
The type of milk you choose can make a big difference in the taste and texture of your homemade cappuccino.
Whole milk is commonly used for making cappuccino as it produces a rich and creamy foam, but you can also use alternatives like soy or almond milk.
When steaming the milk, removing any large bubbles by tapping the bottom of the jug on a surface and swirling the liquid around before pouring is important.
A stainless steel milk jug makes this process easier, allowing you to create perfectly smooth and velvety foam for your cappuccino.
Additionally, adding flavored creamers or syrups is an easy way to add extra flavor to your homemade cappuccino without adding unnecessary calories or sugar.
Starbucks-inspired flavors like vanilla or cinnamon brown sugar syrup are popular options that bring out different notes in your coffee blend while satisfying your sweet tooth.
9. Stainless Steel Milk Jug
A stainless steel milk jug is crucial for crafting the ideal homemade cappuccino.
Unlike their plastic or ceramic counterparts, stainless steel jugs offer ease of cleaning and maintenance, preventing residue build-up that could affect the taste of your coffee.
The jug’s sleek, shiny surface not only adds to its aesthetic appeal but also aids in monitoring milk frothing, allowing for the creation of dense microfoam rather than unstable large bubbles.
Additionally, stainless steel’s superior heat conductivity ensures safe milk heating directly on the stove, without concerns of handle damage from high temperatures.
Choosing The Right Coffee For Your Cappuccino
When selecting the proper coffee for your cappuccino, choosing an espresso blend specially formulated for this brewing method is essential.
One factor to consider when choosing your coffee is its roast profile. Medium roasts are the best choice, bringing out more complex flavors while maintaining a smooth texture.
Finally, one thing not to forget when making quality cappuccino is grind size and uniformity.
The grind should be fine enough so that it doesn’t block the filter basket but not too coarse, or your brew may become under-extracted and weak.
These tips will help you select the perfect beans for your homemade coffee that will delight any caffeine lover looking for an authentic Italian experience right from their kitchen!
Optimal Coffee to Milk Ratio for Cappuccinos
Regarding traditional Italian cappuccinos, the standard ratio is 1:3, meaning one part espresso and three parts frothed milk.
However, if you’re making a cappuccino at home using a moka pot, it’s recommended to use a ratio of 1:2, with one part espresso and two parts frothed milk.
It’s worth experimenting with different ratios to find your preference since some individuals prefer a stronger coffee flavor than others.
Using measured proportions when making your cappuccino is essential to ensure consistency and avoid over- or under-extraction.
Remember that your coffee’s quality and strength can impact the ideal ratio. If you’re using a particularly strong coffee blend, you may want to adjust the quantity of milk accordingly.
Lastly, consider that the texture and foaminess of your frothed milk will affect the overall volume of your finished drink.
So, be mindful of the milk’s frothiness when determining the amount of liquid in your cappuccino.
Step-by-Step Guide To Making a Cappuccino with a Moka Pot
Creating a delicious cappuccino with a Moka pot is easier than it seems.
Following a few simple instructions, you can brew a delightful cappuccino at home that invigorates your senses.
This guide will take you through the process, from boiling water and grinding coffee beans to frothing milk, culminating in enjoying a perfect cappuccino.
1. Boiling Water
The first step is to boil water. Using filtered or bottled water is important to avoid impurities affecting your coffee’s taste.
Fill the bottom chamber of your moka pot with hot water, ensuring that it does not go above the safety valve.
Then, place your coffee basket on top and fill it evenly with freshly ground coffee using a scale for accurate measurements.
Using high-quality fresh coffee beans can make all the difference in the flavor of your cappuccino.
2. Grinding Coffee
Grinding coffee is essential to making a perfect cappuccino with a moka pot at home.
The grind size and uniformity will affect the quality of the final brew.
Using a high-quality grinder ensures optimal grind size and uniformity, which results in better extraction and flavor profiling.
Espresso blends are recommended for making cappuccino at home, as they have been specifically formulated for espresso brewing methods, including moka pots.
A burr grinder is preferred over blade grinders because it produces consistent grounds that result in even extraction.
3. Adding Water And Coffee To The Moka Pot
Paying attention to the coffee-to-water ratio is essential to make the perfect cappuccino in a Moka pot.
The general rule of thumb is one part coffee to two parts water.
First, boil filtered or bottled water and grind your chosen espresso blend of Arabica and Robusta beans on a medium-fine setting using a burr grinder.
Avoid pre-ground coffee as it contains too many unwanted particles that can negatively affect the final taste.
Fill the bottom chamber of your coffee maker with hot water up to just below the valve level, then add ground coffee into the filter basket without pressing them down tightly.
Tap lightly on top of it for consistency before screwing it back onto the bottom chamber.
Place it over low heat until you see steam rising from its spout, but keep an eye out not to burn it, as overheating can cause over-extraction and a bitter taste in your coffee cup.
Using these proper guidelines ensures that every delicious sip will contain perfectly extracted flavors balanced by smooth milkiness for an authentic Italian-style cappuccino made right in your kitchen!
4. Heating The Moka Pot
Heating the moka pot is crucial to ensuring that your homemade cappuccino comes out perfectly.
This helps to create a consistent extraction of coffee grounds, which makes for delicious and rich espresso.
You can heat the coffee maker over low-medium heat on your stovetop until it starts brewing or use an electric stove with a lower power setting.
It’s important not to heat the pot too quickly as this could cause over-extraction and lead to burnt-tasting coffee.
Using properly heated equipment is one of many steps towards making an amazing cup of cappuccino at home!
5. Removing Moka Pot From Heat
Once the first bubble appears in the Moka pot, remove it from heat immediately.
Leaving it on for too long will cause over-extraction and result in a bitter taste. It’s essential to be attentive during this step to avoid burning the coffee or ruining its taste.
After removing the Moka pot from the heat, wait 30 seconds before pouring the coffee into your cup.
Timing is key when brewing with a Moka pot, but with practice, you’ll master this crucial step and achieve a deliciously balanced espresso shot every time.
6. Tasting Your Coffee
It’s time to taste your creation once you’ve brewed your Moka Pot coffee.
Take a moment to appreciate the aroma before taking your first sip.
Taste the coffee and take note of its acidity, body, and flavor profile.
Some flavors commonly found in espresso blends include chocolate, caramel, nuts, and fruit notes like berries or citrus.
When adding milk to your cappuccino, pay attention to how it affects the overall taste of the beverage.
Whole milk is often used for its richness and creamy texture, but feel free to experiment with different types of milk, such as non-dairy options like soy or almond milk, if you prefer a lactose-free alternative.
7. Heating And Frothing Milk
Heating and frothing milk are essential steps that can’t be overlooked to make a perfect cappuccino.
Heating the milk helps dissolve any sugar or sweeteners in the drink and makes it warm enough for a soothing sip.
Frothing, on the other hand, adds texture and foam to the milk, which gives your cappuccino its unique taste.
A stainless steel milk jug is recommended for optimal results, allowing you to tap away bubbles and pour frothy milk smoothly without burning your hands.
With practice and experimentation, you’ll learn how much heat is needed to steam your desired milk effectively without scorching or over-cooking it.
In addition to using traditional dairy products such as whole cow’s milk when making cappuccinos at home using a Moka pot, many alternative non-dairy options are now available with soy or almond toppings, adding an extra layer of nutty flavors.
At the same time, steaming oats creates slightly sweeter notes after heating up during preparation time!
8. Adding Milk To Coffee
When adding milk to your coffee, it is essential to first heat and froth the milk using a stainless steel milk jug or another frothing tool.
The ideal temperature for heating the milk is between 140-160°F, which can be measured using a thermometer.
The milk should be frothed until it reaches a microfoam consistency with small bubbles to achieve a smooth and creamy texture.
Whole milk is commonly used in making cappuccino due to its higher fat content, which makes it easier to froth and provides a richer flavor.
However, non-dairy alternatives like soy or almond milk can also be used for those who are lactose intolerant or prefer plant-based options.
Tips For Perfecting Your Homemade Cappuccino
Perfecting your homemade cappuccino can seem intimidating, but it’s achievable with these helpful tips:
- Use freshly roasted coffee beans, ground before brewing to ensure maximum flavor and aroma.
- Heat the moka pot slowly at a medium-low temperature to prevent burning the coffee grounds and compromising the brew’s taste.
- Remove the moka pot from heat when you hear a gurgling sound, indicating that all coffee has been extracted from the grounds.
- Use a milk jug with a narrow spout for precise pouring and easy latte art designs.
- Tap the milk jug on a surface to remove any large bubbles in frothed milk before pouring it into your cappuccino.
- Experiment with milk types like oats or almonds for unique flavors and textures.
- Don’t be afraid to adjust your grind size or water-to-coffee ratio if your cappuccino tastes too weak or strong.
- Practice makes perfect! Keep refining your technique and trying new ideas until you achieve your perfect homemade cappuccino!
Alternative Cappuccino Variations And Personal Touches
There are many ways to customize your cappuccino to suit your taste preferences.
Here are some alternative variations and personal touches to try:
- Vanilla Cappuccino: Add a shot of vanilla syrup to your cappuccino for a subtle sweetness.
- Chocolate Cappuccino: Mix cocoa powder or chocolate syrup for a rich and indulgent drink.
- Cinnamon Brown Sugar Cappuccino: Sprinkle cinnamon and brown sugar on top of your foam for a warm and cozy touch.
- Iced Cappuccino: Turn your cappuccino into a refreshing summer drink by pouring it over ice.
- Latte Macchiato: A layered drink where steamed milk is topped with espresso, creating an artistic contrast of colors.
- French Vanilla Cappuccino: Made by adding French vanilla creamer, this variation adds another layer of flavor to the classic cappuccino.
- Oat Milk Cappuccino: For a dairy-free option, oat milk can give a creamy texture that’s perfect for frothing.
- Wet or Dry Cappuccino: Ask for extra foam (dry) or extra steamed milk (wet) at coffee shops if you prefer more emphasis on either element.
With these variations and personal touches, you can experiment with different flavors and textures to make your homemade cappuccinos more satisfying.
Final Thoughts
Making a perfect homemade cappuccino with a Moka pot is easy.
With the right equipment and ingredients, you can enjoy a delicious cup of coffee from the comfort of your own home.
Remember to choose high-quality espresso blends, use precise measurements with a coffee scale, and maintain optimal temperature control throughout brewing.
My family always say that I am wasting my time here at web,
but I know I am getting experience everyday by reading
thes pleasant articles or reviews.