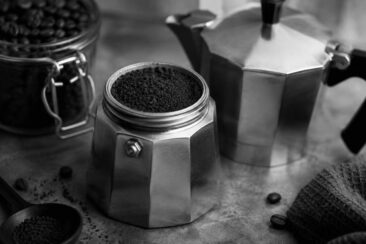
That puck of dark, soggy grounds sitting inside your moka pot’s filter basket after a brew looks like it still has something left to give.
The rich, oily aroma clinging to those spent grounds seems to promise at least one more cup.
It is a tempting thought, especially when you are running low on beans or trying to cut down on waste.
The truth is that reusing coffee grounds in a moka pot produces a thin, bitter liquid that barely resembles coffee.
The brewing process pulls out nearly all the good stuff on the first pass, and a second run extracts what is left: woody, harsh plant fibers with none of the sweetness or body you actually want in your cup.
Below, you will find a breakdown of exactly why this happens, what it can do to your moka pot, and what you should do with those leftover grounds instead.
Quick Answer
Reusing coffee grounds in a moka pot is not worth it. The first brew extracts most of the acids, oils, and sugars from the grounds, so a second brew pulls almost nothing except bitter plant fibers and produces a pale, watery liquid.
Toss the spent grounds and start fresh each time. If you want to get more value from used grounds, composting, garden fertilizing, and household scrubbing are all better options than running them through your moka pot again.
What Happens When You Reuse Coffee Grounds in a Moka Pot
A moka pot works by building pressure in the lower water chamber, forcing hot water up through the coffee bed and into the upper chamber.
That pressure, roughly 1 to 2 bars, does a thorough job of stripping soluble compounds from the grounds on the first cycle.
By the time your moka pot hisses and gurgles its way through a fresh dose, the grounds have released the bulk of their caffeine, sugars, fruit acids, and aromatic oils into your cup.
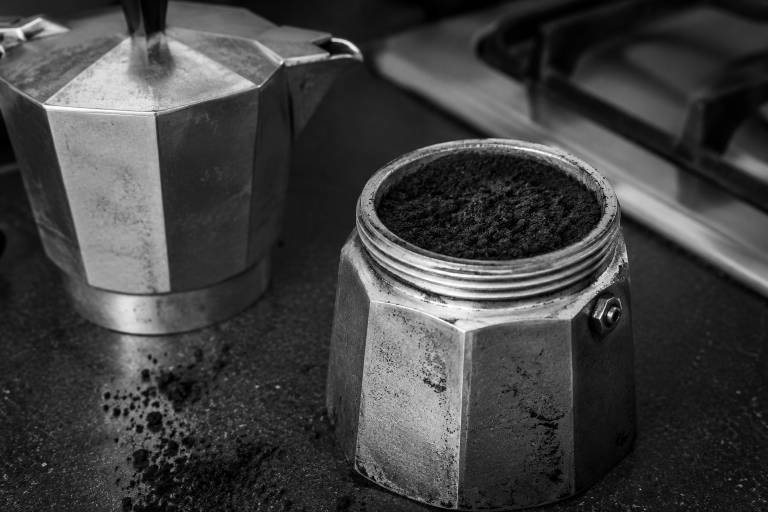
What remains in the basket is a spent puck of cellulose and insoluble plant material.
Running water through that puck a second time produces a pale, translucent liquid that looks closer to weak tea than coffee.
The taste matches the appearance: flat, papery, and laced with a dull bitterness that lingers on the back of your tongue.
One real-world test by Coffee Break Lovers showed that a second moka pot brew from the same grounds had almost no color, no body, and no detectable flavor.
Common Mistake Leaving spent grounds in the basket “just in case” for a later brew invites moisture buildup and stale, sour smells in your moka pot. Empty the basket and rinse the parts after every use.
How Coffee Extraction Works and Why a Second Brew Fails
Coffee beans contain hundreds of soluble compounds, and they do not dissolve into water at the same rate.
Understanding that sequence explains why reusing grounds is a dead end.
Acids come out first, bringing the bright, fruity, citrus-like notes you taste at the front of your tongue.
Oils follow, adding the syrupy body and rounded mouthfeel that make moka pot coffee feel thick and satisfying.
Sugars dissolve next, contributing the caramel and chocolate sweetness that balances the earlier acidity.
Plant fibers break down last, and they bring only bitterness and astringency.
| Extraction stage | Flavor contribution | When it dissolves |
|---|---|---|
| Acids | Brightness, fruitiness | First |
| Oils | Body, mouthfeel | Early-to-mid |
| Sugars | Sweetness, caramel notes | Mid |
| Plant fibers | Bitterness, astringency | Last |
During a normal first brew, hot water under pressure pulls through all four stages in rapid succession.
The grounds give up nearly everything worth tasting in that single pass.
A second brew has access only to the tail end of that curve: the bitter, dry, ashy compounds that good extraction timing is designed to minimize.
No amount of fresh water or extra heat will coax sweetness or brightness from grounds that have already surrendered those compounds.
This is the same reason your coffee tastes increasingly harsh if you leave a moka pot on the heat too long after it finishes brewing.
Will Reused Grounds Damage Your Moka Pot?
Beyond the flavor problem, spent grounds can cause physical wear on your brewer over time.
Old, wet coffee grounds clump and pack together more tightly than fresh ones, and those compacted clumps wedge into the crevices around the rubber gasket and the edges of the filter plate.
That packed residue works like fine sandpaper against the aluminum or stainless steel surfaces every time you screw the chambers together.
The gasket, which needs a clean seal to maintain proper brewing pressure, gradually degrades when gritty old coffee sits pressed against it between uses.
A weakened gasket means steam escapes around the edges instead of pushing water through the coffee bed, and you will hear a sputtering hiss from the seam rather than the steady gurgle of a healthy brew.
Replace the gasket immediately if you notice steam leaking from the joint or your brew suddenly comes out thin and watery.
Wet grounds left sitting in the basket for hours create a warm, moist environment where bacteria thrive.
The risk here is bacterial growth from the damp organic matter, not a dramatic safety hazard, but enough to produce off-putting sour smells and flavors that linger even after you clean the pot.
Quick Tip Rinse the filter basket, gasket, and both chambers with warm water after every brew and let all parts air dry before reassembling. This prevents residue buildup and keeps the seal in good shape.
How to Brew Fresh Moka Pot Coffee the Right Way
Getting a great cup from your moka pot takes very little extra effort once you know the basics.
Start by filling the bottom chamber with water up to the line just below the safety valve.
Hot water, rather than cold, shortens the time your grounds spend over heat and reduces the chance of bitter over-extraction.
Set the filter basket on the lower chamber and fill it to the rim with medium-fine ground coffee, roughly the texture of fine table salt.
Level the grounds with your finger, but do not tamp them down.
Tamping compresses the bed and restricts water flow, which leads to uneven extraction and a harsh, burnt taste.
Screw the upper and lower chambers together firmly.
Place the moka pot on medium heat on your stovetop and leave the lid open so you can watch the coffee as it rises.
Remove the pot from heat the moment the stream turns pale blond and you hear a soft hissing gurgle.
Waiting past that point pushes the brew into over-extraction territory, pulling bitter tail-end compounds into your cup.
Run the bottom of the pot under cold water for a few seconds to stop the extraction completely.
Fresh beans ground just before brewing make the biggest single difference in flavor.
Pre-ground coffee loses its volatile aromatic compounds within minutes of grinding, and those volatiles are what give moka pot coffee its rich, toasty, almost chocolate-like smell.
If you prefer the convenience of regular pre-ground coffee, store it in an airtight container and use it within two weeks of opening.
Do / Don’t for Moka Pot Brewing:
| Do | Don’t |
|---|---|
| Fill water to just below the safety valve | Overfill past the valve |
| Use medium-fine grounds (fine salt texture) | Use espresso-fine or drip-coarse grinds |
| Level grounds with your finger | Pack or tamp the coffee bed |
| Brew on medium heat | Crank the burner to high |
| Remove from heat at the first pale stream | Let it sputter and boil dry |
| Rinse all parts after every use | Leave wet grounds sitting in the basket |
What to Do with Spent Coffee Grounds Instead
Throwing away spent grounds is not the only option, and none of these alternatives require you to choke down a second moka pot brew.
Composting
Spent coffee grounds break down quickly and add nitrogen to your compost pile.
Mix them with carbon-rich materials like dry leaves, shredded paper, or straw to keep the pile balanced.
The earthy, loamy smell of good compost improves noticeably when coffee grounds make up about 10 to 20 percent of the green layer.
Feeding Your Garden
Coffee grounds can go directly into the soil around acid-loving plants like blueberry bushes, azaleas, and hydrangeas.
The nitrogen, potassium, and magnesium in spent grounds support root growth and leafy development.
Scatter a thin layer on top of the soil rather than burying a thick clump, which can trap moisture and invite mold.
Some gardeners report conflicting results when using grounds around vegetables, so test a small area first and watch for any yellowing leaves or stunted growth.
Scrubbing Pots and Surfaces
The gritty, slightly oily texture of used coffee grounds makes a surprisingly effective scouring paste.
Mix a tablespoon of grounds with a small amount of dish soap and scrub baked-on grease from cast iron, stainless steel, or ceramic cookware.
The mild abrasion cuts through residue without scratching, and the natural oils leave behind a faint, warm coffee scent instead of a chemical smell.
Keeping Pests Away
Ants, slugs, and mosquitoes dislike the sharp, bitter aroma of coffee.
Sprinkle a ring of dried grounds around garden beds, doorways, or windowsills to create a scent barrier.
Slugs in particular avoid crawling over the rough, gritty surface, which protects tender seedlings during rainy stretches.
A Better Cup Starts with Fresh Grounds
Reusing coffee grounds in a moka pot saves a few cents at the cost of everything that makes the cup worth drinking.
The extraction science is straightforward: the first brew claims the acids, oils, and sugars, and a second brew gets only the dregs.
Your moka pot’s gasket and filter plate stay in better shape when you empty and rinse the basket after each use rather than letting old grounds sit and compact.
If reducing waste matters to you, composting and garden use put those spent grounds to work far more effectively than a second disappointing brew.
Invest your effort where it counts: fresh beans, a clean pot, and the patience to pull it off the heat right when the stream goes pale.
That single fresh cup, dark and fragrant with a bittersweet edge, will always be worth more than two muddy ones made from recycled grounds.