Your French press is one of the most forgiving coffee brewers you can own, but it punishes neglect fast.
Left uncleaned for a few days, the oils trapped in that mesh filter start turning rancid, and every fresh batch of beans you grind will taste stale before the water even hits them.
A quick daily rinse and a few smart french press maintenance tips can protect your morning cup for years.
Skipping this step costs more than flavor, too, since replacement filters run $5 to $15 and a cracked glass carafe can set you back $10 to $25.
These french press maintenance tips cover daily cleaning, deep cleaning, filter replacement, proper storage, and material-specific care for glass and stainless steel models.
The good news: none of this is hard, and most of it takes less than two minutes.
Quick Answer
Clean your French press after every single brew, and deep clean it once a week with vinegar or baking soda if you use it daily.
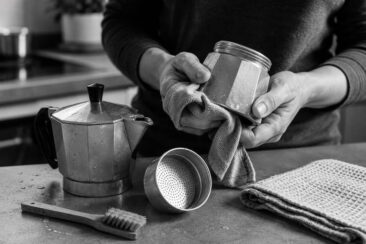
Disassemble the plunger completely when cleaning, since coffee oils and fine grounds collect between the mesh screen, cross plate, and spiral plate where a simple rinse cannot reach them.
If you notice grounds leaking into your cup or the plunger sliding down with no resistance, your filter screen likely needs replacing.
Why a Dirty French Press Ruins Your Coffee
Coffee beans contain natural oils that give each cup its body and richness.
Those same oils cling to the carafe walls and mesh filter after brewing, and within days they start to go rancid.
Rancid oil has a flat, cardboard-like taste that overpowers the sweetness and complexity of your fresh beans.
The buildup does more than wreck the flavor.
Fine grounds wedge themselves into the mesh screen over time, creating resistance that makes plunging feel stiff and uneven.
A clogged filter throws off extraction, pulling too much bitterness from the grounds closest to the screen.
Left alone long enough, moisture trapped in the filter assembly can breed mold in the crevices between the cross plate and spiral plate.
Cleaning your French press is less about hygiene theater and more about protecting the $12 to $20 bag of coffee you just bought.
Common Mistake Rinsing the carafe without disassembling the plunger feels fast, but it leaves the dirtiest parts of the brewer untouched. Oils and silt collect between the filter plates, not on the glass.
How to Clean a French Press After Every Brew
The whole process takes about 90 seconds once you get the rhythm down.
Pour out any remaining coffee and add a splash of warm water to the carafe.
Swirl the water and grounds together, then pour the slurry through a fine mesh sieve over your trash can or compost bin.
Never dump grounds directly down your kitchen drain, since wet coffee clumps together in pipes and creates stubborn blockages over time.
Pull the plunger out and unscrew the bottom knob to separate the mesh screen, cross plate, and spiral plate.
Run warm water through each piece and give the mesh a gentle scrub with a soft sponge or old toothbrush.
Add a drop of dish soap and a few inches of warm water to the carafe, then plunge the reassembled filter up and down four or five times.
Rinse everything until the water runs clear, and set the parts on a drying rack or clean towel.
Use a rubber or wooden spatula to scrape out any stubborn grounds stuck to the bottom of the glass, and avoid metal spoons that could chip or scratch the carafe.
When Your French Press Needs a Deep Clean
Daily rinsing handles the surface-level residue, but it cannot dissolve the oily film that slowly builds inside the mesh and along the carafe walls.
You will smell this buildup before you see it: a faintly sour or musty note that lingers after rinsing.
Deep clean your French press once a week if you brew every day.
If you only use it on weekends, a monthly deep clean keeps things fresh.
Visible brown staining on the inside of the glass is another signal that a standard rinse is no longer enough.
Hard water accelerates the problem, since mineral deposits layer on top of coffee oil buildup and create a chalky white crust that regular soap cannot break down.
A sticky or sluggish plunger that catches halfway down the carafe almost always means the filter plates need a soak, not just a rinse.
Trusting the sniff test is the simplest way to know when it is time: hold the empty carafe up to your nose, and if you catch anything other than clean glass, reach for the vinegar.
Of all the french press maintenance tips in this guide, weekly deep cleaning delivers the biggest improvement in flavor for the smallest investment of time.
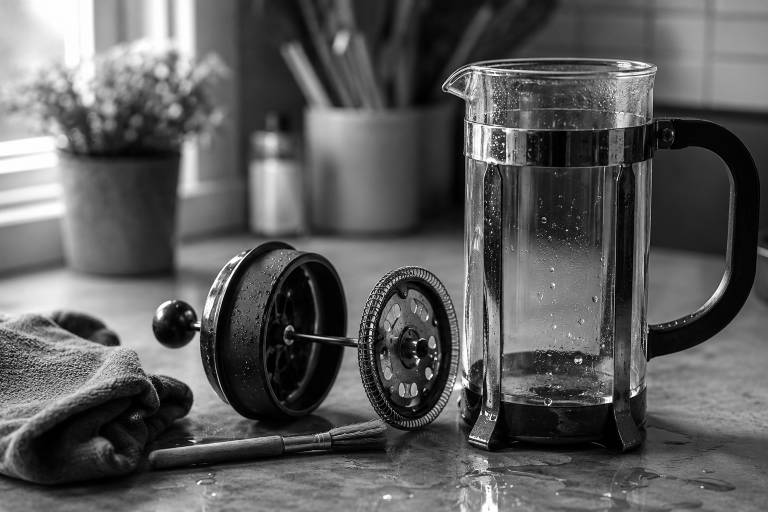
How to Deep Clean a French Press with Vinegar or Baking Soda
Two pantry staples handle the job without any specialty coffee cleaning products.
Vinegar method: Mix equal parts white vinegar and warm water, fill the carafe, drop in the disassembled filter parts, and let everything soak for 15 to 20 minutes.
The acid dissolves mineral deposits and cuts through dried coffee oil that soap alone leaves behind.
After soaking, scrub the carafe interior with a soft bottle brush, rinse all parts under hot water at least twice, and air dry completely.
Baking soda method: Stir one tablespoon of baking soda into two cups of warm water to create a mildly abite paste.
Apply the paste to any stained areas on the glass with a sponge, let it sit for 10 minutes, then scrub and rinse.
Baking soda works especially well on dark coffee stains that have bonded to the carafe over weeks of use.
| Method | Best For | Soak Time | Supplies Needed |
|---|---|---|---|
| White vinegar soak | Mineral deposits, oil buildup | 15-20 min | Vinegar, warm water |
| Baking soda paste | Stubborn stains, odor removal | 10-15 min | Baking soda, warm water, sponge |
| Soap and hot water plunge | Light daily residue | 1-2 min | Dish soap, warm water |
| Citric acid rinse | Heavy limescale in hard water areas | 20-30 min | Citric acid powder, warm water |
Rinse thoroughly after any cleaning solution, and run a finger along the inside of the glass to check for any slippery residue before your next brew.
Quick Tip If your carafe still smells sour after a vinegar soak, fill it with warm water and a tablespoon of lemon juice. Let it sit for 30 minutes, rinse, and the citric acid will neutralize any lingering odor.
How to Disassemble and Clean the Plunger Assembly
Most French press owners never take apart the plunger, and that single habit is responsible for a huge share of stale-tasting brews.
The plunger assembly on a standard French press has four to five separate pieces.
Hold the lid handle in one hand and turn the bottom knob counterclockwise until it detaches.
Slide off the bottom plate, the mesh filter screen (sometimes two screens), and the cross plate or spiral plate that sits between them.
Coffee oil and fine silt collect in the seam between these plates, and no amount of rinsing from the outside can clear it.
Scrub each piece individually with warm soapy water and a soft brush.
Pay close attention to the edges of the mesh screen where it meets the frame ring, since stretched or bent mesh in this zone is the most common cause of grounds leaking into your cup.
Rinse each piece, shake off excess water, and reassemble in the correct stacking order: cross plate first, then mesh screen, then bottom plate, then the securing knob.
If you forget the order, check the manufacturer’s guide or snap a quick photo before your first disassembly.
Tighten the knob firmly but not aggressively, since overtightening can warp the plates and create gaps that let grounds slip past the mesh.
Learning to disassemble and reassemble the plunger is the single most overlooked french press maintenance tip, and it takes less than a minute once you have done it a few times.
Signs Your French Press Filter Needs Replacing
A filter screen does not last forever, no matter how carefully you clean it.
Daily use wears down the fine mesh over months, and the holes gradually stretch wider until your cup fills with sediment that was never there before.
Here is how to tell your screen is past its useful life:
- Grounds appear in your brewed coffee, even with a proper coarse grind
- The plunger slides down with almost no resistance, like pushing through air
- Visible tears, bends, or warping at the edges of the mesh
- Permanent dark discoloration that does not lighten after a vinegar soak
- A metallic or off taste that persists after thorough cleaning
Most stainless steel filter screens last about 1 to 2 years with daily use.
With lighter use (a few times per week), screens can hold up for 2 years or longer before the mesh begins to stretch.
Replacement screens cost $5 to $12 depending on brand and size, and they are available for most popular models including Bodum Chambord, Brazil, Espro, and Frieling.
The rubber or silicone gasket that seals the plunger against the carafe wall wears out faster, often within 6 to 12 months of daily brewing.
If your plunger wobbles or coffee seeps around the edges instead of filtering through the mesh, the gasket is the most likely culprit.
When to Replace If cleaning no longer restores a snug plunger fit, or if your coffee has a persistent metallic taste that fresh beans and clean water cannot fix, swap the filter and gasket before replacing the entire press. A $5 to $10 replacement kit often adds years of life to the brewer.
How to Dispose of Coffee Grounds Without Clogging Your Sink
Wet coffee grounds clump together in pipes like cement.
Pouring them down the drain once or twice might not cause problems, but the habit catches up fast, and a plumber visit costs far more than a compost bin.
The easiest removal method: add a splash of water to the carafe, swirl the grounds loose, and pour the slurry through a fine mesh sieve held over your trash can.
Tap the sieve against the rim to shake the grounds free, then rinse it clean.
If you do not have a sieve, a rubber spatula or a folded paper towel works for scooping out the bulk of the grounds.
Composting is the smartest second life for used coffee grounds.
Spent grounds are rich in nitrogen and break down quickly when mixed with dry leaves, cardboard, or other carbon-heavy materials in a backyard compost pile.
Gardeners sprinkle dried grounds around the base of acid-loving plants like blueberries and azaleas as a slow-release soil amendment.
A small open container of dried grounds in the back of your refrigerator absorbs food odors for up to two weeks.
Glass vs. Stainless Steel: Different Care for Different Presses
The material your French press is made from changes how you clean it, store it, and handle it between brews.
Glass carafes are completely taste-neutral, meaning they will never add unwanted flavors to your coffee.
That neutrality comes with fragility: glass chips, cracks, and shatters in ways that stainless steel never will.
Stainless steel presses, particularly double-walled vacuum models, hold heat dramatically longer than glass.
One comparison test showed a glass press dropping to about 158°F after 15 minutes, and a double-walled steel press staying around 184°F at the same mark.
Steel can handle rougher scrubbing and sudden temperature swings without breaking, making it the safer choice for busy kitchens and outdoor brewing.
On the downside, cheap stainless steel can leave a faint metallic note in the cup, and water spots show quickly on polished surfaces if you skip the drying step.
| Feature | Glass French Press | Stainless Steel French Press |
|---|---|---|
| Flavor neutrality | Fully neutral | Neutral with quality 304-grade steel |
| Heat retention (after 15 min) | Around 158°F | Around 184°F (double-walled) |
| Breakage risk | High | Very low |
| Typical price | $15-$50 | $30-$80 |
| Cleaning difficulty | Shows residue, easy to spot | Hides residue, may need more scrubbing |
| Dishwasher safe | Usually (top rack) | Usually (check manufacturer) |
Glass owners should always hand-wash with a soft sponge and avoid metal brushes that scratch the surface.
Stainless steel owners can scrub harder, but should dry immediately after washing to prevent water spots and mineral film from developing on the polished interior.
Whichever material you own, preheating the carafe with warm water before brewing protects the vessel and improves extraction temperature consistency.
How to Prevent Thermal Shock and Cracked Glass
Borosilicate glass, the material used in most quality French presses, can handle higher temperatures than regular glass, but it is not indestructible.
Thermal shock happens when one part of the glass heats or cools much faster than the surrounding area, creating stress that leads to cracks.
Pouring boiling water into a cold carafe is the most common cause of French press glass failure.
The fix takes 10 seconds: swirl a small amount of warm (not boiling) water inside the carafe before you start brewing.
This step, called preheating, gradually brings the glass up to temperature so the full pour of hot water does not create a dangerous temperature gap.
Never rinse a hot glass carafe with cold water after brewing, since the sudden temperature drop can crack or shatter the glass instantly.
Store your glass press in a cabinet or on a shelf where it will not get knocked by other cookware, pans, or elbows during busy mornings.
If your carafe does crack, replacement beakers in borosilicate glass are sold by Bodum, Grosche, and other brands for $8 to $20, which is far cheaper than buying a whole new press.
How to Store Your French Press the Right Way
A clean French press stored damp will grow mold in the crevices of the filter assembly before your next brew.
Disassemble the plunger after every cleaning session and let all parts air dry completely before putting the brewer away.
Storing the plunger inside the carafe with the lid on traps moisture in exactly the spots where mold grows fastest.
The simplest approach: leave the plunger resting loosely on top of the carafe without pressing it down, so air can circulate through the filter.
Keep the brewer in a dry cabinet away from your stove, where heat and steam can warp plastic lids and degrade rubber gaskets over time.
If you own a glass press, choose a storage spot where it is least likely to get bumped during the morning rush.
Wrap the carafe in a dish towel if it shares a shelf with heavy mugs or cast iron.
For long-term storage (traveling, seasonal use), disassemble everything, dry thoroughly, and wrap the glass carafe in bubble wrap or a padded sleeve.
Proper storage might be the least glamorous of all french press maintenance tips, but it prevents mold growth and gasket damage that lead to expensive replacements.
A Simple French Press Maintenance Schedule
Keeping track of what to clean and when does not need a spreadsheet.
This schedule covers everything from daily rinses to annual part swaps, and it keeps your press brewing clean, full-bodied coffee month after month.
After every brew:
- Remove grounds using a sieve or spatula (never the drain)
- Disassemble the plunger and rinse all parts with warm water
- Wash the carafe with a drop of dish soap and a soft sponge
- Air dry all pieces fully before reassembling
Once a week (daily brewers):
- Soak the filter assembly in a vinegar and water solution for 15-20 minutes
- Scrub the carafe interior with a bottle brush
- Inspect the mesh screen for tears or warping
- Check the rubber gasket for cracks or loss of flexibility
Once a month:
- Deep clean with a baking soda paste on stained areas
- Inspect the plunger rod for smooth operation
- Clean any hard water scale from the carafe rim and spout
Every 6-12 months:
- Replace the rubber or silicone gasket if it feels stiff, flat, or cracked
- Evaluate the mesh filter screen for permanent discoloration or stretched holes
- Replace the glass carafe if it shows chips, hairline cracks, or cloudiness that cleaning cannot remove
Sticking to this routine keeps your french press maintenance tips from becoming emergency repairs, and it protects the flavor of every cup you brew.
A well-maintained French press can last a decade or longer with nothing more than a few dollars in replacement parts each year.