Your coffee maker just died, and the smell of fresh grounds is already calling from the bag on your counter.
Learning how to make coffee without a coffee maker is easier than most people expect.
People brewed great cups for centuries before drip machines, Keurigs, or pod systems existed.
All you need is ground coffee, hot water, and a few items already sitting in your kitchen.
Every method in this guide uses the same golden ratio: 2 tablespoons of ground coffee per 6 ounces of water.
Adjust up or down from there based on how strong you prefer your cup.
Quick Answer
The fastest way to make coffee without a coffee maker is the stovetop saucepan method: boil water, stir in coffee grounds, let them steep for 4 minutes, then pour slowly into your mug. A fine mesh strainer catches any stray grounds. Making coffee without a coffee maker takes less than 10 minutes with most methods.
If you have a coffee filter, you can build a makeshift pour-over in under a minute. Read on for six complete methods ranked by speed and simplicity.
The Stovetop Saucepan Method (Fastest and Easiest)
This is the go-to method for brewing a fresh cup with no machine, and it gets coffee into your hands within 10 minutes using items every kitchen already has.
Grab a small saucepan, your ground coffee, water, and a mug.
Pour slightly more water than you plan to drink into the saucepan, since some will absorb into the grounds and some will stay behind.
Add 2 tablespoons of coffee per 6 ounces of water directly into the pot and stir once.
Set your burner to medium-high heat and bring the water to a gentle boil.
The kitchen will fill with the dark, toasted scent of fresh coffee as the water heats up.
Once the water reaches a rolling boil, remove the saucepan from the heat immediately and let it sit for 4 minutes.
This steep time allows the grounds to settle into a thick layer at the bottom of the pot.
Pour slowly into your mug, tilting the saucepan with a steady hand so the grounds stay behind.
A ladle works well here if you have one, scooping brewed coffee off the top without disturbing the sludge below.
Common Mistake Letting the coffee boil for too long will push the water temperature past 205°F and pull harsh, bitter compounds from the grounds. Remove the pot as soon as it starts rolling.
How to Build a DIY Pour-Over With a Coffee Filter
If you have a paper coffee filter anywhere in your kitchen, you can build a surprisingly effective pour-over setup with no special equipment.
Place the filter over the top of your mug and push the center down slightly to create a small basket shape.
Clip the edges of the filter to the rim of your mug using binder clips, clothespins, or even a rubber band stretched around the outside.
Use at least three clips to keep the filter from collapsing under the weight of water.
Add your measured coffee grounds into the filter.
Heat your water to just below boiling, around 200°F to 205°F, which means removing your kettle or pot from the stove about 30 seconds after it reaches a full boil.
Pour a small splash of hot water over the grounds, just enough to wet them completely, and wait 30 seconds.
This pause lets the coffee “bloom,” releasing trapped carbon dioxide gas so the water can extract flavor evenly.
You will see the grounds puff up and small bubbles rise from the surface during the bloom.
After the bloom, pour the remaining water in a slow, steady stream, working in small circles from the center outward.
The dripping sound of coffee hitting the bottom of the mug is your signal that things are working.
This method produces the cleanest cup of any no-machine technique since the paper filter catches all oils and fine sediment.
A single filter costs less than a penny, making this the cheapest clean-cup method available.
| Method | Brew Time | Cleanup | Flavor Profile |
|---|---|---|---|
| DIY Pour-Over | 5 minutes | Easy, toss the filter | Clean, bright, smooth |
| Stovetop Saucepan | 10 minutes | Rinse the pot | Full-bodied, some grit |
| Coffee Bag Steep | 6 minutes | Easy, toss the bag | Mild, tea-like |
| Cowboy Coffee | 10 minutes | Rinse the pot | Bold, rustic, heavy |
| Microwave Mug | 8 minutes | Rinse the mug | Decent, some sediment |
| Cold Brew | 12-24 hours | Strain and rinse | Smooth, sweet, low acid |
The Coffee Bag Method (Steep It Like Tea)
This method works best when you have coffee filters and a piece of string, twine, or even dental floss.
Scoop 2 tablespoons of ground coffee onto the center of a flat coffee filter.
Gather the edges together and twist the top closed, forming a small pouch that looks like an oversized tea bag.
Tie it snugly with your string, leaving a long tail hanging outside the mug so you can pull the bag out later.
Drop the coffee bag into your mug and pour hot water (just off the boil) over it until the mug is full.
Let it steep for 4 to 5 minutes, pressing the bag gently against the side of the mug with a spoon once or twice to encourage extraction.
The result tastes lighter and softer than a French press or stovetop brew, closer to drip coffee in body and clarity.
Quick Tip A finer grind will extract faster and produce a stronger cup with this method. Medium-fine works well. Coarse grounds can leave the coffee tasting weak and watery after only 4 minutes.
Cowboy Coffee on the Stovetop or Over a Campfire
Cowboy coffee is the oldest and most forgiving way to brew coffee without a coffee maker on this list.
It requires nothing more than a pot, water, coffee grounds, and heat.
Fill your pot with water, add 2 tablespoons of coarsely ground coffee per 6-ounce serving, and stir.
Place the pot on the stove or over a campfire and bring it to a gentle simmer over medium heat.
Letting it simmer rather than boil hard is the difference between a drinkable cup and something that tastes scorched.
Keep the temperature near 200°F for about 4 minutes, stirring once at the 2-minute mark.
Remove the pot from heat and let the grounds settle for another 4 minutes.
Here is the old cowboy trick for settling grounds: splash 2 tablespoons of cold water across the surface of the hot coffee.
The cold water drops the temperature just enough to make the grounds clump together and sink faster.
Pour carefully into your cup, stopping when you see the sludge at the bottom start to shift.
The flavor will be bold, thick, and gritty around the edges, with a smoky sweetness if you used a darker roast.
You will get a small amount of sediment at the bottom of your cup no matter how carefully you pour.
That is normal for unfiltered coffee and perfectly safe to drink.
Your cowboy coffee is ready when:
- The grounds have visibly settled to the bottom of the pot
- The liquid above the grounds looks dark and uniform
- No large clumps of grounds are floating on the surface
- The aroma smells rich and toasty, not burnt
The Microwave Mug Method (No Stove Needed)
This is the bare-minimum approach for mornings when the stove is broken, the electricity cuts out, or you only have access to a microwave and a mug.
Fill a microwave-safe ceramic or glass mug with 8 ounces of water.
Do not use paper cups, plastic cups, or any mug with metallic paint or trim.
Microwave the water on high for about 2 minutes, checking every 30 seconds, until the water is very hot and steaming.
The water should reach roughly 200°F, which means it is producing visible steam and tiny bubbles along the inside walls of the mug.
Do not bring it to a rolling boil inside the microwave, as superheated water can erupt when disturbed.
Remove the mug carefully using a towel or oven mitt.
Stir in 1 to 2 tablespoons of medium-ground coffee, and the grounds will sizzle and crackle as they hit the hot water, releasing a burst of roasted aroma.
Let the mug sit undisturbed for 4 minutes so the grounds can settle to the bottom.
Drink slowly and stop before the last sip, where the sediment collects in a thick paste.
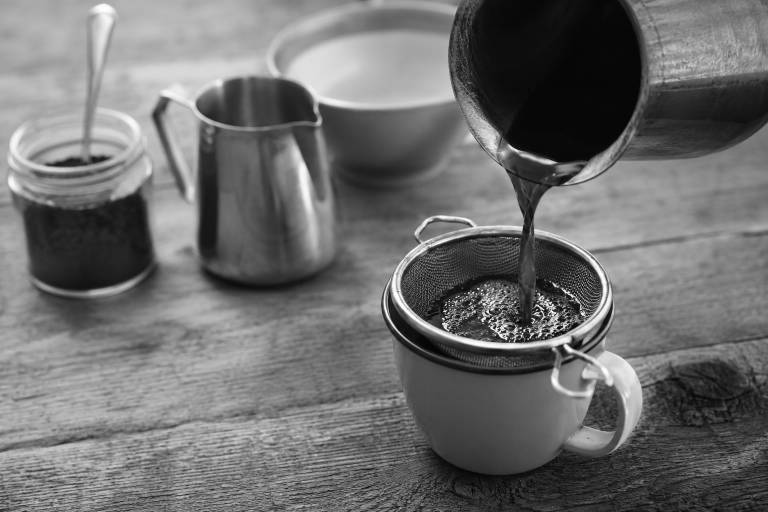
If you have a fine mesh strainer or a second mug and a coffee filter, strain the coffee through either one for a cleaner cup.
Beginner Note Microwave-brewed coffee will never taste as clean as filtered coffee, but it is a reliable backup when you have no other heat source available. The result sits somewhere between French press and cowboy coffee in body and texture.
How to Make Cold Brew Without Any Equipment
Cold brew is the method that needs the most patience and the least effort.
You do not need heat, electricity, or any brewing device at all, making it the most hands-off brewing method on this list.
Combine 1 cup of coarsely ground coffee with 4 cups of cold or room-temperature water in a glass jar, pitcher, or any container with a lid.
This 1:4 ratio creates a strong concentrate that you will dilute before drinking.
Stir the grounds and water together until every particle is wet.
Cover the container and let it sit at room temperature for 12 to 18 hours, or in the refrigerator for 14 to 24 hours.
Room temperature steeping extracts flavor faster and produces a bolder, more full-bodied concentrate.
Refrigerator steeping takes longer and delivers a smoother, mellower profile.
Do not steep for more than 24 hours, or the coffee will turn bitter and woody.
When the steeping time is up, strain the concentrate through a fine mesh strainer, cheesecloth, a clean cotton cloth, or even a coffee filter set over a bowl.
To serve, mix the concentrate with an equal amount of cold water or milk, adjusting to your preferred strength.
A 1:1 dilution with water gives you a cup that tastes similar in strength to regular brewed coffee but with noticeably less acidity and a naturally sweet finish.
The strained concentrate will keep in a sealed container in the refrigerator for 7 to 10 days.
One batch made on Sunday night can supply iced coffee for the entire workweek.
You can add vanilla extract, cinnamon, or a splash of simple syrup to the finished concentrate for a flavored version that rivals any coffee shop order.
| Cold Brew Variable | Recommended Range |
|---|---|
| Grind size | Coarse, like raw sugar |
| Coffee-to-water ratio (concentrate) | 1:4 by volume |
| Steeping at room temperature | 12 to 18 hours |
| Steeping in the refrigerator | 14 to 24 hours |
| Maximum steep time | 24 hours |
| Dilution for drinking | 1:1 with water or milk |
| Refrigerator shelf life | 7 to 10 days |
What Grind Size Works Best for Each Method
The grind size of your coffee grounds matters more than any other variable when you brew without a machine.
Too fine, and the coffee over-extracts into bitterness within minutes.
Too coarse, and the water passes through without pulling enough flavor.
For the stovetop, microwave, and cowboy methods, medium to medium-coarse grounds work best, roughly the texture of coarse sand.
For the DIY pour-over and coffee bag methods, medium to medium-fine grounds give you better extraction through a filter.
For cold brew, always use coarse grounds, about the size of raw sugar crystals or sea salt flakes.
If you only have pre-ground coffee from the store, that bag is almost always a medium grind, which works reasonably well across every hot-brewing method on this list.
The only method that struggles with standard pre-ground coffee is cold brew, where the finer particles can create a muddy, over-extracted concentrate.
Water Temperature and Why It Matters
Water temperature separates a balanced cup from a bitter, harsh one in any manual brewing method, and getting it right without a thermometer is simpler than you might think.
The ideal brewing range for hot coffee is 195°F to 205°F, according to the Specialty Coffee Association.
Water at a full rolling boil sits at 212°F at sea level, which is too hot for good extraction.
The easiest fix: pull your water off the heat 30 to 45 seconds after it reaches a boil and it will drop into the target range.
Water below 195°F under-extracts coffee, leaving you with a sour, watery, flat-tasting cup that smells promising but disappoints on the first sip.
Water above 205°F rips bitter tannins and harsh compounds from the grounds, producing the burnt taste that gives homemade coffee a bad reputation.
If you are at a higher altitude, your water boils at a lower temperature and you may be able to use it right off the boil.
At 5,000 feet, water boils around 202°F, which sits perfectly in the brewing sweet spot.
A simple kitchen thermometer costs under $10 and removes all guesswork from any manual brewing method.
Troubleshooting Common Problems With No-Machine Coffee
Brewing coffee without a coffee maker introduces a few problems that drip machines handle automatically.
Here are the most common issues and their fixes.
Coffee tastes bitter or burnt: Your water was too hot. Let it cool for 30 to 45 seconds after boiling before adding it to the grounds.
Coffee tastes weak and sour: You used too little coffee, too much water, or your steep time was too short. Add more grounds or steep for an extra minute.
Grounds floating on top of the cup: Your grind is too coarse, or you did not stir the grounds into the water at the start. Splash a tablespoon of cold water on top and wait 2 minutes for them to sink.
Muddy, gritty texture in every sip: You used too fine a grind for an unfiltered method. Switch to a coarser grind or strain through a coffee filter before drinking.
Cold brew tastes harsh after steeping: You exceeded the 24-hour steep window. Shorten your next batch to 14 to 16 hours and taste-test before straining.
Scandinavian Egg Coffee, the Old Church Basement Secret
Scandinavian egg coffee is the most unusual method on this list, and it produces one of the smoothest cups you will ever taste.
The technique dates back to the 19th-century wave of Scandinavian immigrants who settled across the American Midwest.
Church basements in Minnesota, Wisconsin, and Nebraska kept the tradition alive for generations.
Crack a whole raw egg, shell and all, into a small bowl.
Add 2 tablespoons of coarsely ground coffee and a splash of cold water, then mash everything together into a thick, gritty paste.
The mixture will look unappetizing, and that is perfectly fine.
Bring 2 cups of water to a boil in a saucepan.
Add the egg-and-coffee paste to the boiling water and stir once.
The pot will foam up, so keep a close watch and reduce the heat if it threatens to overflow.
Boil the mixture for 3 to 5 minutes, then remove from heat.
Pour 1/4 cup of ice-cold water into the pot.
The cold water causes the egg-bound coffee clumps to drop straight to the bottom of the pot, pulling all the fine sediment with them.
Let it rest for 2 minutes, then strain through a fine mesh strainer into your mug.
The proteins in the egg bind with the acids and bitter compounds in the coffee, neutralizing them.
What you get is a cup that feels velvety on the tongue, with almost no bitterness and a clean, rounded sweetness that tastes like it came from a $6 pour-over at a specialty cafe.
This is the method to pull out when you want to turn a simple morning into something memorable.
Choosing the Right Method for Your Situation
The best way to make coffee without a coffee maker depends on what you have available right now.
If you have a stove and 10 minutes, the stovetop saucepan method gives you the most reliable cup with the least guesswork.
If you have a coffee filter, build the DIY pour-over for the cleanest, smoothest result.
If you have no heat source at all, cold brew is your answer, but you need to plan 12 to 24 hours ahead.
If you only have a microwave, the microwave mug method will get caffeine into your system in under 8 minutes.
If you want to impress someone, brew Scandinavian egg coffee and watch their face when you crack an egg into the pot.
Every method on this list uses the same ground coffee you would put into a drip machine, so you do not need to buy anything special.
The next time your coffee maker breaks down, the electricity goes out, or you find yourself in a cabin with nothing but a pot and a campfire, you now know how to make coffee without a coffee maker using six proven methods.