Getting the moka pot ratio wrong is the fastest way to ruin a perfectly good pot of coffee.
Too much coffee and the brew tastes harsh, ashy, and impossible to drink.
Too little and you get something closer to tinted hot water than anything worth pouring.
The fix is simple: match the right amount of ground coffee to the right amount of water for your specific moka pot size.
This guide breaks down the exact moka pot ratio for 1-cup, 3-cup, 6-cup, 9-cup, and 12-cup pots, with measurements in grams, tablespoons, and fluid ounces.
Quick Answer
The standard moka pot ratio falls between 1:7 and 1:10 (coffee to water by weight), depending on how strong you like your brew. Fill the water chamber to just below the safety valve and fill the filter basket level with medium-fine grounds, and most moka pots land in this range automatically.
If your coffee tastes weak or bitter, the ratio and grind size are the first two things to check.
Why the Coffee to Water Ratio Matters in a Moka Pot
A moka pot brews by building pressure in the lower chamber and forcing hot water up through a bed of ground coffee.
That pressure sits at roughly 1 to 2 bar, which is higher than a drip machine but far lower than the 9 bar an espresso machine produces.
The balance between coffee dose and water volume controls how much flavor gets extracted during that pressurized push.
Get the ratio too heavy on coffee, and the water can’t move through the grounds fast enough, which produces a bitter, burnt-tasting cup with a thick, muddy texture.
Swing the ratio too far toward water, and the brew rushes through the coffee bed without pulling enough flavor, leaving you with a thin, sour, almost tea-like result.
A good ratio keeps the extraction in a sweet spot where the coffee tastes full-bodied, slightly sweet, and clean on the finish.
Quick Tip The moka pot’s built-in design does most of the ratio work for you. Fill the water to the safety valve, fill the basket level without pressing down, and you’re already close to the right range.
Moka Pot Coffee to Water Ratios by Size
Every moka pot “cup” is an Italian espresso-sized serving of about 60ml (2 oz), not a standard American coffee mug.
A 6-cup moka pot produces roughly 300ml of brewed coffee, which fills about one and a half regular mugs.
The table below shows the recommended coffee and water amounts for each common moka pot size.
| Moka Pot Size | Water (ml) | Coffee (grams) | Coffee (tablespoons) | Brewed Output (approx.) |
|---|---|---|---|---|
| 1-cup | 60 ml | 7–8 g | ~1.5 tbsp | ~50 ml |
| 3-cup | 150 ml | 14–16 g | ~3 tbsp | ~130 ml |
| 6-cup | 300 ml | 25–30 g | ~5 tbsp | ~270 ml |
| 9-cup | 450 ml | 35–40 g | ~7 tbsp | ~400 ml |
| 12-cup | 600 ml | 50–55 g | ~10 tbsp | ~550 ml |
These numbers work for Bialetti, Grosche, Alessi, and most standard aluminum or stainless steel moka pots.
Your exact amounts may vary slightly between brands, so treat these as a reliable starting point rather than a rigid formula.
Fill the water chamber to just below the safety valve on every size, not above it.
Overfilling creates dangerous pressure buildup and produces over-extracted, bitter coffee.
How to Measure Coffee and Water for a Moka Pot
The most accurate method is weighing your coffee and water on a kitchen scale.
A basic digital scale costs under $15 and pays for itself in better, more consistent coffee within a week.
Measuring in Grams
Grams give you the tightest control over your moka pot ratio.
Weigh your ground coffee into the filter basket, then weigh or measure your water in the lower chamber.
A 1:10 ratio means 30 grams of coffee paired with 300 ml of water for a 6-cup pot.
If you prefer a stronger cup of coffee, shift toward a 1:7 or 1:8 ratio, which translates to roughly 35–40 grams of coffee for the same 300 ml of water.
Measuring in Tablespoons
One level tablespoon of medium-fine ground coffee weighs approximately 5 to 7 grams.
For a 3-cup moka pot, start with 3 level tablespoons of ground coffee and 150 ml of water.
For a 6-cup pot, use about 5 tablespoons with 300 ml of water.
Beginner Note Tablespoon measurements are less precise than grams. Different grind sizes and bean densities change how much coffee fits in a spoon. If your morning cup tastes inconsistent from one day to the next, switching to a scale is the single best upgrade you can make.
Measuring in Teaspoons
One level teaspoon of ground coffee weighs roughly 2 to 3 grams.
For a 1-cup moka pot, that translates to about 3 teaspoons of coffee and 60 ml of water.
Teaspoons work in a pinch, but the margin for error is larger, so make small adjustments until the taste is right.
Measuring by Volume
If you have no scale or measuring spoons, the moka pot itself is your guide.
Fill the water chamber to the safety valve line and fill the filter basket level to the top without tamping or pressing down on the grounds.
This built-in sizing is how millions of Italian households have made coffee for decades, and it reliably lands within the 1:7 to 1:10 range.
What Grind Size Works with These Moka Pot Ratios
The ratio is only half the equation.
Grind size determines how quickly water passes through the coffee bed, and the wrong grind throws off extraction even when your measurements are spot on.
A moka pot needs a medium-fine grind, finer than what you’d use for a drip machine but coarser than true espresso.
The texture should feel similar to fine table salt when you rub it between your fingers.
| Grind Size | What Happens | Taste Result |
|---|---|---|
| Too fine (powdery) | Water struggles to push through, extraction stalls | Bitter, harsh, ashy, sometimes metallic |
| Medium-fine (correct) | Water flows at a steady pace, extraction is even | Full-bodied, slightly sweet, clean finish |
| Too coarse (chunky) | Water rushes through too fast, extraction is shallow | Sour, thin, watery, lacking body |
A burr grinder produces the most consistent particle size for moka pot brewing.
Blade grinders chop beans unevenly, which means some particles over-extract and others under-extract in the same brew, creating a muddy, confused flavor.
If you don’t own a burr grinder, buying pre-ground coffee labeled “moka pot” or “stovetop espresso” is a better option than grinding at home with a blade.
How to Adjust the Moka Pot Ratio to Your Taste
The ratios in this guide are a starting point, not a final answer.
Your preferred strength, the roast level of your beans, and how you plan to drink the coffee all affect the ideal ratio for your cup.
For a bolder, more concentrated brew: move toward a 1:7 ratio by adding slightly more coffee to the basket, keeping the water level the same.
For a lighter, smoother cup: stay at 1:10 or slightly above by using a bit less coffee, which lets more water flavor come through and softens the intensity.
Dark roast beans extract faster and taste stronger at the same ratio, so reducing your coffee dose by a gram or two compared to a medium roast often helps.
Light roasts need a slightly finer grind or a bit more coffee to get the same level of flavor intensity.
If you add milk to your moka pot coffee or make lattes, brew on the stronger side (1:7 to 1:8) so the coffee flavor holds up against the dairy.
For black coffee or an Americano-style drink diluted with hot water, a 1:10 ratio keeps the cup smooth without becoming overpowering.
| Drink Style | Suggested Ratio | Why |
|---|---|---|
| Black coffee, sipped straight | 1:10 | Smooth, balanced, easy to drink |
| Americano (diluted with hot water) | 1:8 to 1:10 | Concentrated enough to hold flavor after dilution |
| Latte or milk drink | 1:7 to 1:8 | Strong enough to cut through milk or cream |
| Iced coffee (poured over ice) | 1:7 | Ice dilutes the brew, so start stronger |
Common Mistake Do not tamp or press down the coffee grounds in the filter basket. Tamping restricts water flow, creates excessive pressure, and leads to a bitter, over-extracted cup. Level the grounds gently with your finger and leave them loose.
Common Moka Pot Ratio Mistakes and How to Fix Them
Even with the right ratio, a few common errors can throw off the brew.
Most of these are easy to fix once you know what to look for.
Filling water above the safety valve. The valve exists as a pressure release safety feature.
Water above the valve line means too much liquid, too little air space for pressure to build correctly, and a weak, under-extracted cup.
Keep the water just below the valve every time.
Using stale, pre-ground coffee. Ground coffee loses flavor within two to three weeks of opening the bag.
If your brew tastes flat and lifeless at the right ratio, the grounds are likely past their peak.
Buy whole beans and grind fresh, or use pre-ground within 14 days.
Brewing on high heat. High heat forces water through the coffee bed too fast, which produces a harsh, burnt flavor even with a correct ratio.
Use low to medium heat and let the brew rise slowly, listening for a steady hiss rather than a violent sputter.
Not removing the pot from heat at the right moment. Once the upper chamber is about 80% full and you hear the first gurgling, take the pot off the burner.
Letting it sputter and boil pushes steam through spent grounds, adding bitterness to an otherwise good cup.
These four fixes solve most complaints about moka pot coffee tasting bitter, weak, or inconsistent.
Step-by-Step Moka Pot Brewing with the Right Ratio
A correct ratio paired with good technique produces coffee that rivals many café drinks, right from your stovetop.
Here is a reliable method that works with any moka pot size.
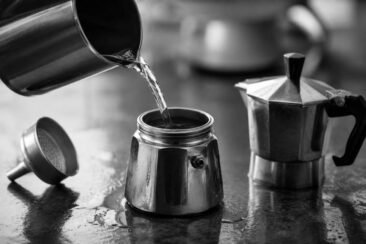
1. Heat your water separately by boiling water in a kettle, letting it cool for about 30 seconds, and then pouring it into the lower chamber.
Starting with hot water prevents the moka pot from sitting on the stove too long, which can scorch the grounds and add a metallic taste.
2. Fill the lower chamber to just below the safety valve with the pre-heated water, stopping right before the valve line.
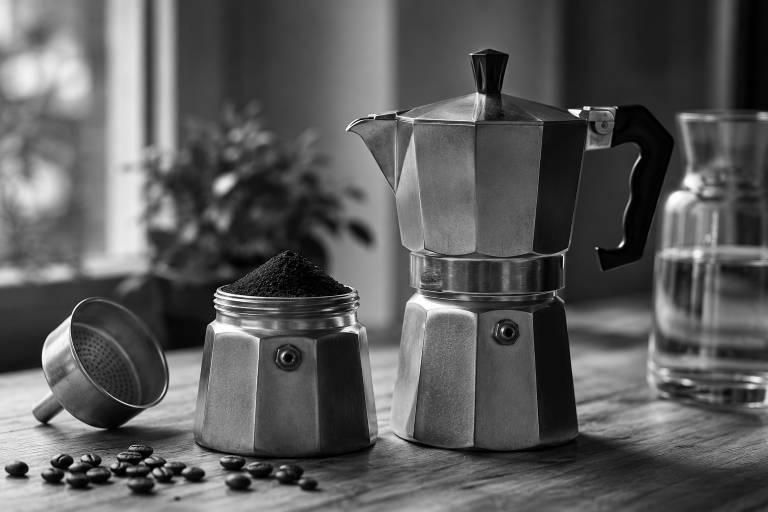
3. Add medium-fine ground coffee to the filter basket, filling it level to the top.
Do not tamp.
Brush away any grounds from the rim so the seal sits cleanly.
4. Assemble the pot tightly by using a towel to grip the hot lower chamber and screwing the upper section on firmly.
5. Place on low to medium heat, and if you’re using a moka pot on an electric stove, use a setting between 3 and 5 out of 10.
6. Leave the lid open and watch as coffee begins rising into the upper chamber within 3 to 5 minutes.
The stream should look dark, steady, and honey-like in flow.
7. Remove from heat when the stream turns pale, taking the pot off the burner immediately once the flow lightens in color and you hear gurgling.
You can run the bottom of the pot under cold water to stop extraction.
8. Pour and serve right away for the best flavor.
Moka pot coffee loses its sweetness quickly as it cools in the metal chamber.
Following this process gives you a perfect cup of coffee from the Moka Pot every time, with the flavor landing exactly where the ratio predicts.
Your moka pot brew is on track when you notice:
- A steady, honey-colored stream rising into the upper chamber
- A rich, toasted aroma filling the kitchen
- A clean, slightly sweet taste with no harsh bitterness
- A full body that coats the tongue without feeling gritty or muddy
Final Thoughts
The right moka pot ratio turns an ordinary stovetop brew into something worth looking forward to every morning.
Start with the table in this guide, match it to your pot size, and adjust by a gram or two based on your taste.
A $15 kitchen scale, fresh beans, and the habit of removing the pot from heat at the first gurgle will do more for your coffee than any expensive gadget.
If you’re still deciding whether a moka pot fits your routine, here’s an honest look at the pros and cons of moka pot brewing.