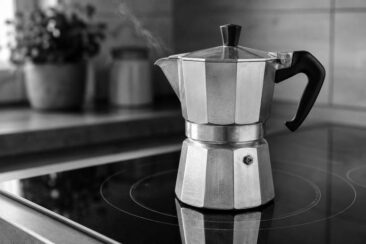
That thin, pale stream trickling from your moka pot shouldn’t taste like watered-down disappointment.
A moka pot can produce rich, concentrated coffee with the syrupy body of an espresso shot, if you control the right variables.
Most weak brews come down to four fixable problems: grind size, coffee dose, heat control, and bean freshness.
This guide walks through each factor that determines how to make moka pot coffee stronger, with specific measurements and techniques you can use on your next brew.
Quick Answer
Make moka pot coffee stronger by using a medium-fine grind (table salt texture), filling the filter basket level to the rim, brewing on medium-low heat, and preheating the water to around 70°C (158°F).
Switching to a darker roast or a blend with Robusta beans adds intensity fast.
Read on for exact ratios, heat adjustments, bean recommendations, and fixes for the most common weak-brew mistakes.
Why Moka Pot Coffee Sometimes Comes Out Weak
A moka pot brews under 1 to 2 bars of pressure, far less than the 9 bars inside an espresso machine.
That lower pressure means extraction depends almost entirely on grind size, dose, water temperature, and brew time.
Get any one of those wrong, and the water passes through the coffee bed too quickly, pulling out pale, sour liquid instead of the dark, full-bodied concentrate you expected.
Coarse grinds are the most common culprit, letting water rush through without absorbing enough of the oils and soluble compounds that give coffee its weight.
Underdosing the filter basket is the second-biggest offender, creating channels where water slips past the grounds entirely.
Common Mistake Using pre-ground drip coffee in a moka pot almost guarantees weak results. Drip grinds are too coarse for the moka pot’s low-pressure system, and the flavor disappears before the brew finishes.
Cold water compounds the problem, forcing the grounds to sit on a hot metal surface for minutes before extraction begins, baking off volatile aromas and producing flat, thin coffee with a metallic edge.
How Grind Size Changes the Strength of Moka Pot Coffee
The right grind size controls how much surface area the water touches during extraction.
Finer particles expose more of the coffee’s oils and soluble solids to the water, pulling out a heavier, more concentrated brew.
For a moka pot, aim for a medium-fine consistency that looks and feels like table salt.
Going finer than that risks clogging the filter screen, which stalls the brew and forces steam backward through the safety valve.
Going coarser produces the watery, underwhelming cup you are trying to fix.
| Grind Size | Texture Comparison | Effect on Moka Pot Coffee |
|---|---|---|
| Too fine | Powdered sugar | Clogs filter, bitter over-extraction |
| Medium-fine | Table salt | Full extraction, strong body |
| Medium | Beach sand | Slightly thin, moderate strength |
| Coarse | Sea salt flakes | Weak, sour, under-extracted |
A burr grinder gives you the most consistent particle size at this setting.
Blade grinders create a mix of dust and boulders that extract unevenly, leaving your cup tasting sharp and hollow at the same time.
Grinding fresh beans right before you brew locks in the aromatic compounds that fade within 15 to 20 minutes of exposure to air.
The Right Coffee-to-Water Ratio for Stronger Moka Pot Brew
Your coffee-to-water ratio sets the ceiling on how strong your moka pot coffee can get.
The standard moka pot ratio is roughly 1:7, meaning one gram of coffee for every seven grams of water.
That ratio already produces coffee about twice as concentrated as a standard drip brew, which runs closer to 1:16.
Fill the filter basket level to the rim without pressing the grounds down.
A typical 3-cup moka pot basket holds around 15 to 17 grams of coffee, and a 6-cup basket holds around 30 to 36 grams.
Do not tamp the grounds. Compacting the coffee restricts water flow and builds dangerous pressure inside the lower chamber.
If the basket is underfilled, water finds gaps in the coffee bed and channels through without extracting much flavor.
For an even bolder cup, reduce the water level slightly, filling to just below the safety valve instead of right at it.
Less water with the same amount of coffee shifts the ratio closer to 1:5 or 1:6, producing a thicker, more espresso-like concentrate.
Quick Tip Weigh your coffee and water with a kitchen scale instead of eyeballing. A $10 scale removes all the guesswork and lets you repeat a good brew every time.
How Heat and Brew Time Affect Moka Pot Strength
Medium-low heat is the single most underrated factor in brewing stronger moka pot coffee.
High heat forces water through the coffee bed at full speed, and fast water extracts less.
Picture the difference between dunking a tea bag once and letting it steep: contact time changes everything.
On low-to-medium heat, water climbs slowly through the grounds, pulling out the oils, sugars, dissolved solids, and aromatic compounds that create a rich, full-bodied cup.
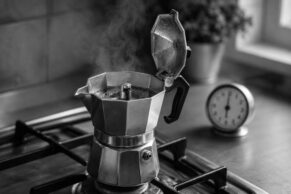
The ideal brew on a 3-cup moka pot takes about 4 to 5 minutes from the moment you place it on the stove with preheated water.
You will hear a soft gurgling hiss when the upper chamber is nearly full.
Remove the pot from heat at the first hiss, before the stream turns pale and sputtery.
Leaving the pot on the stove past that point pushes steam through spent grounds, extracting the harsh, ashy compounds that turn a strong brew into a burnt-tasting one.
Running cold water over the base of the pot right after you pull it off the stove stops extraction immediately and locks in the flavor at its peak.
Do / Don’t:
- Do start on medium-low heat and let the brew take 4 to 5 minutes.
- Do remove from heat at the first gurgling hiss.
- Do run cold water on the base to stop extraction.
- Don’t crank the burner to high for a faster brew.
- Don’t leave the pot on the stove after the stream turns pale.
Why Preheating Water Gives You a Stronger Brew
Pouring cold water into the lower chamber means the moka pot sits on a hot burner for several minutes before brewing even starts.
During that wait, heat radiates upward through the metal and bakes the coffee grounds in the filter basket.
Those grounds lose volatile aromatic compounds and start to taste stale and metallic before a single drop of water touches them.
Preheating your water to around 70°C (158°F) solves the problem.
At that starting temperature, the pot reaches brewing pressure faster, which shortens the total time the grounds spend on heat.
Research by physicist Warren King found that starting at 70°C produces an extraction temperature of approximately 88°C (190°F), close to the ideal range for pulling rich flavor without tipping into bitterness.
Pour the preheated water into the lower chamber, drop in the loaded filter basket, screw on the upper chamber, then place it on medium-low heat.
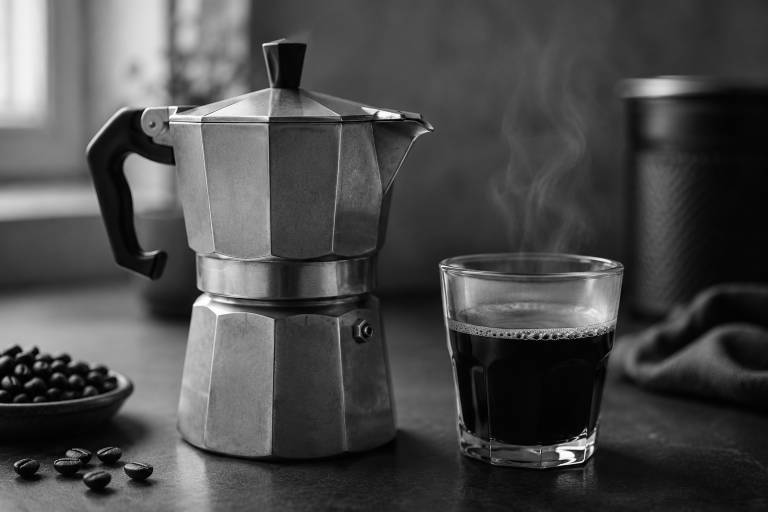
You should see the first dark drops of coffee appear within 45 to 60 seconds.
The result tastes noticeably cleaner, with brighter top notes and a heavier body than cold-water brews from the same beans.
How Bean Selection Makes Moka Pot Coffee Stronger
Fresh, high-quality beans change a moka pot brew more than any other single variable.
Coffee begins losing its aromatic oils and CO2 within days of roasting, and pre-ground coffee accelerates that decline dramatically.
Whole beans stored in an airtight container and ground just before brewing deliver a cup with noticeably more body and aroma.
Darker roasts carry bolder, more caramelized flavors that pair well with the moka pot’s concentrated extraction.
A French roast or Italian roast pushes the cup toward smoky, bittersweet chocolate notes with a thick, syrupy mouthfeel.
Medium roasts still work, but they produce a brighter, lighter cup that some drinkers may mistake for weak coffee.
Blending Arabica beans with a percentage of Robusta adds another layer of intensity.
Robusta beans contain roughly twice the caffeine of Arabica and produce a heavier crema, which is the thin golden foam that collects on top of a well-brewed moka pot coffee.
A 70/30 Arabica-to-Robusta blend is a common starting point for Italian-style stovetop espresso.
| Bean Choice | Flavor Profile | Strength Impact |
|---|---|---|
| Light roast Arabica | Bright, fruity, acidic | Lighter body, less perceived strength |
| Medium roast Arabica | Balanced, nutty, mild sweetness | Moderate body |
| Dark roast Arabica | Smoky, chocolate, low acidity | Fuller body, stronger taste |
| Arabica-Robusta blend | Earthy, bold, thick crema | Maximum perceived strength and caffeine |
Beginner Note If you are new to moka pot brewing, start with a medium-dark single origin and work your way up to darker blends. Jumping straight to a heavy Robusta blend can overwhelm the palate if you are not used to concentrated coffee.
How Water Quality Affects Moka Pot Strength
Tap water loaded with chlorine, minerals, or dissolved solids dulls the flavor of your coffee and can leave a chalky aftertaste.
The water itself becomes part of the final cup, making up roughly 93% of the liquid in your mug.
Filtered water or bottled spring water lets the coffee’s natural oils and sugars come through without interference.
Distilled water goes too far in the other direction.
With zero mineral content, distilled water under-extracts and produces a flat, lifeless brew.
A simple carbon filter pitcher strikes the right balance, removing chlorine and sediment without stripping the minerals that help extract flavor.
If your moka pot coffee tastes dull or muted no matter what beans and grind you use, switching the water source is often the fastest fix.
Fixing Weak or Watery Moka Pot Coffee
Weak coffee from a moka pot usually traces back to one of a few specific errors.
Working through this checklist narrows down the cause quickly.
Troubleshooting checklist for weak moka pot coffee:
- [ ] Grind is medium-fine (table salt texture), not medium or coarse
- [ ] Filter basket is filled level to the rim, not half-full
- [ ] Grounds are not tamped or compressed
- [ ] Water is preheated to around 70°C before adding to the pot
- [ ] Heat is set to medium-low, not high
- [ ] Beans were roasted within the past 2 to 4 weeks
- [ ] Beans are ground fresh, not pre-ground
- [ ] Water is filtered, not straight from the tap
Half-filling the basket is one of the most common moka pot mistakes, and it produces a noticeably thinner cup every time.
If your grind and dose are correct but the coffee still tastes thin, check your beans.
Stale beans that have been sitting in an open bag for weeks lack the oils and CO2 needed for a full extraction, and they produce a brew that smells flat and tastes hollow.
A freshly opened bag of quality beans often solves the problem on its own.
How to Avoid Bitter or Burnt Moka Pot Coffee
Chasing a stronger cup sometimes pushes brewers past the line into harsh, acrid territory.
Over-extraction is the usual cause: the grounds sat in contact with too much heat for too long, releasing tannins and bitter chlorogenic acids that overpower everything else.
The most common trigger is leaving the moka pot on the stove after the coffee stream turns pale and sputtery.
At that point, steam is pushing through spent grounds, and the liquid climbing into the upper chamber tastes like burnt rubber.
Stale or low-grade beans contribute their own bitterness.
Beans roasted months ago have oxidized oils that taste rancid and sharp, and no amount of technique fixes bad raw material.
Bitterness prevention checklist:
- [ ] Remove from heat at the first hiss or sputter
- [ ] Run cold water on the base immediately after removing from stove
- [ ] Use medium-low heat, never high
- [ ] Grind medium-fine, not espresso-fine
- [ ] Use beans roasted within the past 2 to 4 weeks
- [ ] Clean the pot after every use with hot water and a soft cloth, no soap
A grind that is too fine for the moka pot, closer to espresso powder, can restrict water flow and build excessive pressure, which forces over-extracted liquid through the bed.
Backing off to the table salt range fixes most bitterness issues tied to grind.
Tamping the grounds creates the same problem: compressed coffee restricts flow and builds enough pressure to force harsh, over-extracted liquid into the upper chamber.
How Moka Pot Coffee Compares to Other Brewing Methods
Knowing where moka pot coffee falls on the strength spectrum helps you set realistic expectations and understand what your pot can and cannot do.
| Brewing Method | Typical Ratio | Relative Strength | Pressure |
|---|---|---|---|
| Drip / Pour-Over | 1:15 to 1:17 | Light to moderate | Gravity only |
| French Press | 1:12 to 1:15 | Moderate | Gravity only |
| AeroPress | 1:6 to 1:12 | Moderate to strong | Manual hand pressure |
| Moka Pot | 1:7 | Strong | 1 to 2 bars |
| Espresso Machine | 1:2 to 1:3 | Very strong | 9 bars |
A moka pot at a 1:7 ratio produces coffee roughly twice as concentrated as drip.
That puts it in the range of a strong AeroPress brew, and it approaches espresso territory without reaching full espresso pressure or concentration.
If your moka pot coffee still feels weak relative to a café espresso, the gap is normal.
True espresso extracts at 9 bars of pressure, which pulls compounds out of the grounds that a moka pot’s 1 to 2 bars physically cannot reach.
Getting closer to that intensity means working every variable in your favor: fine grind, full basket, preheated water, low heat, fresh dark-roast beans, and filtered water.
Stronger Moka Pot Coffee Starts With the Next Brew
Every variable covered here stacks on top of the others.
Dialing in one factor gives you a marginal improvement, and dialing in all of them produces a cup that rivals a café shot.
Start with the two changes that make the biggest immediate difference: grind fresh beans to a medium-fine consistency, and preheat your water to 70°C before loading the pot.
From there, fill the basket to the rim, keep the heat at medium-low, and pull the pot off the stove the moment you hear that first gurgling hiss.
The smell of dark, rich coffee rising through the spout is the signal that everything is working.