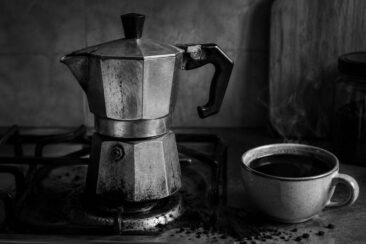
A moka pot can produce thick, syrupy coffee with a caramel-like sweetness that fills your kitchen before the first cup is poured.
Most people who struggle with their moka pot are making the same handful of small mistakes with grind size, heat, or water temperature.
Fix those, and the difference between bitter sludge and a smooth, aromatic brew becomes obvious from the very first sip.
This guide covers everything from choosing the right coffee to pulling your moka pot off the heat at the exact right moment.
Quick Answer
The best moka pot coffee comes from a medium-fine grind, preheated filtered water, medium-low heat, and removing the pot at the first sputter.
Never tamp the grounds, and always fill the water chamber just below the safety valve.
Keep reading for the full step-by-step brewing process, common mistakes to avoid, and drinks you can make at home with moka pot coffee.
How to Choose the Right Grind Size for Moka Pot Coffee
The grind is where most moka pot problems start.
Use a medium-fine grind, somewhere between the powdery texture of espresso and the coarser feel of drip coffee.
A good reference point is table salt: slightly gritty between your fingers, not silky like flour.
Grinding too fine creates excessive pressure inside the pot, which forces water through the coffee bed unevenly and produces a harsh, ashy taste.
Grinding too coarse lets water pass through too quickly, leaving you with thin, watery coffee that smells faintly sour.
A burr grinder gives you the most consistent particle size for this range.
Blade grinders chop beans unevenly and create a mix of fine dust and large chunks, which makes extraction unpredictable from one brew to the next.
Common Mistake Pre-ground espresso coffee is almost always too fine for a moka pot. It can choke the filter basket and create a bitter, over-extracted brew. Look for bags labeled “moka pot grind” or grind your own beans at home.
What Coffee Beans Work Best in a Moka Pot
The right beans make a noticeable difference in how your moka pot coffee smells and tastes.
Medium to medium-dark roasts pair best with this brewing method, producing a rich, full-bodied cup with notes of chocolate, toasted nuts, or caramel.
Light roasts from regions like Kenya or Ethiopia often taste too bright and acidic in a moka pot, since the brewing pressure and temperature amplify fruity, tart flavors in ways that can feel unbalanced.
Those lighter beans tend to perform better in an AeroPress or pour-over, where lower pressure and longer contact time bring out their delicate flavors without sharpness.
Freshness matters more than brand name here.
Coffee beans start losing aromatic compounds within two weeks of roasting, so buying from a local roaster or a specialty supplier with roast dates on the bag gives you a clear head start on flavor.
How to Season a New Moka Pot Before First Use
A brand-new aluminum moka pot carries a faint metallic taste and sometimes a slight oily residue from manufacturing.
Running two or three “throwaway” brews before your first real cup removes that industrial flavor completely.
Fill the bottom chamber with water up to the safety valve, add inexpensive ground coffee to the filter basket, and brew as normal.
Pour the coffee out and repeat the process at least twice more.
After the third brew, the aluminum interior will have absorbed enough coffee oils to create a thin protective layer that improves flavor over time.
Rinse all three chambers with warm water and dry them thoroughly before your first real brew.
| Step | What to Do | Why It Matters |
|---|---|---|
| 1 | Wipe interior with a damp cloth | Removes factory dust and residue |
| 2 | Brew 2-3 pots of cheap coffee | Seasons the aluminum with coffee oils |
| 3 | Discard each brew | These batches will taste metallic |
| 4 | Rinse and dry all parts | Prepares the pot for your first good cup |
Skip this step, and your first few cups will carry a sharp, tinny flavor that masks everything good about the beans.
How to Brew Moka Pot Coffee Step by Step
Start by boiling filtered water in a kettle, then pour it into the bottom chamber up to just below the safety valve.
Using preheated water instead of cold water keeps the pot from sitting on the burner too long, which would overheat the grounds before extraction begins and create a burnt, ashy taste.
Add your medium-fine ground coffee to the filter basket, filling it to the top.
Level the surface with your finger or a flat edge, and brush away any loose grounds from the rim.
Do not tamp or press the grounds down.
Compacting the coffee restricts water flow and builds dangerous pressure inside the pot, which can cause the safety valve to release or, in extreme cases, the pot to burst.
Screw the upper chamber onto the base firmly, making sure the rubber gasket sits flush with no gaps.
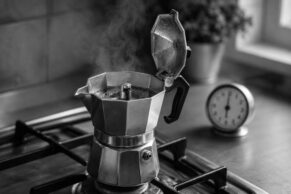
Place the assembled pot on medium-low heat and leave the lid open so you can watch the coffee rise.
Within about 4 to 7 minutes, a golden-brown stream of coffee will begin flowing into the upper chamber.
Remove the pot from heat as soon as the stream turns pale and the flow begins to sputter.
Run the base under cold water or place it on a cold, damp towel to stop the extraction instantly.
The hissing sound that follows the sputter means steam is pushing through without extracting coffee, and every second past that point adds bitterness.
Quick Tip Serve your moka pot coffee immediately after brewing. Leaving it in the hot aluminum pot continues to cook the coffee, turning a smooth cup sharp and metallic within minutes.
What Coffee-to-Water Ratio Works Best for Moka Pots
The moka pot is mostly self-dosing by design.
Fill the filter basket level to the top with ground coffee and fill the water chamber up to the bottom of the safety valve, and the pot delivers a ratio between 1:7 and 1:10 coffee to water by weight.
That built-in ratio produces a concentrated, espresso-style brew with a thick body and a punchy, bold flavor.
For a full breakdown of ratios by moka pot size, see the complete moka pot ratio guide.
A 3-cup moka pot holds roughly 15 grams of coffee and 150 ml of water.
A 6-cup pot holds around 25 to 30 grams of coffee and 300 ml of water.
| Moka Pot Size | Coffee (approx.) | Water (approx.) | Output |
|---|---|---|---|
| 1-cup | 7-8 g | 60 ml | 1 espresso shot |
| 3-cup | 15-17 g | 150 ml | ~5 oz of coffee |
| 6-cup | 25-30 g | 300 ml | ~10 oz of coffee |
If your coffee tastes too strong or overpowering, reduce the amount of grounds slightly rather than adding extra water past the valve.
Overfilling the water chamber creates uneven pressure and risks leaking from the seal during brewing.
Why Filtered Water Changes the Taste of Your Moka Pot Coffee
Water makes up roughly 90% of your finished cup, so minerals and chemicals in tap water show up directly in the flavor.
Chlorine leaves a faint swimming-pool tang that sits under the coffee’s natural sweetness.
Hard water with high calcium or magnesium content can taste flat and chalky, and it leaves behind limescale deposits inside the chamber over time.
Use filtered water or bottled spring water for the cleanest flavor.
A countertop pitcher filter or a faucet-mounted filter removes most of the chlorine and mineral content that interferes with the beans’ natural profile.
Soft, filtered water lets the chocolate and caramel tones in medium-dark roasts come through without any off-flavors underneath.
How to Control Heat for a Smoother Extraction
High heat is the fastest way to ruin a moka pot brew.
When the burner runs too hot, water rushes through the grounds in under three minutes, scalding the coffee and pulling out harsh, bitter compounds that overpower everything else in the cup.
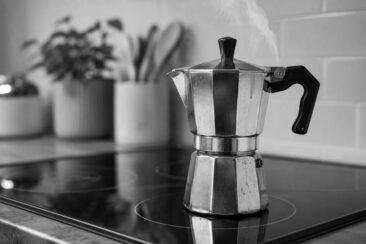
Set your burner to medium-low and let the pot heat gradually.
A slower extraction, closer to 5 to 7 minutes total, gives the water time to pull sugar-browning compounds and aromatic oils from the grounds evenly.
The coffee should flow into the upper chamber in a steady, honey-colored stream, not a violent eruption.
If you see the coffee shooting upward and sputtering early, your heat is too high.
Turn the burner down and expect your next brew to taste noticeably smoother.
Signs your heat is right:
- The coffee rises in a gentle, continuous stream
- The color starts golden-brown and gradually lightens
- You hear a soft bubbling, not a loud rumble
- The entire brew takes between 4 and 7 minutes
How to Fix Bitter or Sour Moka Pot Coffee
Bitter coffee and sour coffee are opposite problems with different fixes.
Bitterness usually means over-extraction: the water pulled too many compounds from the grounds, either from too-fine a grind, too much heat, or leaving the pot on the burner past the first sputter.
Sourness means under-extraction: the water moved through too fast and didn’t pull enough flavor, usually from a grind that’s too coarse or water that wasn’t hot enough.
| Problem | Likely Cause | Fix |
|---|---|---|
| Bitter, harsh taste | Grind too fine | Switch to a slightly coarser setting |
| Bitter, burnt taste | Heat too high | Lower to medium-low heat |
| Bitter, ashy taste | Left on heat too long | Remove at the first sputter |
| Sour, thin taste | Grind too coarse | Use a finer grind setting |
| Sour, weak taste | Water too cool | Preheat water before adding it |
Make one change at a time so you can taste the difference each adjustment creates.
Changing grind size and heat at the same time makes it impossible to know which fix worked.
Beginner Note A single notch on a burr grinder can shift your moka pot coffee from bitter to balanced. Small adjustments produce big flavor changes with this brewing method.
How to Clean and Maintain Your Moka Pot
After each brew, disassemble all three chambers and rinse them under warm running water.
Use a soft cloth or your fingers to wipe away coffee residue from the filter screen and the inside of the upper chamber.
Do not use dish soap on an aluminum moka pot.
Soap strips away the thin layer of coffee oils that seasons the interior, and it can leave a soapy aftertaste that lingers for several brews.
Check the rubber gasket every few weeks by pressing it with your fingertip.
A healthy gasket feels soft and flexible.
A stiff, cracked, or shrunken gasket lets steam escape during brewing, which weakens the pressure and produces thin, watery coffee.
Replace the gasket every 6 to 12 months, or sooner if you notice steam leaking from the sides during brewing.
Descale the water chamber every two months by soaking it in a mixture of equal parts white vinegar and lukewarm water for about an hour, then rinsing thoroughly with fresh water.
Limescale buildup in the chamber narrows the water path and can block the safety valve over time.
Your moka pot maintenance checklist:
- Rinse all parts with warm water after every use
- Wipe the filter screen clean of grounds each time
- Air-dry completely before reassembling
- Inspect the gasket monthly for cracks or stiffness
- Descale the water chamber every 8 weeks
- Replace the gasket and filter screen once or twice per year
Accessories That Improve Your Moka Pot Coffee
A few inexpensive tools can give you more control over your brew.
A kitchen thermometer lets you check your preheated water temperature before pouring it into the chamber, keeping it in the ideal 90 to 96°C range where extraction pulls sweetness without bitterness.
A paper filter placed on top of the grounds in the basket produces a noticeably cleaner cup by trapping fine sediment and oils that the metal screen alone lets through.
Rinse the paper filter under water before placing it to remove any papery taste.
Adding steamed or frothed milk to your moka pot coffee transforms it into a stovetop latte or cappuccino that rivals the texture of café drinks.
A handheld milk frother or a mason jar shaken for 30 seconds and microwaved for 60 seconds creates enough foam for one generous cup.
A digital kitchen scale removes guesswork from dosing, letting you weigh your coffee and water for repeatable results brew after brew.
Drinks You Can Make with Moka Pot Coffee
Moka pot coffee brews at a concentration close to espresso, which makes it a strong base for the same drinks you would order at a café.
Stovetop Latte: Pour a single moka pot shot over 6 to 8 ounces of steamed milk and stir gently.
Moka Pot Americano: Dilute one shot with equal parts hot water for a smoother, lighter cup that still carries the moka pot’s full aroma.
Iced Moka Pot Coffee: Brew a double-strength pot, let it cool for two minutes, then pour over a tall glass packed with ice and a splash of cold milk or cream.
Stovetop Cappuccino: Froth 4 ounces of milk until thick and foamy, pour the moka pot shot into a wide cup, and spoon the foam on top.
Moka Pot Mocha: Add a tablespoon of cocoa powder or chocolate syrup to the cup before pouring the fresh shot, then top with steamed milk and stir until the chocolate dissolves completely.
Each of these drinks works best when the moka pot coffee is served immediately after brewing, before the flavor starts to fade.
Making the Most of Your Moka Pot
The moka pot rewards patience and small, deliberate adjustments more than any other home brewing method.
Once you dial in the right grind, learn to read the color of the stream, and build the habit of pulling the pot at the first sputter, the results become consistent and repeatable.
A $30 moka pot and a bag of freshly roasted beans can produce coffee that smells and tastes closer to an Italian café than most $200 drip machines ever will.
Start with the basics in this guide, pay attention to what your senses tell you, and adjust one variable at a time until every cup hits the mark.