Most people assume crema only comes from a $500 espresso machine.
That golden-brown foam floating on top of a fresh shot looks like it belongs in a café, not a kitchen counter.
A moka pot can produce something close, a thin, aromatic layer that adds body and sweetness to your brew.
The results won’t match a commercial machine running at 9 bars of pressure, but the flavor difference is smaller than the price gap suggests.
Getting crema from a stovetop brewer takes fresh beans, controlled heat, and a few small adjustments most people skip.
Quick Answer
A moka pot produces 1.5 to 2 bars of pressure, far less than the 9 bars of a true espresso machine, so the crema it creates is thinner and less stable. Medium to dark roast beans, ground fine, and preheated water give you the best chance at a visible crema layer.
The technique matters more than the equipment. Read on for the specific steps, the sugar-whip method, and troubleshooting for weak or missing crema.
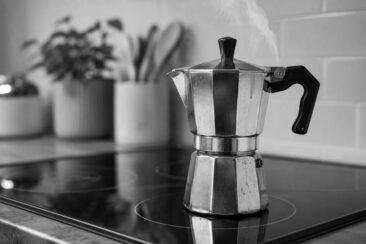
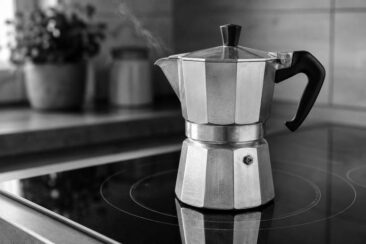
How a Moka Pot Brews Coffee
Alfonso Bialetti introduced the Moka Express in 1933 from his workshop in Crusinallo, Italy.
The design has barely changed in over 90 years.
Three chambers do all the work: a lower boiler holds water, a funnel-shaped filter basket holds ground coffee, and an upper chamber collects the finished brew.
Heat turns the water in the boiler into pressurized vapor, which pushes upward through the coffee grounds and into the collection chamber.
You can hear the process finish when a hissing, sputtering sound replaces the steady gurgle of rising coffee.
The entire brew takes about 4 to 6 minutes on medium-low heat, depending on stove type and pot size.
If you want a deeper look at how a moka pot works, that guide covers the full mechanics and common misconceptions.
Beginner Note A moka pot brews strong, concentrated coffee that tastes similar to espresso. It is not true espresso, since espresso requires at least 9 bars of pressure, and a moka pot generates only 1.5 to 2 bars.
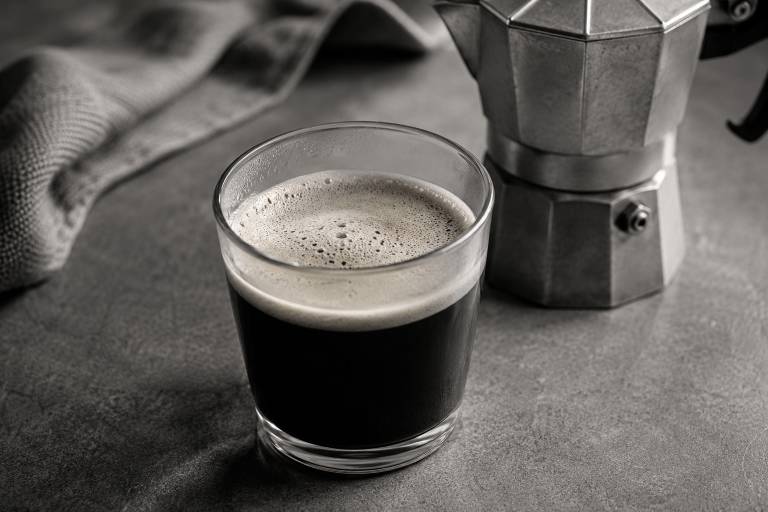
What Crema Is and Why It Matters
Crema is the thin, golden-brown foam that sits on top of freshly pulled espresso.
It forms when hot water under pressure forces carbon dioxide out of roasted coffee grounds, and that gas mixes with the natural oils and sugars in the beans.
The result is a layer of tiny emulsified bubbles, usually about 2 to 3 millimeters thick, that lasts roughly two minutes before dissolving back into the cup.
Some coffee drinkers skim crema off before sipping, since it carries a slightly bitter edge.
Others consider it the best part of the shot, a sign of freshness and proper extraction.
A thick crema cap smells like toasted hazelnuts and caramelized sugar, and that aroma primes your palate before the first sip even reaches your tongue.
In a moka pot, the crema layer will always be thinner and less uniform than what a commercial machine produces.
That difference comes down to physics: less pressure means less gas is forced out of the grounds and fewer oils get emulsified.
Can a Moka Pot Actually Produce Crema?
A standard espresso machine operates at around 9 bars of pressure, and a moka pot generates roughly 1.5 to 2 bars.
That gap explains why traditional moka pot coffee surfaces with little to no foam on top.
| Factor | Espresso Machine | Moka Pot |
|---|---|---|
| Brewing pressure | ~9 bars | 1.5–2 bars |
| Water temperature | 92–96°C (198–205°F) | Near boiling, ~100°C |
| Crema thickness | 2–4 mm, stable | Thin, fades fast |
| Brew time | 25–30 seconds | 4–6 minutes |
The crema a moka pot creates is technically “pseudo-crema,” a lighter, bubblier version that dissipates faster.
It still adds a smooth mouthfeel and a slightly sweet top note to the cup.
Three factors control whether you see any crema at all: bean freshness, roast level, and water temperature.
Skip one of those, and the coffee rises clean and flat into the upper chamber with no foam in sight.
How to Choose the Right Beans for Moka Pot Crema
Bean selection makes or breaks your crema before you even light the stove.
Freshness is the single most important variable. Coffee beans release carbon dioxide for about two weeks after roasting, and that trapped CO2 is what creates the foam layer during brewing.
Beans older than three weeks have already off-gassed most of their CO2, leaving nothing to produce crema.
Roast level matters just as much.
Medium to dark roasts produce richer, more stable crema than light roasts.
Darker roasting creates a more porous bean structure and brings oils closer to the surface, giving pressurized water more material to emulsify into foam.
A light roast retains more acidity and origin flavor, but its denser cell structure and lower surface oil content make crema formation harder, especially at the low pressure a moka pot generates.
Blends containing a small percentage of robusta beans, around 10 to 20 percent, can boost crema production significantly.
Robusta beans contain nearly twice the CO2 of arabica and produce a thicker, longer-lasting foam.
| Bean Factor | Better for Crema | Worse for Crema |
|---|---|---|
| Freshness | Roasted within 1–2 weeks | Older than 3 weeks |
| Roast level | Medium to dark | Light roast |
| Variety | Arabica-robusta blend | 100% light-roast arabica |
| Grind | Fresh, fine grind | Pre-ground, stale |
Grinding your own beans right before brewing makes a noticeable difference.
Pre-ground coffee loses freshness and CO2 within days of opening the bag, and that staleness shows up as a flat, crema-free cup.
Water Temperature and Preheating for Better Crema
Cold water in the boiler forces the moka pot to spend several minutes just heating up, and during that time, the coffee grounds sitting in the filter basket absorb heat and start to “cook” before any water reaches them.
That slow bake extracts bitter compounds and destroys the delicate oils you need for crema.
Start with preheated water between 160°F and 180°F (71–82°C).
Boil a kettle, let it cool for 30 to 60 seconds, then pour it into the lower chamber.
This shortcut cuts the total brew time nearly in half and protects the grounds from overheating.
Fill the boiler to just below the safety valve, never above it.
Covering the valve blocks the pressure release mechanism, which is a safety hazard and can cause the pot to spray hot coffee and steam.
Common Mistake Filling the boiler with cold tap water and placing it on high heat. This overheats the grounds before brewing starts, producing bitter, crema-free coffee with a burnt aftertaste.
Use the lowest heat setting that still brings the water to a gentle boil.
On a moka pot on an electric stove, medium-low is usually the right range, since electric coils retain heat longer than gas burners.
Why You Should Not Tamp Coffee in a Moka Pot
Espresso machines rely on firm tamping to create resistance against 9 bars of pressure.
A moka pot cannot replicate that dynamic.
Tamping coffee in a moka pot compresses the grounds into a dense puck that blocks water flow at 1.5 to 2 bars of pressure.
The result is either a bitter, over-extracted brew or a dangerous pressure buildup inside the boiler.
Fill the filter basket loosely with fine grounds and level the surface with your finger.
Do not press down.
The grounds should sit evenly in the basket with no visible mounds, but they should feel soft and uncompacted when you touch the surface.
A level, unpacked basket lets water pass through all the grounds at an even rate, which extracts flavor and oil uniformly and gives crema the best chance of forming in the upper chamber.
Step-by-Step Guide to Making Moka Pot Crema
This method combines preheated water, fresh beans, and controlled heat for the best crema results.
What you need:
- Moka pot (any size)
- Fresh medium to dark roast beans, roasted within 1–2 weeks
- Burr grinder
- Kettle
- Low to medium heat source
Steps:
- Boil water in a kettle, then let it rest for 30 to 60 seconds.
- Pour the hot water into the moka pot’s lower chamber, stopping just below the safety valve line.
- Grind your beans to a fine consistency, similar to table salt, and fill the filter basket without tamping.
- Level the grounds gently with your fingertip and brush away any loose grounds from the basket rim.
- Screw the upper chamber onto the base firmly, using a towel to grip the hot lower chamber.
- Place the assembled pot on low to medium-low heat.
- Leave the lid open so you can watch the coffee rise.
- Remove the pot from heat when the stream turns pale and you hear a hissing sputter.
- Pour immediately into a warmed cup.
Quick Tip Removing the pot from heat at the first sputter, rather than waiting for the full gurgle, prevents the last rush of steam from scalding the coffee. That final blast is what turns a smooth cup bitter.
Getting the coffee-to-water ratio right for your specific pot size will improve extraction and crema consistency across brews.
The Sugar Method for Thicker Moka Pot Crema
This technique comes from Cuban coffee tradition, where a spoonful of sugar is whipped with the first drops of brewed coffee to create a thick, caramel-colored foam called espumita.
It works with any moka pot and produces a crema-like layer that lasts much longer than natural moka pot crema.
How to do it:
- Place 1 to 2 teaspoons of white sugar in a small cup or bowl before you start brewing.
- Once the first few drops of coffee appear in the upper chamber, scoop about a tablespoon of that initial dark extract into the sugar.
- Whisk the sugar and coffee vigorously with a small spoon for 30 to 60 seconds until the mixture turns into a thick, pale, paste-like foam.
- Let the moka pot finish brewing, then pour the remaining coffee over the sugar foam.
- Stir gently once, and the foam will rise to the top of the cup.
The result is a sweet, creamy cap that looks and feels similar to espresso crema, though it tastes sweeter.
This method works best with dark roast coffee, since the intense bitterness of a dark roast balances the added sugar.
If you prefer unsweetened coffee, skip this method entirely and focus on bean freshness, grind size, and water temperature for natural crema.
Best Moka Pot for Crema: The Bialetti Brikka
The Bialetti Brikka is the only widely available moka pot engineered specifically for crema production.
Its patented pressure valve sits on top of the spout and holds back the coffee until pressure builds higher than a standard moka pot allows.
When the valve releases, coffee shoots into the upper chamber with more force, producing a thicker, more visible crema layer than any traditional moka pot design.
The tradeoff is a slightly more intense brew with a heavier body.
Standard moka pots like the Bialetti Moka Express produce smooth, clean coffee with little to no foam.
The Brikka adds roughly 0.5 to 1 bar of extra pressure, enough to produce a thin crema cap on most brews when paired with fresh, medium-dark beans.
| Feature | Bialetti Moka Express | Bialetti Brikka |
|---|---|---|
| Pressure | ~1.5 bars | ~2–2.5 bars |
| Crema | Minimal to none | Thin, visible layer |
| Flavor | Smooth, lighter body | Bolder, heavier body |
| Price range | $30–$45 | $40–$55 |
| Material | Aluminum | Aluminum |
Cleaning the Brikka’s pressure valve after each use is important, since old coffee residue can clog the mechanism and reduce pressure over time.
Troubleshooting Weak or Missing Crema
Flat coffee with no foam at the top usually points to one of a few common causes.
Your beans are too old. Coffee loses most of its CO2 within three weeks of roasting, and without that gas, no crema can form. Check the roast date on the bag, and switch to beans roasted within the last 7 to 14 days.
Your grind is too coarse. A coarse grind lets water rush through the grounds without building enough resistance for oil extraction. Aim for a fine grind, close to table salt, not powdery like espresso grind.
Your heat is too high. Blasting the moka pot on high heat forces water through the grounds too fast, producing a thin, watery brew with no body and no foam. Drop to low or medium-low heat for a slower, more even extraction.
You used cold water in the boiler. Starting with cold water overheats the grounds during the long warm-up period. Preheat your water in a kettle first.
Crema troubleshooting checklist:
- [ ] Beans roasted within the last 14 days
- [ ] Medium to dark roast
- [ ] Fine grind, similar to table salt
- [ ] Preheated water in the boiler
- [ ] Heat set to low or medium-low
- [ ] Filter basket filled loosely, not tamped
- [ ] Pot removed from heat at first sputter
If you have tried all of these steps and still see no crema, the issue may be your pot itself.
Older moka pots with worn gaskets or mineral buildup inside the boiler can lose pressure, and that lost pressure means less extraction force reaching the grounds.
Replacing the gasket and filter plate every 6 to 12 months keeps the seal tight and pressure consistent.
What to Do with Moka Pot Coffee
Moka pot coffee is concentrated enough to serve as the base for most espresso-style drinks.
Pour it over steamed milk for a latte, add equal parts hot water for an americano, or serve it straight in a small cup the Italian way.
A French press produces a different kind of strong coffee, fuller-bodied but without the pressure-driven intensity a moka pot delivers.
Iced drinks work well too: brew a double batch, let it cool, and pour over ice with cold milk and a splash of simple syrup.
The concentrated strength of moka pot coffee holds up against ice dilution better than drip coffee.
Crema from a Moka Pot Is Possible with the Right Approach
A moka pot will never replicate the thick, stable crema of a commercial espresso machine.
The pressure gap between 1.5 bars and 9 bars is too wide for physics to ignore.
What a moka pot can deliver is a thin, aromatic foam layer that adds sweetness and body to your morning cup, and the sugar-whip method can push that foam even further for people who want the visual and textural effect of crema without buying an expensive machine.
Fresh beans, preheated water, and a gentle hand on the stove dial are the three things that separate a flat brew from one with a golden cap.
Every cup you pull is a chance to adjust one variable and see how the crema responds.