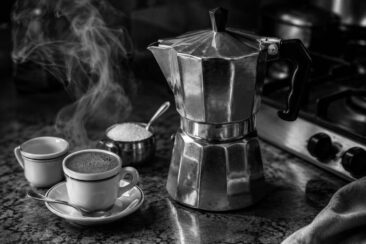
A moka pot latte is the closest thing to a cafe drink you can pull off on your kitchen stovetop.
The coffee comes out concentrated and bold, somewhere between drip and true espresso, and it pairs perfectly with frothed milk.
You do not need a $500 machine for this.
All it takes is a moka pot, good beans, and a few minutes of patience.
This article walks through every step of the process, from choosing beans and dialing in your grind to frothing milk and pouring your first latte art.
What Makes the Moka Pot a Great Latte Brewer
Alfonso Bialetti, an Italian engineer, invented the moka pot in 1933 to bring espresso-style coffee into ordinary kitchens.
His original design, the Bialetti Moka Express, became one of the most recognized coffee makers on the planet with its octagonal aluminum body and flip-top lid.
Today, brands like Grosche and Alessi sell stainless steel versions in sizes ranging from one cup to twelve.
The moka pot costs a fraction of what an espresso machine runs, and it takes up about as much counter space as a salt shaker.
It uses no electricity on a gas stove, produces no disposable pods, and lasts for decades with minimal care.
For latte lovers on a budget, it is the most practical starting point.
Freshly roasted beans and a moka pot can replace a daily $6 cafe habit with a drink that tastes just as satisfying.
How a Moka Pot Brews Coffee
Steam pressure is the engine behind every moka pot.
Water sits in the lower chamber, and as heat builds, steam forces that water upward through a basket of coffee grounds.
The brewed coffee collects in the upper chamber, ready to pour.
A moka pot generates roughly 1.5 bars of pressure, compared to 9 bars in a commercial espresso machine.
That difference means your moka pot coffee will taste strong and concentrated but will not produce the thick crema you see on a pulled shot.
For lattes, this barely matters, since milk and foam cover the surface anyway.
You can use your moka pot on an electric stove or a gas burner with equally good results.
The brew time runs between three and six minutes depending on flame height and pot size.
Picking the Right Beans for a Moka Pot Latte
Dark roast and espresso-labeled beans work best here.
Their heavier body and lower acidity hold up against milk without disappearing into the cup.
Medium roast beans can work too, especially if you prefer a brighter, fruitier flavor underneath your foam.
Buy whole beans with a roast date printed on the bag, not just an expiration date.
Coffee loses flavor within weeks of roasting, and stale beans produce flat, papery moka pot coffee no amount of syrup can rescue.
Local roasters who sell in small batches tend to deliver the freshest options.
If you order online, look for roasters who ship within 48 hours of roasting.
Grind Size for Moka Pot Lattes
Your moka pot grind size determines whether your latte tastes clean or bitter.
Aim for a medium-fine grind, somewhere between table salt and sand, in the 550 to 850 micron range.
Too fine and the water struggles to push through, leaving you with an acrid, over-extracted shot.
Too coarse and the water rushes past the grounds without pulling enough flavor, giving you a watery base that cannot stand up to milk.
A burr grinder gives you the most consistent particle size for repeatable results.
Pre-ground coffee labeled “moka pot” or “stovetop espresso” is an acceptable shortcut if you do not own a grinder yet.
Brewing Your Moka Pot Coffee Step by Step
Fill the lower chamber with filtered water up to the safety valve, not above it.
Drop the metal filter basket into place and fill it with ground coffee, leveling the top with your finger without pressing down.
Screw the upper chamber on firmly, making sure the rubber gasket sits flat and sealed.
Place the moka pot on your burner at medium-low heat.
Leave the lid open so you can watch the coffee as it begins to flow into the upper chamber.
A thin, steady stream of honey-colored coffee is what you want to see.
Once the stream turns pale and starts sputtering, pull the pot off the heat immediately.
Letting it sputter too long pushes steam through spent grounds and adds a harsh, burnt edge to your cup.
Run the bottom of the pot under cold water for two seconds to stop the extraction completely.
Your moka pot coffee is now ready to become a latte.
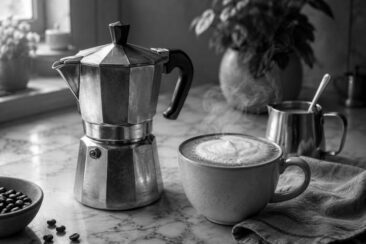
Three Ways to Froth Milk at Home
Mason Jar Method
Pour cold milk into a mason jar until it fills about one-third of the jar.
Screw the lid on tight and shake hard for 30 seconds until visible foam forms on top.
Remove the lid and microwave the jar for 30 to 40 seconds to stabilize the foam and heat the milk through.
Tap the bottom of the jar on the counter a few times to pop any large bubbles.
Spoon the foam onto your latte, then pour the heated milk slowly underneath.
Handheld Milk Frother
Heat your milk on the stove or in the microwave until it steams but does not boil, around 150°F.
Submerge the frother whisk just below the surface and turn it on.
Move it up and down gently for 30 to 60 seconds until the milk doubles in volume with fine, even bubbles.
This method gives you the most control over foam thickness.
French Press Frother
Heat your milk to roughly 150°F in a separate container.
Pour the warm milk into a clean French press, filling it no more than one-third full to leave room for expansion.
Pump the plunger up and down vigorously for 30 to 45 seconds.
The mesh screen whips air into the milk faster than shaking and produces a denser, silkier foam than the mason jar approach.
Let the foam settle for a few seconds, then pour the milk first and spoon the foam on top.
Best Milk Choices for a Moka Pot Latte
Whole milk produces the creamiest, most stable foam and has a natural sweetness that softens bold moka pot coffee.
Two-percent milk strikes a lighter balance if you prefer your latte less rich but still want decent foam structure.
Oat milk is the strongest plant-based option for frothing, with a natural thickness that holds air well and a subtle sweetness that complements dark roast coffee.
Almond milk froths poorly on its own and produces thin, quick-to-collapse bubbles, but barista-edition almond milks contain added stabilizers that improve the texture.
Soy milk froths well at lower temperatures and adds a slightly nutty character to your latte.
Skip ultra-cold milk straight from the back of the fridge if you want good foam; milk closer to room temperature incorporates air more easily.
Coffee-to-Milk Ratio for a Balanced Latte
A standard latte uses roughly one part coffee to three parts milk.
With a moka pot, that translates to about 2 ounces of brewed coffee topped with 6 ounces of steamed and frothed milk.
If you prefer a stronger coffee punch, reduce the milk to a 1:2 ratio, which edges your drink closer to a flat white.
If you want something gentler, go up to 1:4 and add a sweetener.
There is no single correct ratio, and the beauty of making your latte at home is that you can adjust freely until the cup matches your taste.
Measure your first few attempts so you can repeat the ones you like.
Fixing Common Moka Pot Latte Problems
Bitter, burnt-tasting coffee: Your heat was too high or you let the pot sputter for too long after brewing finished.
Lower your burner to medium-low and remove the pot from heat the moment the stream turns pale.
Weak, watery coffee: The grind was too coarse or you did not use enough coffee in the basket.
Fill the basket fully and level it off without tamping.
Coffee tastes sour: Under-extraction from water that was not hot enough or contact time that was too short.
Start with pre-heated or hot water in the lower chamber to shorten the time the grounds sit on a cold pot.
Sputtering and spraying everywhere: The safety valve may be clogged, or the pot was overfilled with water.
Clean the valve with a pin and keep water below the valve line.
Milk foam collapses immediately: The milk was too hot, or you frothed it for too short a time.
Aim for 150°F and froth until the bubbles are fine and uniform before pouring.
Iced and Flavored Moka Pot Latte Recipes
Iced Latte
Brew your moka pot coffee as normal and pour it into a small heat-safe glass or jar.
Fill a tall glass all the way to the top with ice cubes.
Pour in your milk of choice until the glass is about two-thirds full.
Add a drizzle of maple syrup, honey, or a splash of vanilla extract for sweetness.
Pour the hot coffee directly over the ice and milk, then stir once.
The ice chills the coffee on contact, and the layers swirl together into a smooth iced latte.
Caramel Latte
Add one to two tablespoons of caramel creamer or caramel syrup to the bottom of your mug before pouring in the brewed moka pot coffee.
Stir gently to combine.
Froth whole milk or oat milk and pour it slowly over the coffee-caramel mix.
Finish with a thin drizzle of caramel syrup across the foam for a drink that clocks in around 167 calories per 12-ounce glass.
Vanilla Honey Latte
Stir half a teaspoon of vanilla extract and one tablespoon of honey into your hot moka pot coffee until dissolved.
Top with frothed milk and a light dusting of cinnamon.
This version skips processed syrups entirely and has a warm, floral sweetness that pairs well with medium roast beans.
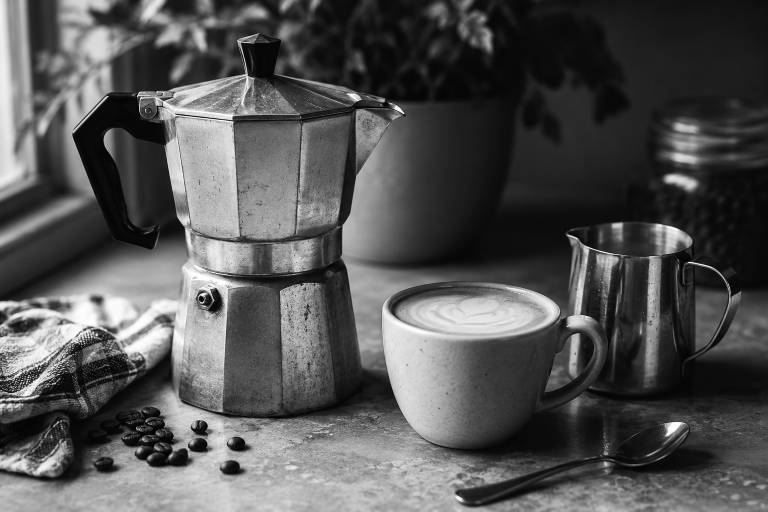
Simple Latte Art for Beginners
Start with a wide-mouthed mug filled about one-third full with your moka pot coffee.
The wider the cup opening, the easier it is to control your pour.
Froth your milk until it has a glossy, paint-like consistency with no visible large bubbles on the surface.
Hold the mug at a slight tilt and pour the milk from about three inches above the cup in a thin, steady stream.
Once the cup is about half full, bring the pitcher closer to the surface and increase the flow.
A gentle side-to-side wrist motion at this stage creates the classic leaf, or rosetta, pattern.
Do not worry if your first dozen attempts look like blobs; latte art is a muscle-memory skill that improves with repetition.
Good foam is more important than good technique when you are starting out.
Your Next Moka Pot Latte Starts Here
A moka pot, a bag of fresh beans, and a way to froth milk are the only things standing between you and a cafe-quality latte every morning.
Start with the brewing steps in this guide and adjust your grind, ratio, and milk choice over the next few days until you land on your personal favorite.
The best part of making a moka pot latte at home is that every cup is yours to customize, from iced caramel to hot vanilla honey, without waiting in line or paying cafe prices.