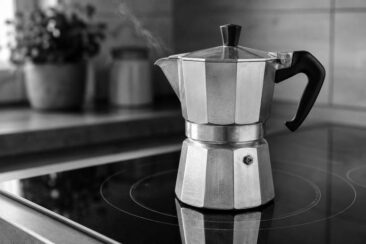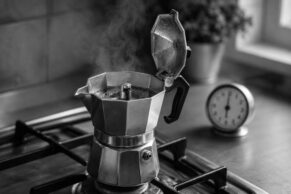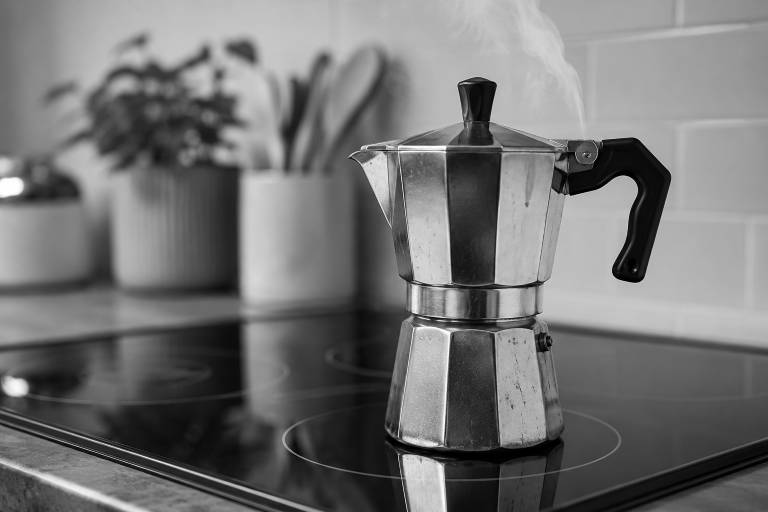
Most moka pots were designed with gas flames in mind, and the uneven heating patterns of electric burners can make your first few brews frustrating.
The good news is that thousands of home brewers pull full-bodied, smooth moka pot coffee from electric coils, ceramic cooktops, and induction surfaces every morning.
Getting it right comes down to matching your heat settings to your stove type, choosing the correct pot material, and knowing when to pull the pot off the burner.
This guide covers every electric stove type, walks through the brewing process step by step, and recommends three moka pots that perform well on electric surfaces.
Quick Answer
A moka pot works on an electric stove, but you need to use medium-low heat (setting 3-4 out of 10) and remove the pot from the burner the moment the coffee starts sputtering.
Electric coil stoves are the easiest match. Glass-top stoves require a heat diffuser to avoid scratching. Induction cooktops need a stainless steel moka pot or an adapter disc.
Can You Use a Moka Pot on an Electric Stove?
A moka pot brews strong, concentrated coffee on an electric stove just as effectively as it does on a gas burner, with one adjustment: you need to pay closer attention to heat control.
Gas flames respond instantly when you turn the dial, but electric burners hold residual heat for minutes after you lower the setting.
That residual heat keeps pushing steam through the grounds even after you reduce the temperature, which can turn a smooth, caramel-sweet cup into something bitter and metallic.
Start with medium-low heat instead of medium-high, and plan to lift the pot completely off the burner once the coffee begins flowing into the upper chamber.
A heat diffuser, a flat metal disc that sits between the burner and your pot, spreads heat evenly across the base and gives you finer temperature control.
Most diffusers cost between $10 and $15, and they make a noticeable difference on coil and glass-top stoves where hotspots tend to concentrate near the center of the element.
The short answer: yes, your moka pot works on an electric stove, and the coffee can taste just as rich and aromatic as any gas-brewed cup once you learn your burner’s behavior.
How Each Electric Stove Type Affects Moka Pot Brewing
Not all electric stoves behave the same way, and the type of surface in your kitchen changes how heat reaches the bottom chamber of your moka pot.
Electric Coil Stoves
Coil stoves are the most forgiving surface for moka pot brewing.
The exposed coil makes direct contact with the pot, delivering consistent heat that builds steady pressure inside the boiler.
Set the burner to medium-low, about 3-4 out of 10, and expect a total brew time of 5 to 8 minutes.
One thing to remember: coils retain heat long after you turn them off, so lift the pot off the burner entirely when the coffee starts sputtering rather than just lowering the dial.
Ceramic and Glass-Top Stoves
Ceramic glass-top surfaces create two problems for moka pots.
The smooth glass can scratch if you slide an aluminum pot across it, and the octagonal shape of a traditional moka pot does not sit perfectly flat on the surface, reducing heat transfer.
A heat diffuser solves these issues by protecting the glass and improving contact.
Never slide the moka pot across the glass. Lift it, place it, and lift it again.
These stoves regulate temperature by pulsing the heating element on and off, which can cause the pressure inside the moka pot to fluctuate and produce uneven extraction.
Starting with pre-heated water in the bottom chamber helps the brew finish faster and reduces the impact of that cycling.
Induction Cooktops
Induction surfaces use electromagnetic energy to heat cookware directly, which means only pots made from magnetic materials will work.
Traditional aluminum moka pots, including the classic Bialetti Moka Express, will not heat up on an induction cooktop without an adapter.
Stainless steel moka pots with ferromagnetic bases work natively on induction.
An induction adapter disc, a magnetic plate that sits on the cooktop and transfers heat to any pot placed on top, is the alternative for brewers who want to keep their existing aluminum moka pot.
Quick Tip Hold a refrigerator magnet to the bottom of your moka pot. If it sticks firmly, the pot will work on induction without an adapter. If it slides off, you need a stainless steel pot or an adapter disc.
Aluminum vs. Stainless Steel: Which Material Works on Electric Stoves?
The material of your moka pot affects heat distribution and durability, and it determines which stove types you can use.
| Feature | Aluminum | Stainless Steel |
|---|---|---|
| Heat-up speed | Faster | Slower |
| Heat distribution | Good, but can create hotspots on glass-tops | More even across the base |
| Induction compatible | No (needs adapter) | Yes (if ferromagnetic) |
| Durability | Lighter, prone to dents and scratches | Heavier, resists corrosion |
| Glass-top safety | Risk of scratching | Smoother base, lower risk |
| Price range | $15-$40 | $25-$60 |
Aluminum pots heat up quickly and conduct warmth efficiently, making them a solid choice for coil stoves where direct contact provides steady energy transfer.
They are lighter and more affordable, but the soft metal scratches easily and can leave marks on glass-top surfaces.
Stainless steel pots take longer to reach brewing temperature, but they distribute heat more evenly and resist the kind of wear that comes from daily use on hard surfaces.
For electric coil stoves, either material works well.
For glass-top or induction stoves, stainless steel is the safer and more practical choice.
How to Brew Moka Pot Coffee on an Electric Stove
A good moka pot brew on an electric stove follows five steps, and each one affects the taste of the final cup.
1. Fill the Bottom Chamber with Hot Water
Pour hot, filtered water into the bottom chamber up to the safety valve.
Using pre-heated water cuts 2 to 3 minutes off the brew time on an electric stove, which prevents the grounds from sitting over a hot element for too long and developing a scorched, ashy flavor.
Cold water forces the stove to work harder and longer, and the grounds absorb heat the entire time, pulling out harsh compounds before the actual extraction begins.
2. Add Coffee to the Filter Basket
Fill the filter basket with medium-fine grounds, level with the rim, without tamping or pressing down.
Tamping increases resistance and can cause pressure to build unevenly, which sometimes makes the safety valve release or sends the brew sputtering violently out of the spout.
The grounds should look like a flat, loose bed of fine sand, not a compressed puck.
3. Assemble and Place on the Burner
Screw the upper chamber on tightly and center the moka pot on the smallest burner that fits the base.
A burner that is too large wastes energy and overheats the handle, and an off-center pot extracts unevenly, with one side of the grounds getting more heat than the other.
Set the burner to medium-low, around 3 to 4 out of 10.
4. Lower the Heat Halfway Through
Once the upper chamber is about half full, reduce the temperature to the lowest setting.
You should hear a soft, steady hiss as steam pushes water through the grounds, and the coffee should flow in a thin, honey-colored stream.
If the coffee shoots out in a pale, explosive gush, the heat was too high from the start.
A gentle brew takes 5 to 8 minutes total on an electric stove, about 1 to 2 minutes longer than gas.
5. Remove from Heat and Cool Immediately
Lift the pot off the burner the instant the flow turns pale and starts sputtering.
Do not wait for the sputtering to stop on its own, and do not simply turn the dial down.
Electric burners stay hot for minutes after you lower the setting, which means the residual heat will keep extracting bitter compounds from the spent grounds.
Wrap the bottom of the pot in a cold, wet towel or run it under cool water for a few seconds to stop the extraction completely.
That quick cooldown is the difference between a smooth, full-bodied cup and a harsh, burnt-tasting one.
Common Mistake Leaving the moka pot on the still-hot electric burner after brewing ends. The leftover heat continues to push steam through the exhausted grounds, adding bitter and metallic flavors to the finished coffee.
Best Heat Settings for Each Electric Stove Type
Getting the heat right is the single most common struggle when switching from gas to electric.
This table gives you starting points for each surface type.
| Stove Type | Recommended Setting | Expected Brew Time | What to Watch For |
|---|---|---|---|
| Electric coil | 3-4 out of 10 | 5-8 minutes | Coil should glow dull red, not bright orange |
| Ceramic glass-top | 3-4 out of 10 | 5-8 minutes | Use a diffuser to prevent cycling fluctuations |
| Induction | Low-medium (setting 3-5) | 4-6 minutes | Induction heats faster, so start lower than you think |
Your coffee tells you whether the heat was right.
A brew that finishes in under 3 minutes was too hot, and the cup will taste thin, watery, and sharp.
A brew that drags past 10 minutes was too cool, and the coffee will taste flat with a heavy, muddy mouthfeel.
The sweet spot produces a steady, golden-brown stream that fills the upper chamber in 5 to 8 minutes, and the finished cup smells like dark chocolate and toasted nuts rather than ash.
Tips for Better Moka Pot Results on an Electric Stove
Brewing with an electric stove rewards patience and attention, and small adjustments can shift the flavor of your cup dramatically.
Match the Burner Size to Your Pot
The size of your moka pot should match the burner underneath it.
A 3-cup moka pot sitting on a large 8-inch burner absorbs too much heat around the sides, which overheats the handle and the upper chamber before the water in the boiler has finished extracting.
Use the smallest burner that your pot can sit on without wobbling.
Use a Heat Diffuser on Glass-Top and Coil Stoves
A heat diffuser is a flat metal plate, usually cast iron or aluminum, that sits between the stove and the pot.
It smooths out hotspots, slows down heat transfer for finer control, and protects delicate glass surfaces from scratches.
The Bialetti induction adapter plate works as a diffuser on non-induction stoves, too.
Pre-Heat the Burner
Electric coils take longer to reach a stable temperature than gas flames.
Turn the burner on to your target setting 30 to 60 seconds before you place the moka pot on it, so the coil is already at a steady heat when brewing begins.
This eliminates the initial temperature spike that happens when a cold coil ramps up.
Brew Your First Cup as a Test
Every electric stove model heats differently.
Your first few brews should be observation runs where you note the heat setting, the brew time, and the taste of the finished cup.
Once you find the setting that produces a smooth, 5-to-8-minute brew, write it down and stick with it.
Common Electric Stove Moka Pot Problems and Fixes
Electric stoves introduce a few issues that gas brewers rarely encounter.
Here are the most frequent problems and what to change.
| Problem | Likely Cause | Fix |
|---|---|---|
| Coffee won’t rise into the upper chamber | Heat too low, or pot not centered on the burner | Increase heat by one setting and re-center the pot |
| Brew takes more than 10 minutes | Starting with cold water, or burner too small | Pre-heat water and use a burner that matches the pot size |
| Coffee tastes burnt or bitter | Heat too high, or pot left on the hot burner after brewing | Lower heat to 3 out of 10 and remove pot immediately when sputtering starts |
| Coffee sputters violently | Grind too fine, or heat too high | Switch to a slightly coarser grind and reduce the heat |
| Weak, watery coffee | Brew finished too fast (under 3 minutes) | Lower the heat so the brew takes 5-8 minutes |
| Bottom of the pot turns dark | Dry-heating before water was added | Always add water before placing on the stove |
Beginner Note If your coffee tastes bitter and your brew finished in under 4 minutes, the fix is almost always lower heat. Electric burners deliver more concentrated energy than most people expect, and the instinct to crank the dial up leads to the most common moka pot mistakes.
How to Adapt Your Moka Pot for an Induction Cooktop
Induction stoves only heat cookware made from ferromagnetic materials, which rules out standard aluminum moka pots if you do not add an adapter.
You have two options.
Option 1: Buy a stainless steel moka pot. Models like the Grosche Milano Steel, the Bialetti Venus, and the Bialetti Moka Induction are built with ferromagnetic bases that work directly on induction surfaces.
Option 2: Use an induction adapter disc. A magnetic plate sits on the induction burner and heats up, then transfers that heat to any pot placed on top of it.
This adds 1 to 2 minutes to the total brew time, and the temperature control is slightly less precise.
Adapting for induction does affect brewing behavior.
Induction surfaces heat faster than coil or ceramic stoves, so start at a lower setting (3 out of 10) and increase only if the brew stalls.
The fast heat-up can surprise you, and a moka pot that overheats on induction will push coffee through the grounds too quickly, producing a pale, sour shot.
For a detailed walkthrough, the full guide on using a moka pot on an induction stove covers adapter selection, heat settings, and troubleshooting.
Electric Stove vs. Gas Stove for Moka Pot Coffee
The debate between gas and electric for moka pot brewing comes down to control versus convenience.
| Factor | Electric Stove | Gas Stove |
|---|---|---|
| Temperature control | Pre-set levels, less precise | Instant adjustment via flame |
| Heat-up time | Slower (especially coil) | Faster |
| Residual heat | Stays hot after turning off | Cools quickly |
| Compatibility | Works with all materials (except aluminum on induction) | Works with all materials |
| Heat distribution | Can create hotspots on glass-tops | Even, wraps around pot base |
| Safety | No open flame | Open flame requires attention |
Gas stoves let you dial in small temperature changes instantly, which makes it easier to hit the narrow window between under-extraction and over-extraction.
Electric stoves demand a more hands-off approach: set the heat lower than you think you need, let the brew develop slowly, and remove the pot when the timing is right.
The flavor difference between the two is smaller than most people assume.
A well-executed electric brew with pre-heated water and correct heat settings produces coffee with the same thick, syrupy body and bittersweet chocolate notes as a gas-brewed cup.
The biggest practical difference is the need to remove the pot from the electric burner, since gas burners cool down the moment you turn them off.
The 3 Best Moka Pots for Electric Stoves

1. Bialetti Moka Express
Authentic Italian-style coffee at home or on the go.

- The original moka coffee pot: Moka Express is the original stovetop espresso maker, it provides the…
- Made in Italy: it is Made in Italy and its quality is enhanced by the patented safety valve which…
The Bialetti Moka Express is the original Italian moka pot, and it remains the most popular option for electric coil and ceramic stove users.
Its aluminum body heats up fast and conducts warmth evenly across the base, pulling a rich, full-flavored shot in under 7 minutes on a coil burner.
The patented safety valve is easy to clean, and the pot is available in sizes from 1 cup to 12 cups.
It is not dishwasher safe, so rinse it with warm water after each use.
The Moka Express does not work on induction stoves without the separately sold Bialetti induction adapter plate.
Best for: electric coil and ceramic stoves, brewers who want the classic Italian moka pot flavor.
2. Grosche Milano
Experience Rich Italian Espresso in Minutes with Grosche Milano!

- ⭐ [Moka Espresso Coffee] Stovetop espresso maker, Moka pot, & manual coffee percolator machine…
- ⭐ [Easy to use Moka Espresso coffee Maker & Cuban Coffee maker] will work on all gas and electric…
The Grosche Milano is a stainless steel moka pot that works on every stove type, including induction.
Its heavier construction distributes heat more evenly than aluminum, and the stainless steel handle stays cooler than plastic alternatives.
The steel body resists corrosion and stands up to years of daily use without denting or scratching.
It brews a slightly different cup than aluminum, with a cleaner, brighter flavor and less of the earthy undertone that aluminum pots are known for.
Best for: induction stove owners, anyone who wants one pot that works on every surface.
3. Primula Classic Stovetop
Craft Authentic Espresso Anywhere with this Portable Coffee Maker

- CRAFT COFFEE AT HOME: Produces nine demitasse/espresso servings of rich, smooth espresso coffee in…
- DURABLE DESIGN: Carefully crafted with cast aluminum for long-lasting durability. Provides thorough…
The Primula Classic is a cast aluminum moka pot that brews 6 cups of concentrated espresso-style coffee and works on electric coil, ceramic, and gas stoves.
It is lightweight and affordable, compact enough to pack for camping or travel.
The cast aluminum construction provides even heat distribution, and the safety release valve controls pressure throughout the brew.
It does not work on induction stoves, and the handle can get warm during brewing, so keep a towel nearby.
Best for: budget-conscious brewers, travelers, and anyone making Cuban-style coffee at home.
Final Thoughts
A moka pot on an electric stove is not a compromise.
It is a slightly different technique that produces the same thick, aromatic, espresso-style coffee once you learn how your burner behaves.
The most common fix for bad-tasting electric-stove moka pot coffee is simple: lower the heat and remove the pot the moment the sputtering starts.
Start there, and every cup after gets better.
If you are still reusing old grounds or brewing with the wrong water temperature, fixing your stove technique alone will not save the cup, so revisit those habits too.
Your next brew is one adjustment away from tasting like it came off a gas flame in a Roman kitchen.