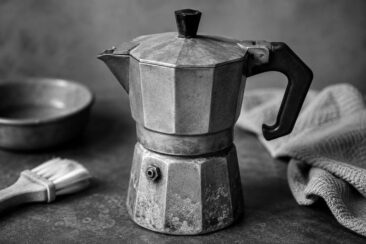
A neglected moka pot turns your morning ritual into a cup of stale, oily bitterness.
Coffee oils, mineral deposits, and leftover grounds build up inside the chambers and filter after every brew, gradually changing the flavor of everything that comes out of the spout.
Learning how to clean a moka pot the right way protects that rich, full-bodied taste and adds years to the brewer’s life.
This guide covers every level of care, from the 60-second rinse you should do after each use to monthly deep cleans, seasonal descaling, and the storage habits that prevent mold.
Why Cleaning Your Moka Pot Matters
Coffee oils turn rancid within hours of brewing, and those residues coat the inside of your moka pot if left unchecked.
Over time, that oily film mixes with mineral deposits from your tap water, creating a gummy layer that changes the taste of every cup.
Clogged filter plates and dirty gaskets restrict water flow, reducing the pressure your brewer needs to function correctly.
A blocked safety valve is the most serious risk of all, since trapped pressure inside the lower chamber can cause the pot to malfunction or, in rare cases, rupture.
Cleaning your moka pot regularly keeps the flavor honest, the mechanics working, and the safety valve free of debris.
How Often to Clean a Moka Pot
A quick rinse after every single use is non-negotiable.
Once a month, or whenever you notice dark staining on the inner walls of the upper chamber, a deeper scrub is in order.
Descaling with vinegar or citric acid should happen every one to three months, depending on how mineral-heavy your tap water runs.
Hard water areas with visible limescale on faucets and kettles will need more frequent descaling than soft water regions.
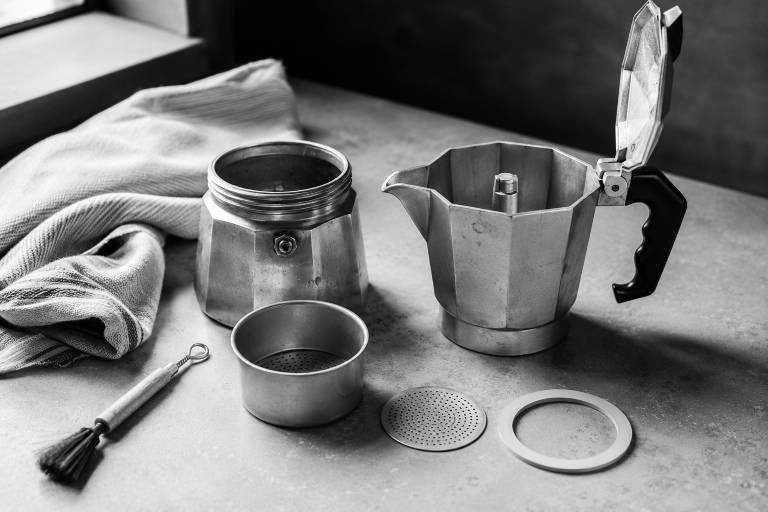
What You Need to Clean a Moka Pot
Most of what you need is already in your kitchen.
A soft cloth or non-abrasive sponge handles the daily wipe-down without scratching aluminum or stainless steel surfaces.
A soft-bristled brush, like a small bottle brush or an old toothbrush, reaches into the filter plate holes and the threads where grounds tend to hide.
Warm water is the only cleaning agent required for routine rinses.
For deep cleaning and descaling, keep distilled white vinegar or food-grade citric acid on hand.
A wooden toothpick or skewer works well for clearing individual holes in the filter plate when they get clogged.
Dry all parts with a clean towel after every wash, paying extra attention to aluminum pots that can corrode from leftover moisture.
How to Clean a Moka Pot After Every Use
Let the moka pot cool completely before touching it, as the metal retains heat for several minutes after brewing.
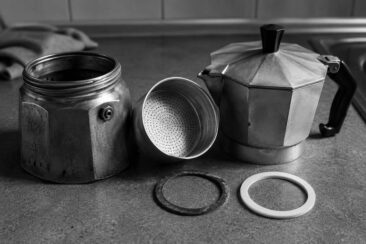
Unscrew the upper chamber from the lower chamber and remove the filter basket.
Tap the used coffee grounds into the trash or compost bin, then pull the rubber gasket and filter plate out of the upper chamber.
Rinse every part under warm running water, using your fingers or a soft sponge to wipe away oily residue from the interior walls.
Run warm water through the filter plate holes to flush out any trapped grounds.
Dry each piece with a clean towel, then leave the parts disassembled until completely air-dried before screwing the pot back together.
How to Deep Clean a Moka Pot
A monthly deep clean removes the stubborn residue that daily rinsing leaves behind.
Disassemble the moka pot completely, including the gasket and filter plate from the upper chamber.
Mix equal parts warm water and distilled white vinegar in a bowl or basin large enough to hold all the parts.
Submerge every component in the solution and let them soak for 15 to 30 minutes.
After soaking, scrub each piece with a soft brush, focusing on the threads, the inside of the upper chamber, and the underside of the filter plate.
Rinse all parts under warm water multiple times until no vinegar smell remains.
Inspect the gasket for cracks, discoloration, or stiffness, and replace it if the rubber has lost its flexibility.
Dry everything completely before reassembling.
How to Descale a Moka Pot
Mineral deposits from tap water accumulate inside the lower chamber and filter over time, leaving behind a chalky white residue that can give your coffee a metallic taste.
Fill the lower chamber with a mixture of one part white vinegar (or dissolved citric acid) and two parts water, stopping just below the safety valve.
Place the assembled pot on the stove over low heat and let the solution work its way through the system, just as it would during a normal brew cycle.
Once the liquid has moved to the upper chamber, turn off the heat and let the pot cool.
Pour out the solution, rinse all parts under warm water, and run one or two brew cycles with plain water to flush any lingering vinegar taste before making coffee again.
Cleaning Stainless Steel vs. Aluminum Moka Pots
Stainless steel moka pots resist corrosion and staining better than aluminum models, making them a bit more forgiving during deep cleans.
You can use slightly more vigorous scrubbing on stainless steel without worrying about scratching the surface, though abrasive pads should still be avoided.
A lemon juice rinse or a brew cycle with lemon peel works well for removing lingering odors from stainless steel.
Aluminum moka pots demand gentler handling, as the softer metal scratches and oxidizes more easily.
Never use bleach, harsh chemical cleaners, or steel wool on aluminum, since these strip the surface and accelerate corrosion.
Stick to vinegar or citric acid solutions at low concentrations, and never let an aluminum pot soak longer than 30 minutes.
After every cleaning session on an aluminum pot, dry the metal immediately and completely to prevent the dull gray oxidation spots that develop from trapped moisture.
Soap and Your Moka Pot
Italian tradition and Bialetti’s official guidance say the same thing: never wash a moka pot with soap.
The reasoning centers on coffee oils that gradually season the inside of the pot, building a thin layer that proponents say improves flavor over time.
Soap, the argument goes, strips that seasoning and can leave behind a residue that taints the next brew.
A growing number of coffee professionals challenge this view, pointing out that old coffee oils go rancid quickly and that a mild, unscented dish soap followed by a thorough rinse leaves no detectable trace.
The safest middle ground is to use warm water and a soft sponge for your daily rinse, reserving a tiny drop of unscented soap for deeper monthly cleans if your pot develops a stale or off smell.
Rinse aggressively after using any soap, running water through the filter plate multiple times to clear every trace.
Common Moka Pot Cleaning Mistakes
Using dish soap on every single wash strips the pot’s natural seasoning faster than most people realize.
Scrubbing with steel wool or abrasive scouring pads scratches the metal, creating tiny grooves where coffee residue and bacteria settle permanently.
Skipping the gasket during cleaning is one of the most common oversights, as old grounds and oils collect in the groove where rubber meets metal.
Putting a moka pot in the dishwasher exposes it to high heat and aggressive detergents that oxidize aluminum, corrode the finish, and warp the gasket.
Leaving the pot assembled after washing traps moisture inside the chambers, creating conditions for mold growth.
Forgetting to check the safety valve during your monthly deep clean can lead to a blocked valve, which is a genuine safety hazard.
Over-soaking aluminum parts in vinegar for more than 30 minutes risks pitting and discoloration on the surface.
Rinsing with cold water instead of warm water leaves oily residue behind, since warm water dissolves coffee oils far more effectively.
How to Season a New Moka Pot Before First Use
A brand-new moka pot carries residues from the manufacturing process that can leave a metallic flavor in your first few cups.
Wash all the parts in warm water with a small amount of baking soda, then rinse thoroughly.
Fill the lower chamber with water up to just below the safety valve, leaving the filter basket empty of coffee.
Run two or three full brew cycles with only water, discarding the liquid each time, to flush out any remaining factory residue.
Your moka pot is now seasoned and ready for its first real brew.
Storing Your Moka Pot Between Uses
The single best storage habit is keeping the pot disassembled when it is not in use.
Leaving the chambers screwed together traps moisture between the gasket and the metal, which leads to mold in the filter area and premature gasket decay.
Store each piece in a dry spot, ideally on an open shelf or in a cabinet with good air circulation.
If you plan to put the moka pot away for more than a week, remove the gasket entirely and store it separately to prevent it from compressing into a permanent shape.
Final Thoughts
A clean moka pot produces better coffee, lasts longer, and never surprises you with a blocked safety valve on a Monday morning.
The routine is simple: rinse after every brew, deep clean once a month, descale a few times a year, and store the pot disassembled.
That small investment of time pays off in every cup.