Your grinder just stopped working, you forgot to pack it for a trip, or you grabbed whole beans by mistake at the store.
The good news: you can grind coffee beans without a grinder using tools already sitting in your kitchen.
That bag of whole coffee beans on your counter can still become a great cup of coffee this morning.
Every kitchen has at least one tool that can crush, crack, or grind coffee beans into something brewable.
The results will not match a burr grinder, but they will taste far better than skipping your cup or reaching for a stale pre-ground bag that has been sitting open on the shelf for weeks.
Quick Answer
You can grind coffee beans without a grinder using a blender, food processor, mortar and pestle, rolling pin, knife, hammer, or spice grinder. Pulse-based appliance methods work fastest, producing a coarse grind in under 30 seconds. The mortar and pestle delivers the most consistent results of all the no-grinder options.
Match your grind to a forgiving brew method like French press or cold brew, and read on to learn the step-by-step technique for each method.
Why Grinding Fresh Makes a Noticeable Difference
Whole coffee beans act like tiny sealed containers for hundreds of volatile aroma compounds.
The moment those beans crack open, oxygen rushes in and starts breaking down the oils and aromatics that give coffee its rich, caramel-sweet fragrance.
Ground coffee loses its peak aroma within 15 to 30 minutes of grinding, according to freshness research from roasters and the Specialty Coffee Association.
Pre-ground coffee from the grocery store has been sitting exposed to air for days, sometimes weeks, before it reaches your kitchen.
That flat, cardboard-like smell coming from an old bag of grounds tells you the flavor compounds have already faded.
Dark roasts lose freshness even faster than light roasts, as the roasting process leaves the bean structure more porous and vulnerable to oxygen.
Grinding your beans right before brewing, even with an improvised method, captures more of those fresh flavors than any pre-ground option.
Whole beans stay fresh for about 2 to 4 weeks after roasting when stored in an airtight container away from heat and light.
Once ground, that window shrinks to minutes for the best taste, and about a week for acceptable flavor.
This is exactly why learning to grind coffee beans without a grinder, using whatever tools you have on hand, is worth the extra few minutes of effort.
How to Grind Coffee Beans with a Blender
A blender’s spinning blades chop beans in a way similar to a blade grinder, making it one of the fastest no-grinder options available.
The smell of freshly cracked beans filling the kitchen as the blades spin is proof that you are getting a fresher cup than anything from a pre-ground bag.
Some blenders include a dedicated “grinder” setting, which runs at a lower speed designed for hard items like coffee beans, whole spices, and nuts.
Quick Tip Pulse in short 2 to 3 second bursts instead of running the blender continuously. Constant blending overheats the beans, and hot grounds taste flat and bitter.
Here is how to get a usable blender coffee grind:
- Add a small handful of beans to the blender jar, roughly 2 to 4 tablespoons per batch.
- Secure the lid tightly and select the pulse or grinder setting.
- Pulse for 2 to 3 seconds, then stop and shake the jar gently to redistribute the beans.
- Repeat 5 to 8 times until the grounds look like coarse sand or raw sugar.
- Dump the grounds into your brewer and repeat with the next batch if needed.
Tilting the blender slightly between pulses helps move larger bean pieces down toward the blade.
The finished grind will be coarse and uneven, with some fine powder mixed in with larger chunks.
This texture works well for French press, drip machines, and cold brew, where a coarse grind produces a clean, balanced cup.
Avoid using the highest speed setting, as that generates the most friction heat and can scorch the bean oils before you finish grinding.
If the grounds smell smoky or sharp instead of sweet and earthy, you blended too long.
A Vitamix or NutriBullet can handle coffee beans just like a standard blender, following the same pulse technique.
Expect the whole process to take about 30 to 45 seconds per batch.
How a Food Processor Grinds Coffee in Seconds
A food processor works on the same chopping principle as a blender, but its wider bowl and larger blade give it more room to handle bigger batches.
The texture of food processor grounds resembles coarse sand with scattered fine particles, good enough for drip coffee and French press brewing.
| Method | Speed | Best Grind Achieved | Ideal Brew Method |
|---|---|---|---|
| Food processor | 10 to 20 seconds | Coarse to medium-coarse | Drip, French press, cold brew |
| Blender | 30 to 45 seconds | Coarse | French press, cold brew |
| Mortar and pestle | 5 to 8 minutes | Medium to fine | Pour over, drip, French press |
| Rolling pin | 3 to 5 minutes | Coarse | French press, cold brew |
| Knife (flat blade) | 5 to 10 minutes | Medium-coarse | Drip, French press |
| Hammer or mallet | 2 to 4 minutes | Coarse | Cold brew, French press |
| Spice grinder | 15 to 30 seconds | Medium to fine | Drip, pour over |
To grind coffee beans in a food processor, add about a quarter cup of beans to the bowl and pulse in 3 to 5 second bursts.
Shake or tilt the bowl between pulses so that larger pieces fall toward the blade.
Stop after 10 to 20 seconds of total pulse time, or the blade will generate enough heat to start cooking the bean oils and producing a burned, acrid smell.
Clean the food processor bowl and blade right after grinding, or your next batch of salsa will carry a faint coffee flavor.
Crushing Coffee Beans with a Rolling Pin and Bag
This method requires nothing more than a rolling pin, a sturdy freezer bag, and a flat surface.
Place 2 to 4 tablespoons of rolling pin coffee beans into a thick zip-lock freezer bag and press out all the trapped air before sealing it.
Thin sandwich bags will tear under the pressure of sharp bean fragments, so a heavy-duty freezer bag or a double layer of parchment paper is the better choice.
Lay the sealed bag flat on a wooden cutting board, not directly on your countertop, to protect the surface from scratches.
Start by pressing the rolling pin straight down onto the beans to crack them into large pieces.
Once cracked, roll the pin back and forth with firm, even pressure, working from one end of the bag to the other.
Rotate the bag 90 degrees and roll again to catch any pieces that escaped the first pass.
Common Mistake Rolling too fast or too hard in one spot creates a mix of powder and whole fragments. Slow, steady pressure from end to end produces a more uniform coarse grind.
The crunching sound of beans breaking under the pin feels satisfying, almost like crushing crackers for a pie crust.
After 3 to 5 minutes of steady rolling, you will have a coarse grind suitable for French press or cold brew.
This is one of the quietest methods on the list, which makes it a good choice early in the morning when the rest of the house is still asleep.
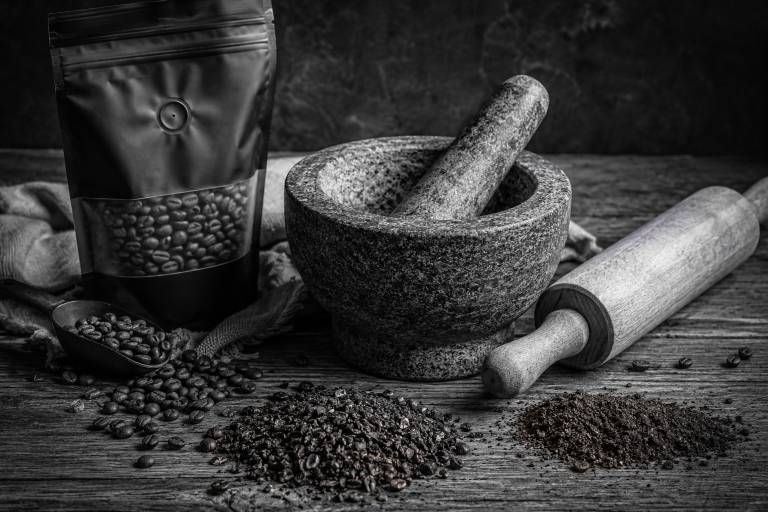
How to Use a Mortar and Pestle for the Finest Control
Cooks and pharmacists have relied on the mortar and pestle for thousands of years to grind herbs, spices, and medicines into fine powder.
Of all the ways to grind coffee beans without a grinder, this is the only method that can produce a grind close to medium or medium-fine, opening up pour over and drip brewing as realistic options.
The secret to mortar and pestle coffee is working with small batches, no more than 2 to 3 tablespoons of beans at a time.
Fill the mortar about one quarter full, grip the pestle with your dominant hand, and hold the mortar steady with the other.
Press the pestle down and twist against the beans to crack them, then switch to a circular grinding motion along the sides of the bowl.
You will feel the texture change under the pestle as the chunks shrink into gritty, sand-like particles.
The aroma released during this process is intense, warm and nutty with sweet caramel undertones that fill the room.
A granite or marble mortar and pestle works better than ceramic for coffee, as the rough stone surface grips the beans and prevents them from sliding around.
Plan on 5 to 8 minutes of steady grinding for a single serving, which makes this method slower than the appliance-based options but far more precise.
The finished grounds will look and feel like coarse sand, with the option to keep grinding for a finer texture if your brew method calls for it.
Your arms will get a workout, but the grind consistency rewards the effort.
Ceramic mortars work in a pinch, though they tend to be lighter and let the beans slide around more than stone versions do.
Using a Knife to Crush Beans on a Cutting Board
The flat side of a wide chef’s knife or butcher knife works like a manual press to crack and crush coffee beans.
Place a small pile of beans on a large cutting board, lay the flat of the blade over them with the sharp edge facing away from you, and press down firmly with the heel of your palm.
You will hear a sharp snap as each bean cracks under the blade.
Do not strike the knife like a hammer. Pressing slowly gives you control over the particle size and keeps stray bean fragments from flying across the kitchen.
After the initial crack, pull the knife slightly toward you with a rocking motion to break the fragments into smaller pieces.
Laying a clean kitchen towel over the blade protects your hand and catches any grounds that try to scatter.
- Press the blade flat against the beans and push down firmly to crack them
- Rock the blade with a slight pulling motion to refine the fragments
- Gather scattered pieces back into a pile and repeat until you reach a coarse to medium-coarse texture
- Work in small batches of 1 to 2 tablespoons for the most control
The finished grind from a knife is coarser and less uniform than what a mortar and pestle produces, but it works well for drip coffee and French press.
Experienced cooks will find this method familiar, as it mirrors the technique used to crush garlic cloves.
How a Hammer or Mallet Cracks Beans Quickly
A meat tenderizer, kitchen mallet, or standard hammer can crush coffee beans with surprising speed, producing the loud thwack of tool against bag as beans crack apart.
Place your beans inside a sealed freezer bag, squeeze out the air, and wrap the bag in a kitchen towel to prevent tearing.
Set the wrapped bag on a sturdy cutting board and press the hammer firmly onto the beans rather than swinging it down with full force.
Beginner Note Pressing rather than striking prevents beans from scattering and protects your countertop from dents. Move from one end of the bag to the other for more even results.
This method produces a very coarse, uneven grind that works for cold brew and French press, where the extended steep time compensates for inconsistent particle sizes.
Why a Spice Grinder Works in a Pinch
That small electric spice grinder sitting in your cabinet operates on the same blade-chopping principle as a blender, just in a more compact form with a tighter chamber that keeps beans closer to the blade.
Add 1 to 2 tablespoons of beans at a time, pulse in 2 to 3 second bursts, and check the grind between rounds.
The compact chamber produces a more uniform result than a full-size blender, and with enough short pulses you can reach a medium to medium-fine consistency suitable for pour over brewing.
Running a tablespoon of dry rice through the grinder after coffee helps absorb lingering oils and odors from previous spice sessions.
Clean the grinder thoroughly before and after using it for coffee, as residual cumin, pepper, or cinnamon oils will transfer directly into your cup and create an unwelcome flavor surprise.
Which Grind Size Matches Each Brewing Method
Grind size controls how fast water pulls flavor from the coffee, and every brew method has a target range.
Finer grounds expose more surface area to the water, speeding up extraction and producing a stronger, more intense cup.
Coarser grounds slow extraction down, which is why methods with longer brew times call for bigger particles.
| Grind Size | Looks Like | Brew Methods |
|---|---|---|
| Extra coarse | Peppercorns | Cold brew |
| Coarse | Sea salt | French press, percolator |
| Medium-coarse | Rough sand | Chemex, flat-bottom pour over |
| Medium | Regular sand | Drip coffee makers |
| Medium-fine | Fine beach sand | Cone-shaped pour over, AeroPress |
| Fine | Table salt | Espresso, moka pot |
| Extra fine | Flour or powder | Turkish coffee |
Most no-grinder methods land in the coarse to medium-coarse range, which limits your brew options to French press, cold brew, and drip.
The mortar and pestle and spice grinder are the two exceptions capable of reaching a medium-fine grind with enough time and effort.
Skip espresso, moka pot, and Turkish coffee entirely when grinding without a grinder, as these methods demand a fine, uniform consistency that improvised tools cannot reliably produce.
Matching your grind to the right brewer is the single most effective way to get a good cup when you grind coffee beans without a grinder.
Best Brew Methods for Unevenly Ground Coffee
French press is the most forgiving brewer for uneven, improvised grinds.
Its metal mesh filter allows oils and fine particles to pass through, creating a full-bodied cup that masks minor grind inconsistencies.
The standard 4-minute steep time at a coarse grind works well with grounds from a blender, food processor, or rolling pin.
If your improvised grind is coarser than normal, extend the steep time to 5 or 6 minutes to give the water more contact time with the larger particles.
Cold brew is the second-best option for rough grinds, as its 12 to 24 hour steep time at room temperature or in the fridge compensates for wildly uneven particle sizes.
The slow, cold extraction pulls smooth, sweet flavors from the beans and suppresses the bitter, sour notes that uneven grinding can create.
Drip coffee makers with flat-bottom baskets handle slightly uneven grinds better than cone-shaped brewers, as the wider bed distributes water more evenly across the grounds.
The AeroPress, with its short brew time and manual pressure, can handle medium-coarse improvised grinds if you extend the steep time to 3 or 4 minutes.
A standard moka pot, on the other hand, needs a fine grind that improvised methods simply cannot deliver consistently.
Percolators are another tolerant option, as their repeated cycling of hot water through the grounds compensates for particle size variation.
Cowboy coffee, where you simply boil grounds in a pot and let them settle, works with the roughest possible grind from any method on this list.
The flavor will be heavy, oily, and strong, closer to campfire coffee than a refined pour over.
- French press: Steep 4 to 6 minutes with coarse grounds from any method
- Cold brew: Soak 12 to 24 hours in cold water with coarsely crushed beans
- Drip machine: Use a flat-bottom basket and aim for medium-coarse grounds
- AeroPress: Set to a longer brew time (3 to 4 minutes) with coarser grounds
Avoid cone-shaped pour overs with improvised grinds, as fine particles will clog the filter and stall the brew, leaving you with an over-extracted, bitter mess.
When a Hand Grinder Makes More Sense Than Improvising
If you find yourself crushing beans with a rolling pin or pulsing a blender more than once or twice a month, a small hand grinder will change your mornings.
Manual burr grinders cost between $25 and $60 for a reliable entry-level model, and they produce a consistent, adjustable grind that no kitchen improvisation can match.
The difference in cup quality between a hand grinder and a blender is immediate and obvious, like switching from instant coffee to freshly brewed.
A hand grinder fits in a travel bag, needs no electricity, and takes about 30 to 60 seconds to grind a single serving.
Popular models like the Hario Skerton, JavaPresse, and Porlex Mini run between $25 and $50 on Amazon, and they last for years with minimal maintenance.
The ceramic or steel burrs inside these grinders crush beans between two textured surfaces at a fixed distance, producing particles of a uniform size that brew evenly.
This consistency is the single biggest difference between a proper grinder and every method you might use to grind coffee beans without a grinder.
For anyone who drinks coffee daily, the $25 to $50 investment pays for itself within the first week in cup quality alone.
Tips for Getting the Most Even Grind Without a Grinder
Whenever you grind coffee beans without a grinder, small batches produce better results than large ones.
Grinding 2 to 4 tablespoons at a time gives you more control over particle size and lets you see and feel the texture as it develops.
Grind only what you need for your next brew. Storing improvised grounds for later defeats the purpose of grinding fresh, and the uneven particle sizes will go stale even faster than properly ground coffee.
Brew within minutes of grinding to capture the most aroma and flavor.
If your grounds look uneven, a simple kitchen sieve can separate the fine particles from the larger chunks, giving you two usable batches for different brew methods.
Use the fines for drip or pour over and the coarser pieces for French press or cold brew.
Keeping your tools clean prevents flavor contamination, especially if you are using a blender, food processor, or spice grinder that sees regular use with other ingredients.
Every improvised method on this list works, and none of them are perfect.
The goal is a fresh cup of coffee, and a rough grind from a rolling pin in a hotel room beats a week-old bag of pre-ground supermarket coffee every single time.