Are you struggling to determine when your beloved Moka pot has finished brewing?
You’re not alone; it’s a common challenge many coffee lovers face.
Our guide will help demystify the process, teaching you clear indications of when your brewing is complete and how always to achieve that perfect cup.
Ready for a flavorful revelation? Let’s dive in!
Key Takeaways
- Bubbling and a steady flow of coffee into the upper chamber indicate that your Moka pot has finished brewing.
- Sputtering and reduced liquid flow suggest that the brewing process is complete, but be cautious if sputtering begins before any substantial amount of coffee has been brewed.
- Color changes, transitioning from dark to light, and an evocative aroma are visual and olfactory cues that your Moka pot coffee is ready to be enjoyed.
- Factors such as burner heat settings, coffee grind size, and water temperature can affect your Moka Pot coffee’s brewing time and taste.
Signs To Determine When Your Moka Pot Has Finished Brewing
When your Moka pot has finished brewing, you’ll notice a bubbling and steady flow of coffee into the upper chamber.
1. Bubbling and Steady Flow of Coffee Into the Upper Chamber
A clear sign your Moka Pot has finished brewing is the appearance of bubbles and a steady stream of coffee in the upper chamber.
This bubbling action signifies that pressure from below is pushing water up through your ground coffee, creating deliciously brewed espresso.
The flow should be consistent but not too fast; if it’s slow or gurgling, there may be issues with a blocked pin in the valve, incorrect heat setting, or other brewing process problems.
As soon as this smooth transition shifts to sporadic sputtering or hissing sounds – which are often misattributed to being signs that brewing has ended – you’ll want to remove your pot from the heat source promptly to prevent over-extraction and a burnt taste in your final cup of rich Moka coffee.
2. Sputtering and Reduced Liquid Flow
Sputtering is a crucial tell-tale sign indicating your Moka Pot has finished brewing.
This phenomenon occurs due to the brewing process, which involves an increased internal pressure within the pot.
The steam generated by heating gets forced swiftly through the coffee grounds into the upper chamber of the pot, inducing sputtering.
However, it’s important to note that if your Moka Pot starts sputtering before brewing any substantial amount of coffee, it’s likely because there isn’t enough built-up pressure inside.
A noticeable reduction in liquid flow and a slight decrease in noise often accompany this phase.
Managing these factors effectively ensures you get an excellent cup of brewed coffee every time while avoiding bitter tastes or over-extraction caused by excessive heat or poor sealing between the upper and lower parts of your espresso maker.
3. Lighter Color and Aroma
One visible sign that your Moka pot coffee is ready is a noticeable color change, transitioning from dark to light.
This lighter shade indicates the completion of the brewing process, as it typically develops when most of the heavier oils from your ground coffee have been extracted.
Concurrently, an evocative aroma will start filling your kitchen space: this shift in scent is another trustworthy indicator of a finished brew.
The unique fragrance you smell arises because volatile compounds in coffee beans are released during brewing and, much like color, intensify until peak extraction.
It’s important to note that retaining these appealing attributes requires properly closing the lid during brewing which helps preserve both color and aroma.
Observing for subtleties such as changes in shade or sniffing out delectable whiffs would help ascertain if your delicious coffee is done on time while using a Moka pot.
4. No More Coffee Filling the Upper Chamber
Once your moka pot has finished brewing, you’ll notice no more coffee filling the upper chamber.
This means all the water in the lower chamber has been pushed up through the coffee grounds and into the top chamber.
You can check this by lifting the lid or observing any transparent portion of your moka pot.
The absence of coffee flowing into the upper chamber indicates that the brewing process is complete, and it’s time to remove your moka pot from heat.
This visual cue helps ensure you don’t overbrew your coffee, resulting in a bitter taste.
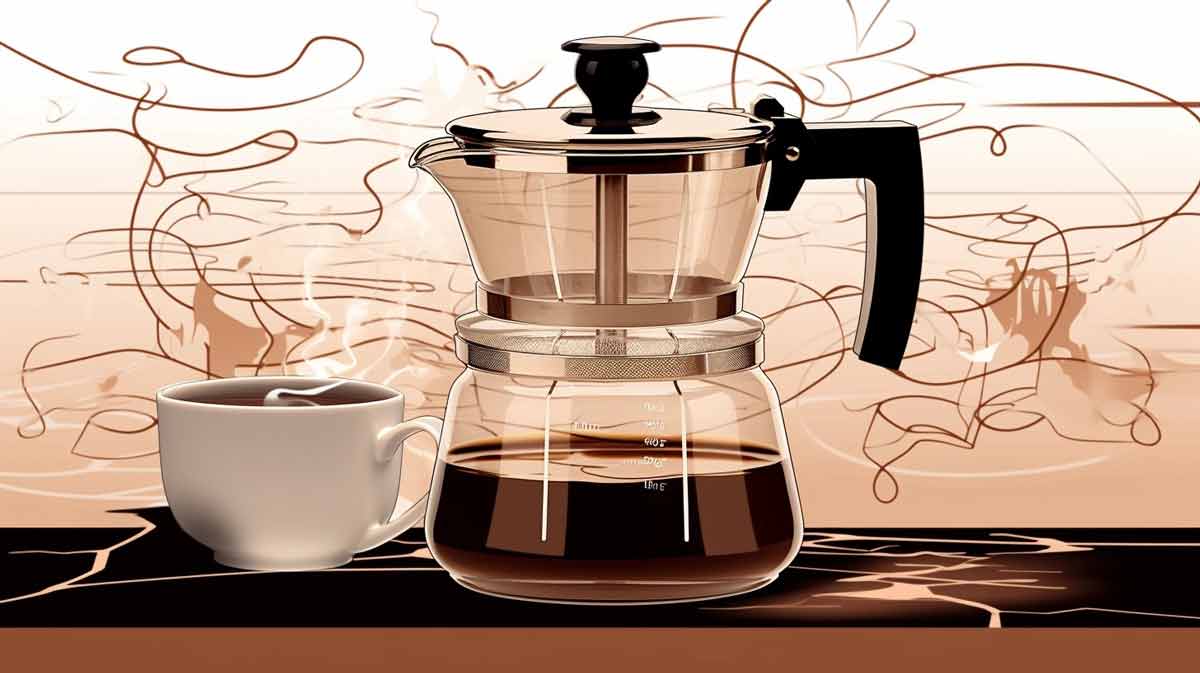
5. Visual Cues Through the Transparent Top Chamber
The transparent top chamber of a Moka pot is a valuable tool for determining when the brewing process is complete.
As the coffee brews, you can easily monitor its progress by looking through the clear chamber.
Keep an eye out for changes in color and consistency, as these visual cues will indicate that your coffee is ready to be enjoyed.
A fully brewed Moka coffee will have a rich, dark color in the top chamber, ensuring a flavorful cup of joe.
By utilizing this handy feature, you’ll be able to achieve perfection with every batch of Moka pot coffee.
Factors Affecting Brewing Time in a Moka Pot
Several factors can affect the brewing time in a Moka pot, including the burner heat settings, coffee grind size, and water temperature.
1. Burner Heat Settings
The burner heat settings on your stove are critical in achieving the perfect brew with a Moka Pot.
The right heat level will ensure the coffee is extracted at the right pace, resulting in a rich and flavorful cup.
Too high heat can cause the coffee to overheat, leading to a burnt and bitter taste, while too low heat may result in under-extraction and weak coffee.
Finding the sweet spot for your burner heat is essential for perfect balance.
Remember, controlling the heat allows you to control brewing time and ultimately determines the quality of your Moka Pot coffee.
2. Coffee Grind Size
The coffee grind size you use in your Moka Pot can greatly impact your brewing time and taste.
Finding the right balance between fine and medium-fine grinds is important for optimal extraction.
Grinding your coffee too fine can lead to over-extraction, resulting in a bitter taste, while grinding it too coarse may result in under-extraction, leading to a weaker flavor.
Ultimately, finding the ideal grind size is crucial for achieving that rich and robust flavor that makes Moka Pot coffee delicious.
3. Water Temperature
The water temperature plays a crucial role in the Moka Pot brewing process.
It directly affects the extraction rate, impacting the flavors and substances present in your brewed cup.
Filling your Moka Pot with cold water rather than hot water is recommended for optimal results.
This helps to avoid overheating and ensures a smoother extraction process.
Starting with medium heat and gradually increasing the temperature allows maximum flavor extraction without risking burning or over-extracting the coffee grounds.
According to the Specialty Coffee Association of America (SCAA), an ideal brewing temperature range for a Moka Pot is between 195°F and 205°F.
So be sure to pay attention to your water temperature for a deliciously brewed cup of coffee every time.
Tips for Achieving the Perfect Brew With a Moka Pot
To achieve the perfect brew with a Moka pot, lift the pot off the heat as soon as you hear it start to sputter.
Adjusting the burner heat can also help you control the brewing time and ensure your coffee turns out just right.
Keep a close eye on the brewing process and experiment with different variables to find your ideal method.
1. Lift the Moka Pot off the Heat When Sputtering Begins
To achieve the best brew with a Moka pot, lifting the pot off the heat when sputtering begins is crucial.
This prevents overheating and ensures that your coffee is not burnt or bitter.
Sputtering occurs when steam is forced through the coffee grounds in the Moka pot, and if left on the heat too long, it can result in an unpleasant taste.
By lifting the Moka pot off the heat at this stage, you’ll enjoy a delicious cup of coffee without any unwanted bitterness.
Remember, keep a close eye on your brewing process and take action as soon as sputtering starts for optimal results.
2. Adjust Burner Heat To Achieve Desired Brew Time
One important tip to achieve the perfect brew with a Moka pot is to adjust the burner heat to control the brew time.
The Moka pot should be placed on moderate heat during brewing, usually taking around five minutes.
Adjusting the burner temperature allows you to customize your brewing experience and ensure that your coffee is brewed the way you like it.
Remember that removing the pot from the heat once it starts sputtering will help prevent overcooking and preserve the flavors of your coffee.
Experimenting with different heat settings will allow you to find your ideal balance between extraction and flavor.
Don’t be afraid to try different temperatures until you discover your preferred brew time.
3. Monitor the Brewing Process Closely
Monitoring the brewing process closely is crucial to achieving the perfect brew with your Moka pot.
This classic Italian coffee method requires a hands-on approach, so keeping an eye on things is essential.
Pay attention to the color and aroma of the coffee as it rises in the brew chamber – when it starts looking more like water than coffee, that’s a good indication that it’s almost done brewing.
Listen for any sputtering sounds coming from the pot, which is another sign that it’s nearing completion.
By closely monitoring these visual and auditory cues, you can extract all those delicious flavors without over-extracting or under-extracting your coffee.
4. Experiment With Different Variables To Find the Ideal Brewing Method
The Moka Pot brewing method is about finding the perfect balance of variables to achieve your desired cup of coffee.
Don’t be afraid to experiment with different ratios, grind sizes, and types of beans to find the ideal brewing method that suits your taste.
Adjusting these variables can unlock a world of flavor profiles and strengths in your Moka Pot brew.
It’s important to understand that each variable plays a crucial role in the final result, so take the time to explore and discover what works best for you.
Remember, there’s no one-size-fits-all approach to brewing with a Moka Pot – it’s all about personal preference and experimentation.
Best Practices for Handling a Moka Pot After Brewing
After brewing, it is essential to let the Moka pot cool down before cleaning or storing it.
Letting the Moka Pot Cool Down
Allowing the Moka pot to cool down after brewing is crucial in ensuring a flavorful cup of coffee.
Letting it cool prevents the coffee from overcooking and preserves its delightful taste.
This simple practice helps maintain the optimal flavor profile and prevents unwanted bitterness when the pot remains on the heat for too long.
So, after enjoying your freshly brewed coffee, remember to let the Moka pot cool down before cleaning and storing it properly.
Cleaning and Storing the Pot Properly
Proper cleaning and storage are crucial to the longevity of your beloved Moka pot.
After brewing that perfect cup of coffee, allow the pot to cool down before disassembling it for cleaning.
Remove the filter basket and dispose of the used coffee grounds in the garbage.
Give the filter basket a thorough rinse and dry it thoroughly before reassembling your Moka pot.
Regularly cleaning your Moka Pot after each use prevents any buildup that could cause issues in the future.
Consider using a gentle dish soap or vinegar cleaning solution to remove scaling and oil residue effectively.
These simple steps will keep your Moka pot in pristine condition, ensuring many more delicious cups of coffee to come.
Common Mistakes To Avoid When Using a Moka Pot
Avoid leaving the Moka pot on the heat for too long, resulting in over-extracted and bitter coffee.
1. Leaving the Pot on the Heat for Too Long
Leaving your Moka pot on the heat for too long is a common mistake resulting in a less-than-ideal coffee experience.
When the pot sits on the burner for an extended period, it can lead to over-extraction and a burnt taste in your brew.
To avoid this, it’s important to pay close attention to the brewing process and remove the pot from the heat as soon as your coffee has finished brewing.
Doing so will prevent any bitter flavors from developing, and enjoy a delicious cup of perfectly brewed coffee every time.
Remember, timing is key when using a Moka pot!
2. Taking the Pot off the Heat Too Soon
One common mistake to avoid when using a Moka Pot is taking the pot off the heat too soon.
Doing this can result in under-extracted coffee, leading to a weak and unsatisfying brew.
It’s essential to allow the brewing process to complete fully to extract maximum flavor from your coffee grounds.
Waiting until the bubbling and sputtering have finished before removing the pot from the heat ensures you’ll get a rich and flavorful cup of coffee.
So be patient and resist the temptation to rush – your taste buds will thank you for it.
3. Using Low-Quality Coffee Grounds
Using low-quality coffee grounds in a Moka Pot can significantly impact your brewed coffee’s overall taste and quality.
Not only can it result in a less flavorful cup, but it can also create issues with the brewing process itself.
Low-quality coffee grounds often lack the freshness and complexity of high-quality beans, leading to a dull and uninspiring brew.
These inferior grounds may also contain impurities or be inconsistently ground, causing clogging or uneven extraction during brewing.
Invest in high-quality coffee beans and grind them fresh for each brew to ensure the best possible outcome with your Moka Pot.
This simple change will elevate your coffee experience and allow you to fully appreciate the rich flavors of a well-brewed Moka Pot coffee.
4. Neglecting To Clean the Pot Regularly
Neglecting to clean your moka pot regularly can lead to potential safety issues and compromise the quality of your coffee.
Keeping your moka pot clean is essential for safe and efficient operation.
Failing to do so can result in a buildup of old coffee residue, affecting the taste and increasing the risk of explosion during brewing.
To prevent these problems, clean your moka pot with warm water and mild dish soap after every use.
Additionally, inspecting the filter regularly for any damages or wear that could allow coffee grounds into your cup is important.
Maintaining a clean and well-functioning moka pot lets you enjoy delicious coffee without worries or surprises!
Final Thoughts
Knowing when your Moka pot has finished brewing is key to achieving the perfect cup of coffee.
You can ensure a delicious brew every time by paying attention to signals such as bubbling and steady flow, sputtering and reduced liquid flow, lighter color and aroma, and visual cues through the transparent top chamber.
For optimal results, consider factors like burner heat settings, coffee grind size, and water temperature.
With practice and experimentation, you’ll become an expert at using your Moka pot to create the perfect cup of joe.
Cheers!