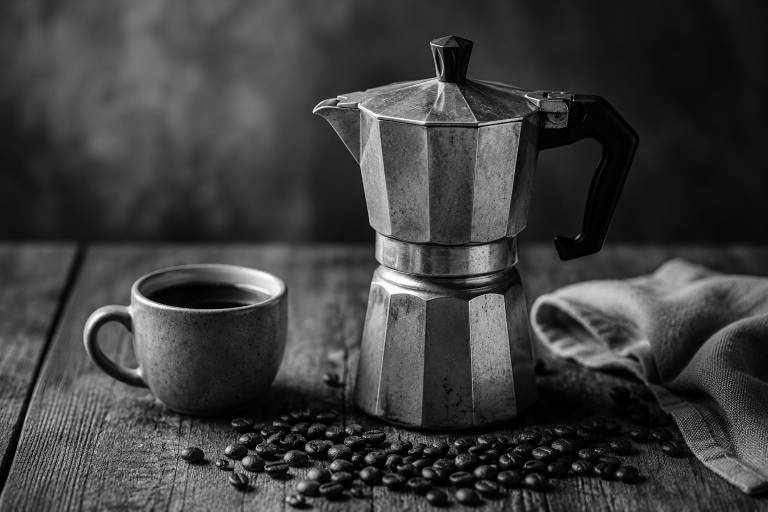
That first sip of moka pot coffee should taste rich and full-bodied, with a warmth that fills the kitchen before the cup even reaches your lips.
Too often, a few small missteps turn that promising brew into something bitter, watery, or burnt.
The moka pot is a simple machine, three chambers screwed together over a flame, yet the margin between a great cup and a ruined one is thinner than most people expect.
Below are 17 moka pot mistakes that wreck your morning coffee, each paired with a clear fix you can use right away.
Quick Answer
The most common moka pot mistakes are using too much heat, starting with cold water, and packing the grounds too tightly. Any one of these can push the brew into bitter, burnt territory.
Fix these three first, and every other adjustment becomes easier. Keep reading for the full list of 17 mistakes, from grind size and water levels to cleaning habits that slowly poison the flavor.
1. Choosing the Wrong Moka Pot Size
Moka pots range from a 1-cup single-serve model up to a 12-cup version, and picking one that doesn’t match your daily routine creates problems from the start.
A pot too large for one person never builds enough pressure to extract the coffee properly, leaving you with a thin, sour-tasting cup.
A pot too small for two people forces you to run it twice, overheating the aluminum and wearing out the gasket faster.
The fix is straightforward: match the pot size to the number of servings you make most mornings.
One person drinking a single strong shot needs a 1-cup or 3-cup pot, and a household of two or three does better with a 6-cup.
Running a half-filled moka pot every day is like heating a full oven for one slice of toast, inefficient and disappointing in the result it produces.
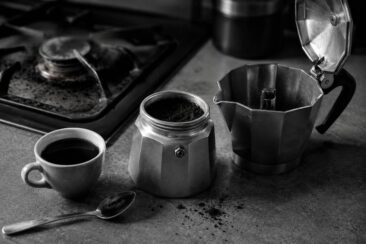
2. Using the Wrong Grind Size
Grind size controls how fast water moves through the coffee bed, and the wrong setting will push every other variable out of balance.
A very fine espresso grind clogs the filter basket and traps pressure inside the lower chamber, producing a harsh, over-extracted shot that tastes like burnt rubber.
A coarse drip-style grind lets water rush through with barely any resistance, creating weak, tea-like coffee with almost no body.
A medium-fine grind is the target, roughly the texture of table salt.
Investing in a burr grinder gives you consistent particle sizes from one brew to the next, and that consistency is what separates a predictable morning cup from a gamble.
Measure your beans by weight before grinding, not by scoops, so each session starts from the same place.
Pre-ground coffee labeled “moka” or “stovetop” works in a pinch, but freshly ground beans release oils and aromas that stale bags lost weeks ago.
| Grind Setting | Texture | Moka Pot Result |
|---|---|---|
| Too fine (espresso) | Powdery, like flour | Clogged basket, bitter and over-extracted |
| Medium-fine (correct) | Like table salt | Balanced, full-bodied, smooth |
| Too coarse (drip) | Like coarse sand | Weak, watery, under-extracted |
3. Brewing with Low-Quality or Stale Beans
No amount of technique can save a brew that starts with flat, stale beans.
Coffee beans begin losing flavor within two weeks of roasting, and pre-ground supermarket bags sitting on shelves for months have almost nothing left to give.
The result tastes papery and hollow, a ghost of what the same beans tasted like fresh.
Buying whole beans from a local roaster who prints the roast date on the bag puts you weeks ahead of any grocery shelf option.
Grinding those beans within a few minutes of brewing fills the kitchen with a sharp, sweet aroma that signals the oils are still alive.
A 12-ounce bag of specialty beans costs between $14 and $20 at most roasters, roughly the price of three or four café drinks, and it lasts a solo drinker about two weeks.
4. Getting the Coffee-to-Water Ratio Wrong
An incorrect coffee-to-water ratio creates a cup that lands either painfully bitter or disappointingly weak.
Too many grounds in the basket increase resistance, slow the water, and drag out extraction until the coffee turns acrid.
Too few grounds let water blast through in seconds, barely picking up flavor on the way.
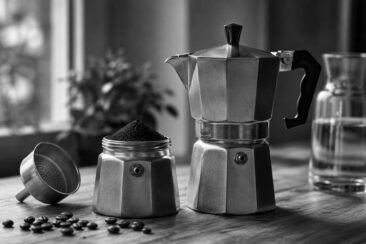
For a standard 6-cup moka pot, start with about 20 to 22 grams of ground coffee in the filter basket, filled to the rim without pressing down, and fill the lower chamber with hot water just below the safety valve.
Quick Tip Weigh your coffee on a kitchen scale instead of eyeballing it. A $10 digital scale pays for itself in the first week by removing the biggest source of brew-to-brew inconsistency.
Adjusting by a gram or two in either direction lets you fine-tune strength to your taste without guessing.
5. Packing Coffee Grounds Too Tight or Too Loose
The moka pot is not an espresso machine, and it does not need tamped grounds.
Pressing the coffee down into a dense puck blocks water flow, builds dangerous pressure inside the lower chamber, and forces steam through the grounds so aggressively that the coffee comes out scorched and bitter.
On the other end, a loosely scattered pile of grounds lets water channel through gaps, producing a thin cup with uneven extraction.
Fill the basket to the rim, level the surface with your finger, and leave it alone.
That gentle, untamped bed gives water enough resistance to extract flavor evenly without pushing the pot’s pressure past its safe operating range of 1 to 2 bars.
6. Starting with Cold or Poor-Quality Water
Cold tap water in the lower chamber means the pot spends extra minutes on the stove heating up, and every one of those minutes exposes the dry grounds above to rising radiant heat.
By the time the water finally reaches brewing temperature, the coffee bed has already started to scorch, and the result tastes metallic and ashy.
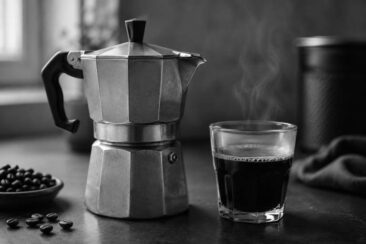
Starting with hot water just off the boil shortens the total heat exposure from several minutes down to about 60 to 90 seconds.
Water quality matters just as much as temperature.
Coffee is roughly 98% water, so chlorine, mineral buildup, or sulfur odors in tap water translate directly into off-flavors in the cup.
Filtered or bottled water with a neutral taste gives the coffee itself room to shine.
Do / Don’t
| Do | Don’t |
|---|---|
| Start with pre-heated, filtered water | Pour cold tap water into the base |
| Heat water in a kettle first, then pour it in | Let the pot sit on the stove heating from room temperature |
| Taste your tap water on its own for off-flavors | Ignore strange smells or tastes in your water supply |
7. Overfilling or Underfilling the Water Chamber
The safety valve on the side of the lower chamber is there for pressure relief, not decoration.
Filling water above that valve blocks the only emergency vent the pot has, creating a real risk of steam blowout.
Filling too low, on the other hand, starves the brew of liquid and produces a tiny, sour, under-extracted shot that barely covers the bottom of a cup.
Fill to just below the safety valve, never above it.
A simple pencil mark on the inside of your chamber at the correct fill line makes this a two-second check every morning instead of a guess.
Pre-heating your water before pouring it into the chamber helps the pot reach stable brewing pressure faster and keeps extraction time short.
8. Ignoring Worn or Damaged Gaskets
That thin rubber ring between the upper and lower chambers is the only thing holding pressure inside the pot.
A cracked, hardened, or compressed gasket lets steam escape sideways, and you can hear it hissing from the seam long before any coffee appears in the upper chamber.
The result is weak, under-extracted coffee that tastes flat and sour, sometimes accompanied by hot water dripping down the outside of the pot.
Most gaskets need replacing every 6 to 12 months with regular use, and replacement rings cost less than $5 for a pack of two or three.
Before each brew, run your finger around the gasket to check for cracks, stiffness, or a flattened cross-section that no longer bounces back.
Proper care and maintenance of your moka pot keeps these small parts in check before they turn into big flavor problems.
When to Replace If the gasket feels stiff, cracked, or permanently compressed, or if you see steam escaping from the middle seam during brewing, swap in a new one immediately.
9. Brewing with the Lid Open
Lifting the lid to watch the coffee rise is tempting, but it bleeds heat from the upper chamber at the worst possible moment.
That lost heat slows extraction, drops pressure, and lets the brew cool on contact with open air, resulting in a lukewarm, under-extracted cup.
Keeping the lid closed creates a sealed environment where steam pressure pushes hot water through the grounds at a steady rate.
The coffee finishes faster, extracts more evenly, and arrives in the upper chamber at a hotter, more flavorful temperature.
If you want to monitor progress, listen instead of looking: a soft gurgling hiss signals the brew is nearly done.
10. Leaving the Brew on Heat Too Long
Over-brewing is one of the fastest ways to ruin moka pot coffee, and it happens in seconds, not minutes.
Once the upper chamber fills and the stream turns from dark brown to a pale, sputtering yellow, the extraction is finished.
Every second the pot stays on the flame after that point pushes steam through spent grounds, dragging out harsh, ashy compounds that make the coffee undrinkable.
Remove the pot from heat the moment you hear the first loud gurgle or sputter.
A brew that finishes cleanly should take somewhere between 4 and 6 minutes total from the moment you set the pot on the stove with pre-heated water.
If you regularly hear violent sputtering and see a foamy, pale mess in the upper chamber, you are catching it too late.
11. Cranking the Stove to High Heat
High heat feels like it should speed things up, but a moka pot on full flame brews too fast and too aggressively.
The water boils before the pressure has time to build gradually, shooting steam through the grounds at a rate that extracts every bitter compound in the bean.
A medium or medium-low setting gives the pot time to reach a steady, gentle pressure that pulls sweetness and body from the coffee without scorching it.
On a gas stove, the flame should never lick past the edges of the base.
The difference in brew time between medium and high heat is only about 60 seconds, but the difference in taste is dramatic: smooth and balanced versus harsh and burnt.
Pairing medium heat with pre-heated water gives you the speed of a hot start without the scorched flavor of a full-blast flame, and that combination is what produces a stronger, fuller-bodied cup.
12. Using a Burner That Doesn’t Match the Pot
A small 3-cup moka pot sitting on a large burner receives heat from all sides, not just the base.
That wraparound heat scorches the rubber gasket, warps the handle, and boils the water unevenly, forcing steam through the grounds before the liquid water has time to do its work.
The coffee comes out thin, bitter, and metallic.
Your burner should be close to the same diameter as the bottom of the pot, or slightly smaller.
On a gas stove, keep the flame cone centered and narrow enough that no fire extends beyond the base’s edge.
A $10 stove reducer ring solves this problem for anyone whose smallest burner is still too large for their pot.
13. Skipping a Thorough Clean After Each Brew
Old coffee oils cling to the inside of the upper chamber, the filter plate, and the funnel walls, and they go rancid within a day or two.
Each new brew pushes fresh coffee past those stale, oxidized oils, picking up a musty, cardboard-like taste that gets worse over time.
After every use, disassemble the pot into its three main parts, rinse each one under warm running water, and wipe away any visible residue with a soft cloth.
The filter plate deserves extra attention: hold it up to the light, and if you cannot see through the tiny holes, they are clogged.
A gentle scrub with a soft brush or a soak in warm water for 10 minutes clears the buildup.
Skipping this step for a week coats the inside with a greasy film you can smell before you even add water.
Cleaning checklist after every brew:
- [ ] Disassemble all three chambers
- [ ] Rinse each part under warm running water
- [ ] Wipe the inside of the upper chamber with a soft cloth
- [ ] Hold the filter plate to the light and clear any blocked holes
- [ ] Check the gasket for grounds or residue
- [ ] Air-dry all parts before storing
14. Washing with Harsh Cleaners or Dishwashers
Tossing an aluminum moka pot into the dishwasher strips the protective patina that builds up inside the pot over time.
Dishwasher detergent reacts with aluminum, leaving a chalky white residue and a sharp, metallic taste that takes several brews to fade.
Steel wool and abrasive scrub pads create tiny scratches that trap oils and grounds, accelerating rancidity and corrosion.
Warm water and a soft cloth are all the pot needs after each use.
For stubborn buildup, soaking the parts in a mixture of warm water and a tablespoon of white vinegar for 15 to 20 minutes loosens residue without damaging the metal.
The goal is a pot that looks slightly darkened and seasoned on the inside, not shiny and raw like the day it came out of the box.
15. Leaving Old Coffee Grounds Inside the Pot
Storing a moka pot with spent grounds still in the basket seems harmless, but those wet grounds start growing mold within 24 to 48 hours in a warm kitchen.
Old coffee oils mixed with moisture create a sour, musty smell that seeps into the rubber gasket and the aluminum walls.
The next brew picks up those stale flavors before the fresh coffee even has a chance to extract.
Dump the used puck immediately after brewing, rinse the basket, and leave all parts open to air-dry.
A clogged filter basket from compacted old grounds can restrict water flow on the next brew, raising internal pressure and increasing the risk of steam leaks or, in rare cases, a dangerous pressure buildup.
16. Reassembling the Pot Before It Dries
Screwing the chambers back together with water still sitting in the threads traps moisture against the gasket and inside the lower chamber.
That trapped dampness breeds mold, creates musty odors, and accelerates corrosion on aluminum surfaces.
Over a few weeks, the pot starts to smell stale before you even add coffee.
Dry every component with a clean towel, then leave the parts disassembled and open to air until completely dry.
Before reassembling for the next brew, check that the filter basket sits flat in its seat and that the gasket is properly aligned.
A misaligned gasket or a tilted basket causes uneven extraction and steam leaks that weaken the entire brew.
17. Not Cooling the Pot After Brewing
Pulling the pot off the burner stops the flame, but it does not stop the brewing.
Residual heat trapped in the aluminum walls and the lower chamber continues pushing steam through the spent grounds for another 30 to 60 seconds.
That final burst of extraction drags out the harshest, most bitter compounds in the coffee, turning an otherwise good brew sour at the finish.
Running the base of the pot under cold tap water for 5 to 10 seconds stops the thermal momentum immediately.
You will hear a faint hiss as the metal cools, and the coffee in the upper chamber stays at the flavor peak you hit when you pulled it from the stove.
This one small habit, a quick rinse under cold water, is the difference between coffee that finishes clean and coffee that trails off into bitterness.
It costs nothing and takes less time than pouring the cup.
Brew Better Coffee from Your Moka Pot Tomorrow
Every mistake on this list has a fix that takes less than a minute to apply.
Start with the three that make the biggest difference: pre-heat your water, keep the stove at medium heat, and stop the brew the moment you hear the first sputter.
From there, work through the grind, the gasket, and the cleaning routine at your own pace.
The moka pot rewards attention with some of the richest, most full-bodied coffee you can make at home for under $30 in equipment.
A single morning spent correcting these habits changes the way every cup after it tastes.