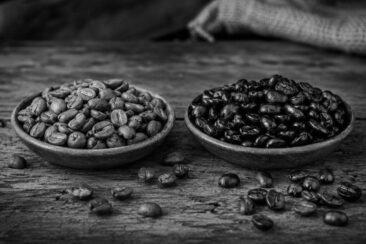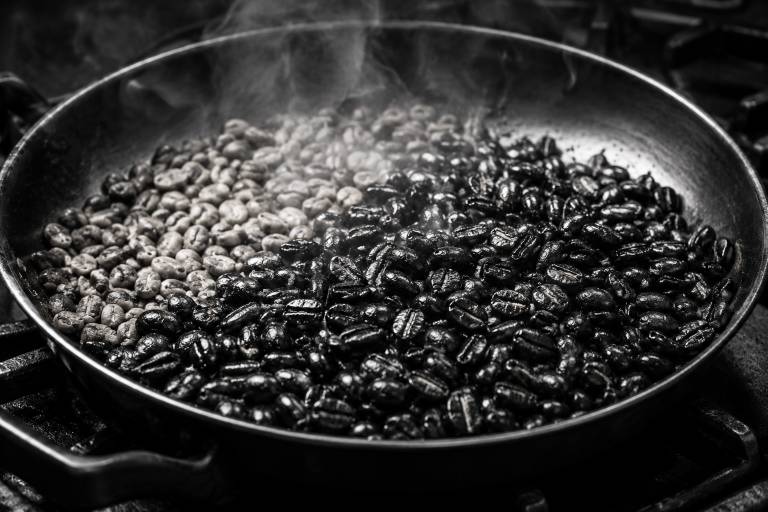
A bag of green coffee beans and a hot pan can turn your kitchen into a small roastery in about ten minutes.
Learning how to roast your own coffee beans gives you a level of freshness that grocery shelves cannot match.
The process uses heat, motion, and timing to turn a hard green seed into the fragrant brown bean you grind every morning.
This guide walks through the gear, the roasting stages, three home methods, and the rest time your beans need before that first cup.
Quick Answer
You can roast your own coffee beans at home using a stovetop skillet, a hot air popcorn popper, or an oven, and each method turns green beans brown through the same heat stages.
Listen for first crack around 400°F, pull the beans off heat near your preferred color, then cool them fast in a colander or on a baking sheet.
Fresh roasted beans need a rest of two to five days for their best flavor, and the sections below cover every method in order.
What Happens When You Roast Coffee Beans?
Coffee roasting moves a bean through three stages: drying, browning, and development.
In the drying stage, the pale green bean sheds moisture and gives off a grassy smell, closer to hay than coffee.
Heat then pushes the bean into the browning stage, where the Maillard reaction pairs amino acids with sugars to build the toasted, nutty aromas coffee is known for.
Sugars caramelize soon after, and the bean’s color shifts from tan to a light cinnamon brown.
The bean cracks audibly once trapped steam and gas force their way out, a sound roasters call first crack.
From that point, every extra minute in the pan pushes the bean toward a darker, smokier profile, so timing becomes the main tool you control.
Equipment You Need to Roast Coffee Beans at Home
Home roasting rewards a few pieces of gear more than any single gadget.
A heat source, whether a stovetop burner, an oven, or an electric popcorn popper, does the actual roasting.
A metal colander or a wide baking sheet cools the beans fast once they leave the heat, which stops the roast from creeping past your target color.
A digital kitchen scale keeps batch sizes consistent from one roast to the next, so flavor stays repeatable.
A wooden spoon or heat resistant spatula stirs beans in a pan, and a timer or stopwatch tracks minutes so you can repeat a roast you liked.
Here is a simple checklist before your first batch:
- Green coffee beans, at least 4 ounces for a first test batch
- A cast iron skillet, oven tray, or popcorn popper
- A metal colander for cooling
- A kitchen scale
- Oven mitts or a folded towel for handling hot pans
- A well ventilated space, ideally near an open window or under a range hood
Quick Tip Roast your first batch outside or near an open window. Coffee smoke sets off indoor smoke alarms faster than most cooking does.
How to Choose Green Coffee Beans for Roasting
Green coffee beans are the raw, unroasted seed of the coffee cherry, and they smell grassy rather than like coffee at all.
Most home roasters start with Arabica beans, prized for a smoother, more complex cup than the sharper, higher caffeine Robusta variety.
Origin shapes flavor before roasting even begins: Brazilian beans lean nutty and mild, Colombian beans lean balanced with a chocolate note, and Ethiopian beans lean bright with floral or fruity notes.
Processing method matters too, and washed beans tend to roast more evenly than natural process beans, thanks to a moisture content that stays more consistent across a batch.
Green coffee beans usually cost between $5 and $7 per pound online, well under the price of pre roasted specialty coffee.
Buy a small batch for your first roast, since a pound or two lets you test a method before committing to bulk pricing.
| Origin | Common flavor notes | Good for beginners |
|---|---|---|
| Brazil | Nutty, mild, slightly sweet | Yes |
| Colombia | Balanced, chocolate, light fruit | Yes |
| Ethiopia | Floral, bright, fruity | With more roasting practice |
| Sumatra | Earthy, heavy body | With more roasting practice |
How to Roast Coffee Beans in a Popcorn Popper
A hot air popcorn popper is the method most guides recommend to first time roasters, since it agitates beans on its own and keeps airflow even.
Pour half a cup of green beans into the popper’s chamber and turn it on.
The chaff, the papery skin still clinging to some beans, will blow up and out of the popper as roasting begins, so set the popper over a bowl or towel to catch it.
Watch, listen, and smell through the whole roast. The color moves from green to yellow to light tan, and the grassy smell fades into something closer to toast.
First crack usually starts around the four to six minute mark in a popper, sounding like popcorn beginning to pop.
Once cracking slows and the smell turns rich and slightly sweet, pour the beans into a colander to cool.
A full popper roast runs about 4 to 10 minutes depending on your popper’s wattage and how many beans you loaded.
Common Mistake Do not walk away during a popper roast. Chaff can smolder near the heating element, and a few unattended minutes is long enough for beans to scorch.
How to Roast Coffee Beans in a Skillet or Pan
Roasting coffee beans in a pan on the stovetop needs almost nothing beyond a cast iron skillet and a wooden spoon.
Preheat the empty skillet over medium high heat for a few minutes before adding beans, since a cold pan produces an uneven roast.
Add a single layer of green beans and stir constantly, keeping the beans moving so no patch of the pan scorches one side.
Constant motion is the whole trick here. A pan roast rewards attention more than any other home method, and a pause of even thirty seconds can leave scorched, bitter patches.
Listen for first crack near the eight to twelve minute mark, later than a popper, the result of a pan transferring heat less evenly.
Pull the beans the moment you reach your target color, then tip them straight into a colander and stir hard to cool them within a minute or two.
How to Roast Coffee Beans in the Oven
Oven roasted coffee beans work well for anyone who wants a hands off method without buying new equipment.
Preheat the oven to around 450°F and line a rimmed baking sheet with parchment paper.
Spread green beans in a single layer, giving each bean room so hot air reaches every side.
Roast for 12 to 15 minutes, pulling the tray out every few minutes to stir the beans and check their color.
Oven roasting produces more smoke than a popper roast, so crack a window or run your range hood the entire time.
Beans finish unevenly in an oven more often than in a popper, since heat comes from above and below rather than surrounding each bean, so expect a wider mix of light and dark beans in the same batch.
Cool the tray’s contents in a colander right away to stop the roast from carrying past first crack into territory you did not intend.
Is a Dedicated Home Coffee Roaster Worth It?
A dedicated home coffee roaster costs more upfront than a popcorn popper or a skillet, usually somewhere between $150 and $400 for a beginner model.
In exchange, it gives precise temperature control, built in cooling cycles, and a viewing window that lets you track color without opening a lid.
Buy one once you know you enjoy the hobby, rather than starting there, since a $20 popper teaches the same fundamentals for a fraction of the cost.
Roasters with drum designs turn beans automatically, producing rounder, more even color than most stirred pan roasts.
Some models pair with an app that logs temperature curves, letting you repeat a roast profile that worked well weeks later.
For anyone roasting more than a pound of coffee a week, the time saved and the consistency gained tend to justify the price within a few months.
How to Read First Crack and Second Crack
First crack and second crack are the two sound cues every home roaster learns to listen for.
First crack happens around 385°F to 405°F, a sharp popping sound close to popcorn, caused by trapped moisture turning to steam and forcing its way through the bean’s cell walls.
Pulling beans right at first crack produces a light roast, pale brown, dry on the surface, with bright acidity and strong origin flavor.
Second crack follows later, usually between 435°F and 450°F, and sounds thinner and quicker, closer to Rice Krispies settling in milk than to popcorn.
The gap between first and second crack is where most flavor decisions happen. Beans pulled early in that window land as a light medium roast, and beans pulled near second crack land as a full, oil sheened dark roast.
Do not roast past the end of second crack, since beans move quickly from dark and smoky to burnt and flat once cell structure breaks down completely.
Sound is a more reliable guide than a clock, so trust your ears over a fixed timer once you have roasted a few batches.
Choosing Your Roast Level
Roast level is the single biggest flavor decision in the whole process, more than origin or brew method.
A light roast, pulled just after first crack, keeps the most origin character, with higher acidity and floral or fruity notes.
A medium roast, pulled between first and second crack, balances sweetness and acidity and works well across most brewing methods.
A dark roast, pulled at or after second crack, trades acidity and origin character for bold, smoky, low acid flavor with a visible sheen of oil on the bean.
| Roast level | Approximate temperature | Flavor profile | Best brew methods |
|---|---|---|---|
| Light | 385 to 405°F | Bright, floral, high acidity | Pour over, drip |
| Medium | 410 to 430°F | Balanced, sweet, some acidity | Drip, French press |
| Medium-dark | 435 to 445°F | Rich, low acidity, some smoke | Espresso, French press |
| Dark | 445 to 455°F | Bold, smoky, oily surface | Espresso, moka pot |
Cooling and Removing Chaff After Roasting
Cooling stops the roast, and it needs to happen within a minute or two of pulling beans off heat.
Spread hot beans in a metal colander and shake them over a sink or trash bin. The motion knocks chaff loose as cool air passes through the beans and drops their temperature fast.
Never pour cold water over hot beans to cool them, since trapped moisture ruins texture and can trigger mold during storage.
A box fan aimed at a colander speeds cooling further and blows loose chaff away from your work surface at the same time.
Chaff itself is harmless and edible, but leftover chaff in a storage container can turn stale and add a papery taste to your coffee over time.
Wipe down your roasting area once beans have cooled, since chaff dust settles on nearby surfaces during every method.
How Long to Rest Coffee Before Brewing?
Fresh roasted coffee is not ready to brew the moment it cools, no matter how good it smells.
Coffee degassing is the release of carbon dioxide built up inside the bean during roasting, and it continues for days after the roast ends.
Brewing too soon traps that gas against your filter or portafilter, producing a sour, flat, or unevenly extracted cup.
Light roasts need the longest rest, often seven to ten days, since a denser bean structure releases gas more slowly than a darker one.
Medium roasts are usually ready within five to seven days, and dark roasts, with their more porous structure, often taste their best after just two to four days.
Espresso benefits from an even longer rest than drip or pour over coffee, since its short brew time makes it more sensitive to excess gas.
If you cannot wait, a pour over or French press brewed a day or two after roasting will still taste far fresher than anything from a grocery shelf.
How to Store Home Roasted Coffee Beans
Storage protects everything you just worked to build during roasting.
An airtight container with a one way valve lets carbon dioxide escape without letting oxygen back in, which slows staling.
Keep beans whole until you brew. Ground coffee loses aroma within minutes, and whole beans hold their flavor for weeks in the right container.
Store beans at room temperature, away from direct sunlight, stovetops, or any other heat source.
Skip the refrigerator and the freezer for everyday storage, since condensation from temperature swings can introduce moisture that dulls flavor.
Label each container with a roast date, and plan to use most beans within three to four weeks of roasting for the brightest cup.
Common Mistakes When Roasting Coffee Beans at Home
A handful of mistakes account for most disappointing first roasts.
Do:
- Preheat your pan, oven, or popper fully before adding beans
- Keep beans moving during a pan roast to prevent scorching
- Cool beans within a minute or two of pulling them from heat
- Rest beans for at least two days before brewing
- Roast in a well ventilated space
Don’t:
- Walk away from an unattended roast
- Overload your pan, popper, or tray past a single layer
- Pour cold water over hot beans to cool them
- Brew beans the same hour they finish roasting
- Store beans in a sealed container without a degassing valve
Small batches forgive mistakes far better than large ones, so keep early roasts under half a pound as you learn your equipment’s quirks.
Your First Roast Sets the Tone for the Next One
Roasting your own coffee beans turns a daily habit into a small, repeatable skill you control from bean to cup.
Every batch teaches you something new about timing, sound, and smell that no guide can fully replace.
Start with a cheap popcorn popper, a small batch of Brazilian or Colombian green beans, and a notebook to track what worked.
The first roast will not be your best, but it will almost certainly beat what is sitting in a bag on a store shelf.