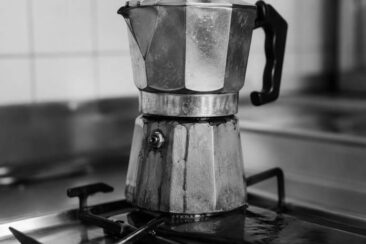
Your moka pot is hissing, the kitchen smells like hot metal, and the upper chamber sits empty.
Instead of that thick, dark stream of coffee rising through the spout, all you get is a cloud of wet steam and a puddle of frustration.
This is one of the most common moka pot breakdowns, and the fix is almost always something you can handle at your kitchen counter in under ten minutes.
The causes range from a worn gasket to a clogged filter to something as simple as too much water in the base.
Below, you will find every reason a moka pot produces only steam, the exact steps to fix each one, and the maintenance habits that keep the problem from coming back.
Quick Answer A moka pot that only releases steam is almost always failing to build enough pressure in the lower chamber to push water up through the coffee grounds.
The most common causes are a worn or misaligned gasket, a clogged filter, overfilled water, or a warped funnel lip that breaks the internal seal.
Start by disassembling the pot, inspecting the gasket and filter for damage or buildup, and cleaning all parts with warm water before your next brew.
Why a Moka Pot Needs Pressure to Brew Coffee
A moka pot does not work like a drip machine or a French press.
It relies on steam pressure building inside the sealed lower chamber to force hot water upward through a bed of ground coffee and into the upper collecting chamber.
That pressure is low compared to a commercial espresso machine, sitting around 1 to 1.5 bars versus the 9 bars an espresso machine generates.
The entire brewing cycle depends on an airtight seal between three contact points: the top rim of the water reservoir, the lip of the metal funnel, and the rubber gasket pressed against them from above.
If air or steam escapes through any gap in that chain, pressure never builds high enough to push liquid water through the coffee.
You hear boiling, you see steam venting from the spout or the sides, and the upper chamber stays dry.
Beginner Note A moka pot does not make true espresso. It makes a strong, concentrated coffee that works well for lattes, iced drinks, and americanos. The lower pressure is the reason, and that same lower pressure is what makes seal integrity so much more important.
Knowing this pressure system is the fastest way to diagnose a steam-only failure, so keep those three contact points in mind as you work through the causes below.
What Causes a Moka Pot to Produce Only Steam
Every steam-only failure traces back to one of a handful of mechanical problems.
Some are obvious the moment you open the pot, and others take a closer look to catch.
Overfilling the Water Chamber
Pouring water above the safety valve line is one of the quickest ways to trigger a steam-only brew.
The safety valve sits on the inside wall of the lower chamber, and the water line should stop just below it.
When water covers or passes the valve, the pot cannot regulate internal pressure properly, and excess steam vents out before water ever reaches the coffee.
A simple measuring cup or a quick visual check against the valve will prevent this every time.
Worn, Cracked, or Misaligned Gasket
The rubber gasket is the ring that sits between the upper and lower chambers and creates the pressure seal.
After months of heat cycling, gaskets dry out, crack, shrink, or lose their elasticity.
A gasket that no longer presses firmly against the funnel lip and the chamber rim will let steam escape around the edges instead of forcing water upward through the grounds.
You can spot this by running a finger along the gasket and feeling for hard, brittle, or uneven sections.
Replacing the gasket on a regular schedule is one of the simplest maintenance habits that prevents steam-only brews.
Clogged or Dirty Filter Screen
The metal filter screen sits below the gasket in the upper chamber, and its job is to let brewed coffee pass through and hold grounds back.
Coffee oils, fine particles, and mineral deposits from hard water clog those tiny holes over time.
A blocked filter creates back-pressure that stalls the brewing cycle, leaving water sitting in the lower chamber and converting to steam instead of coffee.
Hold the filter up to a light source after removing it from the pot.
If light barely passes through the mesh, the filter needs a deep soak in warm water and a scrub with a soft brush.
Clogged Safety Valve
The safety valve is designed to vent excess pressure and prevent dangerous buildup inside the pot.
Coffee grounds, mineral scale, or dried residue can lodge inside the valve and interfere with its function.
A stuck-open valve bleeds pressure continuously, so the pot never builds enough force to push water upward.
Gently press the valve with a toothpick or pin to confirm it moves freely, and rinse the area with hot water after every few uses.
| Cause | What You’ll Notice | First Fix |
|---|---|---|
| Overfilled water | Steam from spout, safety valve hissing early | Lower water to just below the valve |
| Worn gasket | Steam leaking from the seam between chambers | Replace the gasket |
| Clogged filter | Very slow or zero coffee output, gurgling sounds | Remove and soak the filter screen |
| Clogged safety valve | Constant hissing from the valve during brewing | Clear the valve with a toothpick |
| Warped funnel | Steam from spout with no coffee at all | Reshape or replace the funnel |
Warped or Bent Funnel Lip
This is the cause that most troubleshooting guides miss.
The aluminum funnel that holds the coffee basket has a thin lip at the top that must sit flush against the rim of the water reservoir.
Over time, or from over-tightening the chambers together, that lip bends downward and creates a gap.
Air escapes through the gap during heating, pressure never builds, and you get nothing but steam rising through an empty upper chamber.
The fix is straightforward: use a pair of pliers to gently bend the funnel lip back to a flat, 90-degree angle so it rests flush on the reservoir rim.
How to Fix a Moka Pot That Only Produces Steam
Once you have identified the likely cause, the repair process follows a logical sequence from cleaning to part inspection to reassembly.
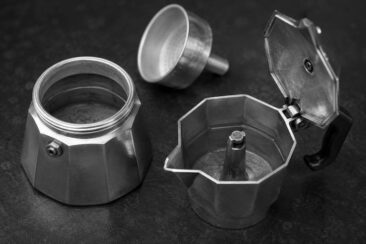
Disassemble and Deep-Clean Every Part
Unscrew the upper chamber, remove the funnel basket, pop out the gasket, and pull free the filter screen.
Soak the gasket, filter, and funnel in a bowl of warm water mixed with a tablespoon of distilled white vinegar for about 30 minutes.
That soak loosens coffee oils that have turned sticky and dark, along with the chalky mineral deposits that hard water leaves behind.
Scrub the filter screen gently with a soft-bristle brush, rinse every part under running water, and lay them out to dry on a clean towel.
Quick Tip Never use soap on a moka pot. Soap residue clings to aluminum and can leave a soapy taste in your next brew. Hot water and vinegar are all you need.
Inspect the Gasket and Filter for Damage
After cleaning, hold the gasket flat and look for cracks, tears, thin spots, or sections that feel hard and rigid instead of flexible.
Press the gasket gently between your fingers; a healthy gasket should feel rubbery and bounce back immediately.
If it feels stiff, crumbles at the edges, or has a visible crack, order a replacement sized for your specific moka pot model.
A damaged gasket will cause leaks and steam loss no matter how clean the rest of the pot is.
Check the Funnel Lip and Basket Fit
Set the funnel basket into the lower chamber without screwing on the top.
Look at where the top lip of the funnel meets the rim of the reservoir.
There should be no visible gap between those two surfaces.
If you see light between them, or if the funnel wobbles, the lip has warped and needs reshaping with pliers.
After bending, test-fit the funnel again and confirm it sits flat before reassembling the full pot.
Adjust Your Heat Level
Too much heat turns water to steam faster than the brewing cycle can push it upward, which creates the same empty-chamber result as a bad seal.
Start your moka pot on medium-low heat and let the brew cycle take about 4 to 5 minutes from flame to first coffee appearing in the upper chamber.
If you see violent sputtering or hear loud popping, the heat is too high.
If the brew takes longer than 7 minutes, increase the flame slightly.
Coffee that tastes burnt or bitter is a sign the heat has been running too high for too long.
Common Mistake Cranking the burner to high does not speed up a good brew. It just overheats the grounds and sends steam past the coffee bed before water can follow.
Use the Right Amount of Coffee and Water
Fill the water chamber to just below the safety valve, not above it and not far below it.
Fill the funnel basket with ground coffee until it sits level with the rim, without pressing or tamping the grounds down.
The standard moka pot ratio is roughly 1 part coffee to 7 to 10 parts water by weight, which works out to about 7 grams of coffee for every 60 ml of water.
Too little coffee in the basket lets steam bypass the grounds and rush upward without extracting anything.
Too much water raises pressure beyond what the pot can manage and activates the safety valve.
How Grind Size Affects Steam and Extraction
Grind size plays a bigger role in steam-only failures than most people expect.
Grounds that are too fine, closer to espresso powder or flour texture, pack tightly and choke the filter basket.
Water cannot pass through a dense puck of ultra-fine coffee, so pressure builds in the lower chamber with nowhere productive to go, and steam escapes through the valve or the sides.
Grounds that are too coarse allow water to rush through without enough resistance, producing a weak and watery cup instead of a steam-only failure, but still leaving you with disappointing coffee.
The right grind for a moka pot is medium-fine, similar in texture to table salt or fine sand.
| Grind Size | Texture Feels Like | What Happens in a Moka Pot |
|---|---|---|
| Too fine (espresso/powder) | Flour between your fingers | Chokes the filter, causes steam backup |
| Medium-fine (correct) | Table salt or fine sand | Smooth extraction, full-bodied coffee |
| Too coarse (drip/French press) | Rough sand or breadcrumbs | Weak, thin, under-extracted coffee |
If you have been using pre-ground coffee labeled for espresso machines, that grind is likely too fine for a moka pot.
Switch to a medium-fine setting on a burr grinder, or look for pre-ground coffee labeled for moka pots or stovetop brewers.
Quick Tip Rub a pinch of your ground coffee between your thumb and finger. If it clumps together like wet sand, it is too fine. If it falls apart immediately like dry dirt, it is too coarse. The right grind feels slightly gritty but holds a loose shape for a second before crumbling.
Preventing Steam-Only Problems in the Future
A moka pot that works today can develop a steam-only issue next month if maintenance slips.
These habits cost almost no extra time and prevent the most common failures before they start.
Rinse and Dry After Every Use
Disassemble the pot completely after each brew, rinse every part under hot running water, and let them air dry before reassembling.
Coffee oils left on the filter screen oxidize and harden into a varnish-like residue that slowly clogs the mesh.
That residue is the gummy, dark-brown film you can feel if you rub a dirty filter with your thumb.
Use Filtered or Bottled Water
Tap water with high mineral content leaves calcium and lime deposits inside the lower chamber, around the safety valve, and across the filter screen.
Those white, chalky spots you see after a few weeks of brewing with hard water are the early stages of scale buildup.
Filtered water slows that buildup dramatically and keeps the internal surfaces cleaner between deep cleans.
Store the Pot Disassembled
Leaving the moka pot screwed together between uses traps moisture inside the chambers and compresses the gasket under constant pressure.
That combination accelerates rust on aluminum surfaces and flattens the gasket faster, shortening its lifespan.
Store the upper chamber, lower chamber, funnel, and gasket separately in a dry cabinet.
Check the Gasket and Filter Monthly
Pick up the gasket once a month and flex it gently.
If it feels stiff, if the edges are crumbling, or if you see a thin crack forming, replace it before your next brew.
Hold the filter screen up to a window and look for blocked holes.
A monthly check takes less than a minute and catches problems before they cause a failed brew.
Your moka pot’s overall care routine determines how many years of clean brews you get from a single unit.
Preventive maintenance checklist:
- Rinse and fully dry all parts after every use
- Use filtered water for every brew
- Store the pot disassembled with the lid open
- Inspect the gasket and filter screen once a month
- Replace the gasket every 6 to 12 months depending on use frequency
- Deep-clean with a vinegar soak every 2 to 4 weeks
When to Replace Your Moka Pot Instead of Fixing It
Not every moka pot problem has a repair waiting on the other side.
Some damage is cosmetic, and some signals that the pot has reached the end of its safe, functional life.
Rust inside the water chamber means moisture has been sitting in contact with the aluminum or steel for too long, and the corrosion will keep spreading even after cleaning.
Deep pitting or flaking metal on the interior walls can release particles into your coffee and indicates structural degradation that a new gasket cannot fix.
A cracked base, broken handle, or damaged thread on the chamber connection makes the pot unsafe under pressure.
A persistent metallic taste that survives multiple deep cleans and a new gasket usually means the interior coating or the aluminum itself has degraded past the point of recovery.
If your moka pot is not using all the water and none of the fixes above solve the issue, the internal geometry of the pot may be warped beyond what you can reshape by hand.
When to Replace If you see rust, flaking metal, cracks in the housing, or a metallic taste that persists after a full cleaning and gasket swap, it is time to retire the pot. A new 3-cup Bialetti Moka Express costs around $25 to $35, which is far less than the frustration of fighting a pot that cannot hold pressure.
Final Thoughts
A moka pot that only makes steam is almost never broken beyond repair.
The fix usually comes down to one worn part, one clogged screen, or one overfilled water chamber.
Clean the filter, replace the gasket, check the funnel lip, and respect the water line.
Those four actions solve the problem for the vast majority of moka pot owners, and the whole process fits inside a single coffee break.