Learning how to use a Moka pot is the cheapest way to get espresso-style coffee at home.
No machine, no pods, no electricity, just a stovetop and ground coffee.
This guide walks through every step, from picking the grind to pulling the pot off the heat at the right second.
By the end you will brew a thick, full-bodied cup that holds up next to a cafe shot.
Key Takeaways
- A Moka pot brews rich, espresso-style coffee on any stovetop, with no electricity or special machine needed.
- The main parts are the boiler, the safety valve, the coffee basket, the gasket and filter plate, the upper chamber, and the column and spout.
- When buying, weigh size against how much you drink, aluminum against stainless steel, and brand quality, with Bialetti the classic choice.
- The core method: pick a medium-dark espresso grind, fill the boiler with hot water below the valve, add about 20 grams of coffee, assemble, brew on medium heat for 5 to 10 minutes, and pull it off the moment it sputters.
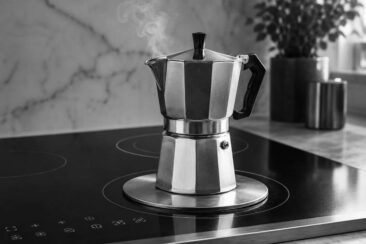
How a Moka Pot Brews Espresso With Steam Pressure
A Moka pot looks simple, and the way it works is simple too.
Water sits in the bottom chamber and heats on the stove.
As it boils, steam builds pressure and forces the hot water up through a basket of ground coffee.
The brewed coffee collects in the top chamber, ready to pour.
No electricity and no pump, just heat doing the work.
What comes out is heavy and concentrated, closer to espresso than to drip coffee, sometimes with a thin layer of crema on top.
That is the same cup behind a cafe au lait or a Spanish cafe con leche, and it works on a gas burner, an induction stovetop, or an electric stovetop.
Inside a Moka Pot: Boiler, Basket, Gasket, and Spout
A Moka pot comes apart into a handful of parts, and each one has a job.
Knowing what each does makes the next two steps, buying and brewing, much easier.
- Boiler: the bottom chamber, usually aluminum or stainless steel, where you pour the water up to the valve line.
- Valve: a small safety vent in the boiler wall that lets extra pressure escape before it becomes dangerous.
- Funnel or coffee basket: the metal cup that sits on the boiler and holds the grounds, around 20 grams for a standard pot.
- Gasket and filter plate: the rubber ring seals the two halves with no leaks, and the perforated plate keeps grounds out of your cup.
- Upper chamber: the top half that screws on and catches the finished coffee as it rises.
- Column and spout: the center tube works like a chimney, guiding coffee up into the top chamber, where it pours out through the spout.
Buying a Moka Pot: Size, Aluminum vs Stainless Steel, and Brand
Shopping for a Moka pot can feel like a lot of choices, but it comes down to three questions.
Start with size.
Moka pots are sold by cup count, from tiny single-serving pots to six-cup and larger models, so match the pot to how much you actually drink in one go.
A pot brews best when it is close to full, so buying oversized for occasional guests usually means weaker everyday coffee.
Next comes the material.
Aluminum is cheaper, lighter, and carries the classic look, but it will not work on an induction burner.
Stainless steel costs more, lasts longer, and runs on induction, so it is the better pick if you have a modern cooktop.
Here is my rule of thumb: get a stainless pot if you cook on induction, and a classic aluminum Bialetti if you have gas and want the traditional cup.
Brand still matters too.
Bialetti, the maker founded by Italian engineer Alfonso Bialetti, holds up for years and seals well, which is worth the few extra dollars over an unbranded pot.
Last, check how easy the pot is to take apart and clean, and whether the maker lists it as dishwasher safe.
How to Use a Moka Pot: Step-by-Step Guide
Once you have the right pot, the method is the same every time.
Six short steps take you from dry grounds to a poured cup.
1. Choosing the Right Coffee
Good coffee starts with good beans, freshly roasted and ground just before you brew.
Reach for a medium to dark roast, ideally one labeled for espresso or Moka pot use.
Those roasts give you the heavy, syrupy cup the pot is built for.
Grind size matters as much as the roast, so aim for something a little finer than drip but coarser than Turkish coffee, right around an espresso grind.
Skip the pre-ground tubs if you can, since beans lose their smell and flavor within minutes of grinding.
2. Filling the Pot with Water
Boil your water separately first, bringing it to a gentle simmer in a kettle.
Pour the hot water into the boiler until it sits just below the safety valve, no higher.
Filtered or bottled water makes a cleaner cup, so use it over straight tap water when you can.
Cold tap water carries chlorine and minerals that dull the taste, and starting with hot water keeps the pot off the heat for less time, which protects the flavor.
That hot fill is what builds the steam pressure that pushes a rich brew up into the top chamber.
3. Adding the Coffee Grounds
Measure out about 20 grams of fresh grounds for a standard pot.
Tip them into the basket and level the top with a finger or a flat edge.
Leave the bed loose and do not tamp it down the way you would for a machine.
A packed bed clogs the basket and chokes the flow, while a loose, even bed lets water move through and pull out full flavor.
4. Assembling the Pot
Wipe the rim and the threads clean so the seal closes tight, since stray grounds on the edge can block the seal and let steam escape.
Set the filled basket into the boiler, then screw the top chamber on firmly using a towel if the metal is hot.
Hand-tight is enough, and overtightening can crack the gasket over time.
Stray grounds around the basket edge are the most common cause of a leaky brew, so a quick wipe pays off.
The first few pots feel fiddly, then assembling it becomes muscle memory.
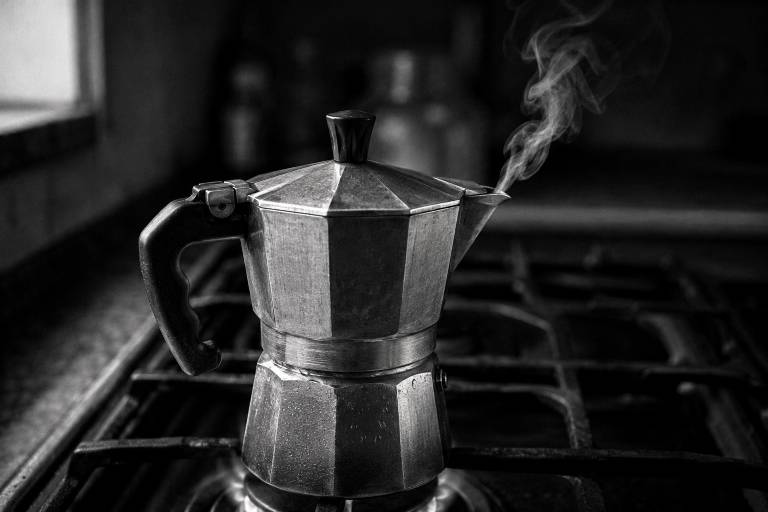
5. Brewing on the Stove
Set the burner to medium and place the pot on top.
Resist the urge to crank the heat for a faster cup, because high heat scorches the coffee and pushes out a bitter brew.
Inside, the heating water builds steam pressure and drives itself up through the grounds.
The whole brew runs about 5 to 10 minutes, so let your kitchen fill with the smell of toasted cocoa while you wait.
When you hear a sputtering hiss, like a small kettle running dry, the pot is nearly done.
6. Watching the Brew Finish
The last minute is the one that matters most.
Watch the top chamber fill with dark coffee and lighten in color as it nears the end.
When the stream turns pale and starts to sputter, the good extraction is over and only bitter water is left.
Pull the pot off the heat right then to stop over-extraction.
A quick rinse of the boiler base under cool water halts the brew fast, and then you pour straight away while it is hot.
Three Fixes for Better Moka Pot Coffee: Grind, Water, Heat
The basic method gets you coffee, and small adjustments get you a better cup.
Three levers do most of the work: the grind, the water, and the heat.
1. Dialing In the Grind
Grind size is the fastest fix when a cup tastes off.
Too coarse and the water races through, leaving a thin, sour brew.
Too fine and it clogs, runs slow, and turns bitter.
The sweet spot is a fine espresso grind that still pours freely, so adjust a notch at a time until the brew runs smooth.
Fresh grounds beat pre-ground every time, holding their smell and oils that fade fast once a bag is opened.
2. Choosing the Water
Water is most of what ends up in your cup, so it shapes the taste more than people expect.
Use clean, filtered or bottled water free of chlorine and off-flavors.
Tap water often carries chemicals that leave a flat or metallic edge on the coffee.
Starting from filtered water gives you a cleaner, sweeter cup with almost no effort.
3. Managing Heat and Timing
Heat is the lever most beginners get wrong.
Keep the burner at medium so the coffee brews evenly without scorching.
Timing shifts with your grind and your stove, so the gurgle is your real clock, not the minutes.
When that sputter starts, kill the heat and pour, and you will land a balanced cup that is neither sour nor burnt.
Cleaning and Descaling a Moka Pot the Right Way
A clean pot makes better coffee, and the routine takes two minutes.
Follow these steps after brewing:
- Take the pot apart once it has cooled.
- Hand wash each piece in warm water with a little unscented dish soap.
- Scrub stuck residue with a soft brush, never steel wool.
- Rinse every part well under clean water.
- Skip harsh cleaners and scouring pads that strip the finish.
- Dry each piece fully before screwing the pot back together.
Every month or so, descale to clear mineral buildup.
Fill the boiler with equal parts white vinegar and water, assemble the pot, and run it on low heat until about half the solution reaches the top chamber.
Pour out the solution, then rinse all the parts thoroughly with clean water.
Keep the pot out of the dishwasher, since the heat and detergent ruin the finish and dry out the gasket.
Brewing Your First Cup
A Moka pot rewards a little patience and almost nothing else.
Once you learn how your stove and your beans behave, the same steps give you the same good cup every morning.
Start with a medium-dark roast, an espresso grind, and medium heat, then adjust from there.
Pull the pot off the burner the moment you hear that sputter, and pour straight away.